Tuesday, May 31, 2011

Hultafors HVK Review

The Hultafors knives have been taking a larger and larger share of Mora’s market, with knives that are fairly similar in design. With respect to the bushcraft community, the Hultafors HVK has made serious gains in popularity.


Specifications:
Knife Length: 8 1/4 inches (210 mm)
Blade Length: 3 11/16 inches (94 mm)
Blade Thickness: 3/32 inches (2 mm)
Blade Width: 23/32 inches (18 mm)
Blade Material: Unknown Japanese carbon steel
Blade Hardness: HRC 58-60 on the Rockwell Scale
Type of Tang: Partial concealed
Blade Grind: Scandinavian with a very small secondary bevel
Handle Material: Plastic
Sheath Material: Plastic
Cost: $12.00


The Hultafors HVK is a cheap knife, and even though it has been hard to find them in the US, more and more distributors are starting to sell them here. Even getting it shipped over form the UK should keep the price down to under $15.00.

When compared to the Mora 1, the Hultaforst HVK has an almost identical blade, with a very similar grind. The thickness, width and length are about the same, but the Hultafors HVK has a very slight secondary bevel at the edge unlike the Mora 1. The handle on the HVK is a little thinner and noticeably longer than that of the Mora 1. It is quite comfortable. If does have a finger guard, which I find uncomfortable. It is a lot more comfortable to use for wood working tasks than the more robust Hultafors GK because of the narrower blade, but the finger guard on the handle still limits certain grips.


The Hultafors HVK has a concealed partial tang. Just like with the GK model, the connection to the handle felt very secure. The picture was not taken by me.


The knife had no problem with light splitting and batoning. The blade is thin, so while it will eventually go through the wood, it is not nearly as good of a splitter as the more robust GK model.


The knife feels very secure, so I had no problem truncating with it. The slight secondary bevel on the edge helps to prevent rolling.


The knife came sharp, so there was no problem with making some feather sticks.


The sheath of the Hultafors HVK is of higher quality than that of the Mora 1. It holds the knife securely and has a good belt attachment. It is still a cheap plastic sheath, so you shouldn’t expect too much, but it is very usable.

Overall, I like the Hultafors HVK a lot more than I did the GK model. The blade is thin and narrow just like that of the Mora 1, which makes it good for more intricate tasks. Of course, those characteristics make it less effective at heavier tasks such as batoning. The handle is not my favorite. I tend to like shorter handles, but that is a personal preference. I found the finger guard to get in the way a good chunk of the time, so if I was to use this knife, I would probably try to remove it. For the price, not bad at all.

Friday, May 27, 2011

Cold Steel Trail Hawk Review

The Cold Steel Trail Hawk is a tool that I have had for some time now, but have held off on doing a review because it has a wide following, including people who I respect as woodsmen, and I was trying really hard to see what they see in it. I am afraid I have failed in that task.


Specifications:
Manufacturer: Cold Steel
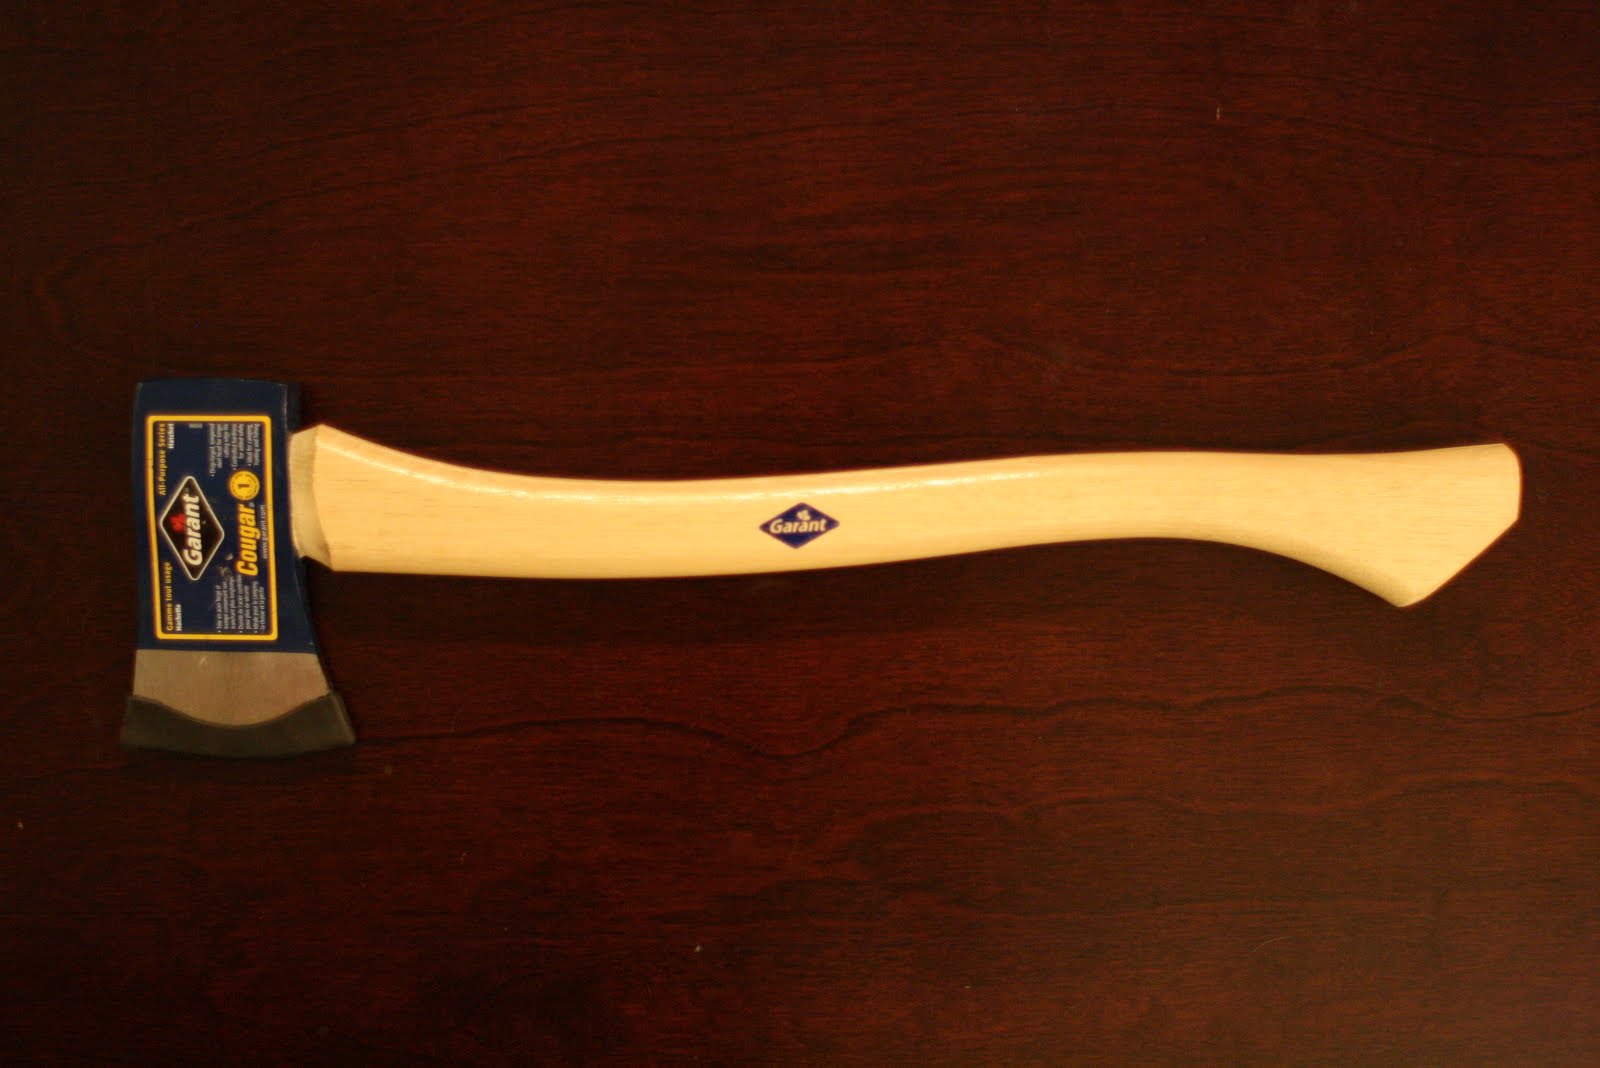
Axe Head Weight: 3/4 lb; 1.5 lb overall weight
Axe Length: 22 inches
Axe Head Material: 1055 carbon steel
Handle Material: Hickory
Cost: $25.00


To begin with, this is what these days is referred to as a tomahawk. There are some slight variations between modern axes and tomahawk, and the Trail Hawk embodies all of the characteristics of a modern hawk. You can see some of my thoughts on the differentiation between axes and tomahawks here.

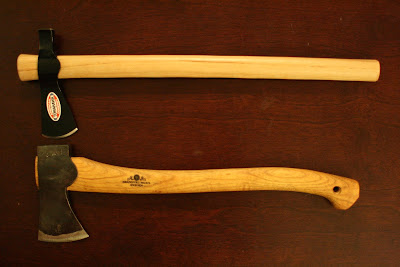
As you can see from the specifications, the Trail Hawk has a handle similar in length to the Gransfors Bruks Small Forest Axe. The head however is about half the weight of that of the Small Forest Axe. In terms of comparison, for most of the pictures I used the Small Forest Axe to illustrate the features. For the testing however, I also compared the Trail Hawk to the Gransfors Bruks Wildlife Hatchet, which has the exact same overall weight of 1.5 lb. Here you can see the Cold Steel Trail Hawk next to the Gransfors Bruks Small Forest Axe.


The handle of the Trail Hawk had several disadvantages over a traditional axe handle. As you may know, the head of the Trail Hawk is not placed on the handle from the top, as it would be on an axe, but instead, it is threaded through the bottom of the handle, all the way to the top where it is held by a swelling of the handle. This necessitates that the handle takes the shape and size of the eye of the head. The result is a straight, very thin handle. I found it to be incredibly uncomfortable. Not only was it too thin to swing properly, especially with two hands, but it also has no swell on the foot of the handle for a secure grip. The grain on my Trail Hawk was nearly horizontal, but I have seen some other ones with good grain, so it seems to be a quality control issue. The head is placed on the handle as described above, and is held in place by a screw. The head was loose on mine, even with the screw in place.


The head of the Trail Hawk has some interesting features as well. In order to allow for the hanging process referred to above, the eye of the Trail hawk has to be fairly large and round. This creates a very inefficient design, as there is little chance that the eye will pass through any piece of wood when chopping or splitting. Traditional designs compensated for this problem by elongating the bit of the axe, so that it may penetrate the wood without the eye ever reaching the tree. The Trail Hawk does the same thing. The bit is very long. This creates another problem-the head has an absolutely horrible overall geometry. There is no transition to speak of between the cheeks and the eye. The bit is narrow the whole length of the cheeks, and binding is a significant problem.


This binding issue is partially alleviated by making the head very narrow. This does two things. First it minimizes the amount of metal that enters the wood in the hopes of reducing the binding, and second, the small cutting edge allows for the force to be concentrated, increasing the penetrating power of the tool. The down side of this design feature is that chopping becomes very inefficient because the contact area with the wood is so small.


The balance of the Trail Hawk is not particularly good, but it’s not the worst I have seen either. From the picture it looks pretty bad, but the feel of it from a balance stand point is okay.


In terms of performance, the Cold Steel Trail Hawk is far behind most other tools I have tested. After spending some time putting a good profile on the bit and sharpening it, I took it out for some comparison testing against the Small Forest Axe and the Wildlife Hatchet. For the test, I removed the screw that was holding the head in place, as that is characteristically what most users of the tool do. To hold the head I relied on friction.

The testing was as conclusive as I have seen in a while. As expected, the Small Forest Axe outperformed the Trail Hawk significantly when it came to chopping, splitting and carving. Interestingly however, the Wildlife Hatchet outperformed the Trail Hawk just as soundly in all of the categories. In the picture you can see the results in a log after the same number of swings with each tool.


The very poor head geometry explains a lot of the failures in performance with respect to chopping and splitting. In terms of carving, the deficiency comes from the small bit, which does not offer a lot of cutting surface. This, combined with a rather annoying feature which I will speak about shortly makes it very hard to use as a carving tool when compared to some other hatchets and axes.

The practical reason often given for carrying a tool like the Trail Hawk over a hatchet or axe of comparable weight is that it is more “versatile”. By that people usually mean that you can easily remove the head to use either as a small, very uncomfortable and inefficient knife, or to replace the handle if you ever break it somewhere deep in the woods and must do field repairs.

I find that the ease of removal of the head on the Trail Hawk is a direct result of the head being inadequately attached. For me, this is a tool with a loose head. Just because it is held from flying off during a swing, does not make it properly attached, much like a ducttaped loose axe head would be considered problematic.

The head continuously comes loose during use, whether it be chopping or carving, sliding up and down the handle. Any kind of precision is made very difficult. Even after spending a significant amount of time trying to create a good friction fit, after several swing the head would come loose again. Now of course, there are ways to secure the head. If the head is pressed onto the wood with sufficient force, similar to what you would see in the eye of an axe, it will probably hold. Some manufacturers have taken to epoxying the head in place, or we could put back the screw (the head would still be loose, but will not slide up and down). Of course if we do that however, we remove the “versatility” from the hawk.

In my opinion, carrying this tool in the bush rather than an axe or hatchet of comparable weight just because it may be easier to re-handle in the event you ever have to do that, is the same as using a butter knife to do your carving because you are less likely to cut yourself with it. While that is true, it kind of misses the point, as it fails to do the tasks ordinarily assigned to the tool. I use axes to do a lot of chopping, splitting and carving. If a tool fails to do those things well, it does me little good that I can more easily re-handle it. If you are interested in seeing what it takes to re-handle an axe in the woods, see here.

Overall, if you plan on throwing hawks, or need a possible weapon, then this may be a good choice for you. If on the other hand you need a tool for chopping, splitting or carving of wood, there are many better options out there for the same weight.

Wednesday, May 25, 2011

Basic Tarp Configurations

This post is intended for people who are thinking about using, or have just started using tarps as a shelter method. I want to just show a few very basic configurations that can be put up fairly quickly. They will require one or two trees to put up as I have described them in this post. There are numerous more advanced techniques which can be set up using poles and other methods, but I will not cover any of them here.

For the pictures I am using a DD 10'x10' tarp. For lines I am using simple paracord cut up into different lengths. I use paracord instead of thicker ropes because I have found it to be strong enough, and it significantly saves on weight. The ropes will be one of the heaviest parts of your shelter set up. It is not uncommon to see people carrying a light weight tarp with enough rope to make it weigh more than a three person tent. For stakes I simply use sticks that I sharpen in the field. It adds another 10 minutes to the set up time, but I just see no need to carry them from home.

The first configuration is one of the most basic, and in my opinion most useful and versatile ones. The reason why I say it is versatile is that it can be set up at different heights, offering different types of shelter. You can put it high up, giving you sufficient room to work, or you can place it close to the ground for better rain protection. In more advanced techniques, you can use poles to lift up one side of the tarp, offering better exposure to a fire.


The set up is simple. If you look at the tarp, most likely there will be a centerline of loops. Thread a line through them, and tie each end to two appropriately spaced trees. This is not a post on knots, so use the knots that work best for you. Nothing fancy is required. Along that same centerline of loops, there will be a two additional loops at each end facing outward (on most purpose built tarps). Thread a separate line through each of them, and pulling them tight, tie the lines to each tree. This ensures the tarp is well stretched out. If the trees are far apart, you can tie these two lines to the main centerline with a friction knot instead of tying them to the trees.


Once this is done. Tie short lines to the corners on the tarp (or to as many of the loops that run along the sides as you like), and tie them down to stakes that you place in the ground. I would recommend placing the stakes at an angle, facing away from the tarp. This ensures that the rope will not slide off, and holds the stake more securely in areas where the ground is soft.


When tying the rope to the stakes, I make sure to use a friction know so that I can adjust the tension as I work through all the different points along the tarp.


That is all there is to it. I have found that the set up is fast. The most time consuming part for me tends to be the finding of suitably spaced trees that have a fairly good piece of ground between them.

Another easy set up, which I like a bit less, but is even easier to put up is this:


Here you will use the tarp diagonally. Stake down one of the corners, and just tie the other one to a tree. All you have to do then is go around the tarp and stake down the remaining loops. It is just that simple and it offers good protection.

A variation of the first tarp set up, which offers a huge amount of protection from rain and wind is this:


It is put up exactly like in the first example, with two differences. The loop on one of the ends along the centerline has been staked to the ground instead of tied to the tree, and the corners of the tarp on that end have been tucked in under the tarp. The rest of the loops along the tarp have been directly staked to the ground without the use of any ropes. This creates almost tent like protection, but limits space under the tarp.

None of these set ups are complex, nor do they require any special skills or equipment.

If you are just starting out with tarps, an important tip is to keep a way to isolate a wet tarp from the rest of your gear. This is an easy way to quickly see who has never had to actually use a tarp in the rain. The tarp will protect you from the rain just fine, but when you take it down, you can’t just put it back in you pack. I like to carry a plastic, waterproof bag for the tarp that I can put inside the stuff sack. That way the rest of my gear stays dry. Similarly, I keep my ropes in plastic bags because they get just as wet.

Tuesday, May 24, 2011

Rush Mat Tepee, c. 1903

This is a picture of a tepee covered with rush mats. That is specifically why I find it interesting. Most tepees we see are covered with canvas or hides. The image was taken at the Colville Indian Reservation in Washington.

Monday, May 23, 2011

Silky F180 Folding Saw Review

This is another folding saw that is similar in size to the popular Bahco Laplander. In the interest of providing more options, I figured I would review it and see how it compares.


Specifications:
Overall Length: 9 inches
Blade Length: 7 inches
Weight: 6.34 oz
Cost: $28.00

Here you can see the Silky F180 next to the Bahco Laplander.


In size and weight the two saws are virtually identical. They also both perform very well for the size. I was not able to tell any difference in the speed of cutting between the two. The silky F180 has larger teeth than the Bahco Laplander, and I’m sure that would make a difference in certain types of wood, but in the cutting I did with it, it was not noticeable. The Silky also has a smaller cutting surface. While on the Laplander the teeth extend all the way back to the handle, on the Silky they stop about 3/4 of an inch before the handle.

There are a few differences between the two saws, mostly in the locking mechanism. While the Bahco Laplander has only an open and a closed position, the Silky F180 has two open configurations. The second configurations allows you to open the saw even further, as you can see from the picture. I am not sure what advantage that offers, but options are always a good thing.


Unlike the Bahco Laplander however, the Silky F180 does not lock closed. I did not have the saw open in my pack, but I would have certainly preferred it if it locked when closed. Another problem with the Silky F180 that I found very irritating was the placement of the closing mechanism. On the Bahco Laplander the button that releases the locking mechanism and allows the saw to close is on the side of the handle. On the Silky F180 it is located on top, and is a rather prominent, large button. This prevents the holding of the saw close to the blade. If you hold the handle in that location, which I like to do, you unavoidably end up pressing the release button.

I also found the blade of the Silky F180 to have a bit more movement than the Bahco Laplander. While the wiggle was small, and did not effect the performance, when we are talking about two good saws, the small things make the difference.

Overall, I prefer the Bahco Laplander. The performance wasn’t all that different, but a few small things made the difference for me. The most important was probably the location of the release button for the locking mechanism.

Friday, May 20, 2011

Differentiation Between Axes and Tomahawks

Recently I posted a comment on a forum, where a person was asking for an explanation on the difference between hatchets and tomahawks. The following is a modified version of what I wrote there. I figured I would post it here as well. Keep in mind that I am not an expert on the subject, and this is just what I have been able to piece together from my own research.


When trying to differentiate a tomahawk from an axe or a hatchet, there are two things to consider. One is the historical evolution and distinction between the tools, and the second is the modern definition of the two.

In general terms, from a historical standpoint, a tomahawk is any small axe from the early American colonial period. Most were used for trade with Native American tribes, but were also used by explorers and outdoorsmen. The term tomahawk appears to be an Algonquian word for hatchet. In fact, in this early period, the two terms were interchangeable, and referred to the same object.

From a design and functional standpoint, a basic tomahawk from this early period is not distinguishable in form from an axe. The reason for that is that tomahawks were literally shrunken versions of then existing European model axes. Prior to the innovations in axe design which occurred in America in the 1800s, axes were simply constructed, with a round eye, and virtually no poll. You can see a good example of how early axes were made, and their design elements here. A tomahawk was a lighter version of that design, produced at very low cost and largely used for trading.

Very quickly, these small axes or tomahawks found a place as a combat tool, and different designs emerged to aid in that role. The most obvious is the pike hawk, which has a blade on one side and a spike on the other. Because of this role, the main distinction from a historical stand point, between axes and tomahawks comes down to how the tool was used. It is generally accepted by collectors that a tomahawk is a trade axe which was used for fighting. Certainly a tomahawk would find itself put to use doing camp chores on a cold night, and similarly a belt axe would split an enemy’s skull as easily as it would split wood, but for collectors, how the tool was used can make a big difference. From a design standpoint however, a basic tomahawk is indistinguishable from an axe of similar size from the early period.

Over time, the hawk lost its role in warfare, and significant changes occurred to axes, such as the use of a heavy poll to counterbalance the bit, and a narrower, almost triangular eye. Eventually, the modern axe and modern hatchet emerged. For the evolution of the axe head design, see here.

These days there are numerous axe and tomahawk designs. There is great overlap between the two tools, and many of the designs have lost any historical connection. We often assume that what we see called a tomahawk today is the same as a tomahawk of the 1600s, but that is not necessarily the case. There are many things we attribute to tomahawks these days that would not have been that commonplace in early colonial America. That being said, three elements have come to be considered definitive when distinguishing a current production tomahawk from an axe, at least in bushcraft circles.

The first element is that tomahawks have a more or less round eye, unlike an axe, which has a narrow and almost triangular eye. This design characteristic is a remnant of early axe designs and has remained in use primarily because it is easier to put a handle in a round eye than a narrow eye. For that reason, many of the axe designs produced even recently by companies like Collins for export to South American and Asia have had a round eye. That way a purchaser who does not have access to commercially made handles can just take a branch, shape it a bit, and fit it as a handle.

The second element is that a tomahawk is hafted from the bottom, unlike an axe which is hafted from the top. The head of a tomahawk is inserted on the handle from the bottom. It is then held in place by a wider portion of wood on the top of the handle. Friction and momentum keep the head in place. With an axe, the head is inserted on the handle from the top, and is then held in place by a wooden wedge which is inserted in the top part of the handle, expanding the wood. Ironically, this feature was not historically definitive as a distinction. I have seen examples of tomahawks from the early period hafted using both methods.

The third element is that a tomahawk has a longer handle in proportion to its head weight than a hatchet. Many people see a tomahawk as a tool with a light head (½ lb) with a fairly long handle (about 20 inches). This apparent characteristic just like the hafting method is a fairly new “definitive” aspect of tomahawks. Historically, tomahawks have come in many different lengths. The well known pipe hawks had fairly long handles, but many other designs used what we would today consider hatchet handles. In his book Camping and Woodcraft, Kephart states that his hawk had a 12 inch handle. Also, many hawks were carried tucked into the user’s belt, limiting the size of the handle.

So, this is just some brief background on tomahawks. This should provide some framework, so you know what I am calling tomahawk as opposed to an axe or hatchet. I think that in our modern definition of “tomahawk” we have exaggerated certain aspects of what was historically considered a tomahawk, and we have downplayed others. The hafting method has taken center stage, while things like the inclusion of a poll have become commonplace. This can create a significant amount of confusion when people talk about tomahawks and axes, because we end up mixing history as well as terminology.

Thursday, May 19, 2011

Apache Wickiup, 1903

This is an image taken by Edward Curtis in 1903. It shows an Apache wikiup or wigwam-a domed structure constructed of bent branches, covered with grass. Note the baskets next to the door.

Wednesday, May 18, 2011

Tuatahi Work Axe Review

This is a review posted on The Wandering Axeman. The review is of one of the Tautahi axes, a company best known for their custom made competition axes. It is a beautiful and rare axe. It is not something I am likely to review because in all honesty it is just too much axe for me to handle, but if you are interested, you should certainly take a look.


The axe shown in the post is one of their work axes, featuring a more robust bit than their competition versions. You can see the post here.

Tuesday, May 17, 2011

Garant Cougar Axe (HUN15021) Review

I first found out about the Garant axes from a friend who writes The Sharpened Axe blog. He mentioned that he had heard that these were the axes most used by loggers in Canada. I searched all over the place, but could not find their axes anywhere in the US. Fortunately, one of my readers from Canada, Glenn, saw that and took it upon himself to try to get me some Garant axes. Thanks to his amazing efforts, I was able to get my hands on two Garant axes. Thanks Glenn!

Garant used to be an independent axe manufacturer in Canada, founded in 1895. It appears that now they are a branch of Ames True Temper. They make a number of different axes under the Garant name.


Specifications:
Manufacturer: Garant/Ames True Temper
Axe Head Weight: 1.5 lb.
Axe Length: 20.5 inches
Axe Head Material: Unknown carbon steel
Handle Material: Hickory
Cost: $30.00


The reason why I picked this particular axe to test is that it is almost identical in size and weight to the Gransfors Bruks Small Forest Axe, and comes in at only $30. Here you can see the Garant Cougar (HUN15021) axe next to the Gransfors Bruks Small Forest Axe.


The handle of the Garant axe is of very low quality. The grain is almost horizontal, and the fit and finish is quite rough. In fact, after some use, a small split developed at the edge of the handle-nothing that would impair its use, but the quality is certainly low. The handle also enlarges unnecessarily at the end. This is a feature of most axes, but this one is just a bit too much.


The head of the Garnat axe is about as wide at the eye as the Small Forest Axe. The head however s shorter, creating a much more triangular shape. The cheeks expand rapidly, creating an axe that at first look appears to be more directly suited for splitting than chopping. It is very similar in design to the Bahco axe I reviewed recently.


The head is attached to the handle using a wooden wedge, and probably some epoxy. The bit has a rather prominent flat grind. Additionally, because of its relatively short length, the balance of the head is quite good.


When I took the axe out for testing, I was certain that the performance would be less than ideal. I expected results very similar to those I got from the Bahco axe because of the similarly wide head design. When I started chopping, I was very surprised to see the results.


The Garant axe kept up quite nicely with the Small Forest Axe. After 25 swings in some oak, the dept of the cuts looks about the same. It took me some time to figure out how that would be possible. I even went back and re-tested the Bahco axe to see if I somehow messed up that test. The Garant easily outperformed the Bahco. The chopping ability of the Garant seems to come from the flat grind of the bit that I mentioned earlier. Even though it has the same overall shape as the Bahco axe, the bit is made much narrower by the flat grind. It is very similar to how the Fiskars axes get their performance despite having relatively wide heads.

The axe came with no sheath, but had a rubber guard on the blade, which easily falls off in the pack.

Overall, despite my initial reservations about he axe, it performed very well. The quality control is certainly not there. The execution of the design leaves a lot to be desired. I would certainly like to see a handle of better quality. That being said, for $30, you get some serious performance out of this little axe.

Monday, May 16, 2011

Collecting Honey From a Tree

This is yet another short video from the series Human Planet. Here you see a person climbing a tree in order to collect honey from a bee hive without using any protection.

Friday, May 13, 2011

Condor Bushlore 2011 Model Review

I previously reviewed the 2010 version of the Condor Bushlore. As you may remember, the review was not favorable. You can see it here. I found both the design and the quality of the knife to be much less than adequate. This year, Condor apparently took all the criticism to heart, and did a major overhaul of their products. The first one of the 2011 models I was able to find was the Bushlore. In this review I want to look at some of the changes from the 2010 model.


Specifications:
Knife Length: 9 1/4 inches (233 mm)
Blade Length: 4 5/16 inches (110 mm)
Blade Thickness: 1/8 inches (3 mm)
Blade Width: 1 1/4 inches (32 mm)
Blade Material: 1075 carbon steel
Blade Hardness: HRC 57-59 on the Rockwell Scale
Type of Tang: Full
Blade Grind: Single bevel with a convex edge
Handle Material: Wood inlays
Sheath Material: Leather
Cost: $35.00

The knife comes in exactly the same sheath, which I actually like. The knife inside the sheath however is completely different. Here you can see the 2010 and 2011 Bushlore models side by side. The new 2011 model is the one on top.


As you can see, there have been major improvements. In the 2011 model the edge has actually been extended all the way back to the handle, giving you over four inches of cutting edge. Contrast that with the 2010 model, where there was about an inch of unusable blade. Another major difference is that the blade is much thinner. This creates a more usable knife for general tasks and woodwork. Because the blade has been thinned out, the angle of the edge has also been decreased, allowing for a sharper knife. The edge is still slightly convexed, and will need to be touched up to get it optimally sharp. The handle has also been slightly shortened, and the finish of the wood seems to be of higher quality.

Most important of the changes with the 2011 Bushlore model is that the quality control seems to have been significantly increased. On my 2010 model, the edge was thrown on, and was completely out of alignment. This has been solved on my 2011 Bushlore. There are no production defects that I could see on my knife.

The knife still remains very robust. It went through a three inch piece of wood with ease. People sometimes forget that batoning is an issue not only of the strength of the knife, but also the thickness. A thicker blade will split the wood much more easily. In this respect the Condor Bushlore outperforms thinner knives such as the Moras.


Similarly, the knife is robust enough to take a serious pounding into the wood without a problem.


Even out of the box, the knife is sharp enough to work wood. It is not as sharp as it should be. The difference between the Bushlore and a Mora is noticeable in that respect. The edge of the Bushlore is thicker, but it also needs some good sharpening.


Overall, I am very impressed not only with this knife, but with Condor as a company. They seem to have actually listened to people and made significant improvements to their product. I can not wait to get my hands on some of the other examples. This is certainly not my ideal design for a knife, but if you like the Bushlore clones, this is an excellent one for the money.

Woodcraft by E.H. Kreps

This is a book written in the early 1900s by E.H. Kreps. It focuses skills and equipment required in northern forests. It is an excellent book, even though some of the subjects discussed, such as the building of a log house, are too large to just be a chapter in a book. All the information appears to be well grounded in experience rather than just nostalgic reminiscence about the outdoors. It has quickly become one of my favorite books.


To the best of my knowledge this book is in the public domain and a copy can be downloaded here, here, and a number of other places online.

Tuesday, May 10, 2011

Kershaw 2550X Folding Saw Review

This is a saw I’ve had for a long time, and had used for years before switching to the larger Trailblazer. In this review I just wanted to provide you with some side by side photos of the Kershaw 2550X and the much better known Bahco Laplander folding saw.


Specifications:
Overall Length: 9 inches when folded
Blade Length: 7 inches
Weight: 6.35 oz
Cost: $20.00

Here you can see the Kershaw 2550X next to the Bahco Laplander.


I was not able to tell any difference between the two saws. They appear to be identical in every respect except color. The two saws have the exact same dimensions, including the thickness and alignment of the saw teeth. The cutting times of the two saws are also identical.

This is a very well thought out and durable design. The blade is locked into place, both when fully open and closed. In order to move the blade, you have to press the red button on the side of the saw. The handle is very comfortable, and the performance is quite good for such a small saw.

However, you must have realistic expectations here. After all, this is a fairly small saw with a small tooth pattern. It takes a good amount of work and time to cut with this saw. It is easily left behind when compared to a larger saw like the Trailblazer, or even a tool like the Small Forest Axe. For some comparison testing, you can have a look here.

Overall, this is a very good saw to carry if you want to supplement your knife, and speed up camp chores. If however you plan on gathering large quantities of wood, this is probably not the saw for you.

Monday, May 9, 2011

Stealing Meat From Lions

This is another brief excerpt from Human Planet, currently being shown on the Discovery Chanel and the BBC. I this video you see a group of Dorobo hunters in southern Kenya stealing their dinner from a pride of lions.

Friday, May 6, 2011

A Brief Look at the Cegga Custom Hatchet

I have to give a big thanks to Ches from North Carolina for letting me use his very rare hatchet for this review. I am always amazed when people trust me with such valuable tools and am truly grateful for the opportunity.

Of course, this in not a hatchet that you can just go out and buy. It is a custom creation by Cegga. For those of you who do not know him, he is an employee for Hultafors/Hults Bruk in Sweden. Most of his axes are modified versions of the Hultafors Classical line of axes, and are hard to find. This one was initially made for a member of Bushcraft UK, and then after several trades/sales, made its way to Ches, who, being the cool guy that he is, contacted me and offered me the opportunity to test it.


Specifications:
Manufacturer: Cegga/Hultafors
Axe Head Weights: Overall weight is 1 1/2 lb. Head weight is about 3/4 lb.
Axe Length: 15 1/4 inches
Axe Head Material: Unknown Swedish steel
Handle Material: Hickory
Cost: As negotiated

The first thing that I noticed about the axe is that it has been very well finished. I don’t know exactly what the initial axe looked like, but clearly a lot of work has been put into it. As you can see from the picture, the head has been highly polished. All lines have been made smooth and continuous, and all imperfections have been removed.

Even more impressive is the finishing job on the handle. It almost doesn’t feel like wood. On most other axes, including the high end ones, you can feel the texture of the wood-the grain, the roughness, the pores in the wood, etc. The handle on the Cegga axe appears to have been somehow oiled and waxed so thoroughly that the whole surface has a uniform texture. For some reason, I was very impressed by that fact. The head is attached to the handle using a wooden wedge with a circular metal pin, typical of Hultafors.

The grinding of the head has of course removed a good amount of material from it. My guess is that Cegga started with a Hultafors Trekking Axe (HB FY-0,5 MINI), which has a head weight of 1.1 lb. After the material was removed, the weight of the head probably dropped down to 3/4 lb. I say that because of the comparison to the Gransfors Bruks Wildlife Hatchet.


The Wildlife Hatchet has an overall weight of 1 1/2 lb. Of that weight, the handle weight half a pound, making the head 1 lb. The two axes seem to have about the same overall weight. The Cegga axe however has a much more robust handle. It is certainly longer by more than an inch, and on top of that, it is thicker. Since the Wildlife Hatchet head weight about a pound, the head of the Cegga axe must be less than that, probably closer to 3/4 lb.

How does that translate into performance? Well, I took the two hatchets out into the woods for some testing. My experience has been that increasing the handle length does not compensate very well for a decrease in weight. For example, my Husqvarna hatchet has a handle that is about an inch shorter than the Wildlife Hatchet, but because the head is a quarter of a pound heavier, it still easily outperforms the Wildlife Hatchet.

The results I got confirmed that. When it comes to axes, weight is important. That being said however, I actually think that the difference in performance was much more a result of the bit profile of the two axes. It is impossible to detect in pictures but the Cegga axe has a slightly thicker bit. The overall thickness of the head is about the same, but the very edge was thicker. Since I mostly work with hard wood, this significantly detracts from the performance. If I was working with soft wood, this probably wouldn’t be a problem at all, but in hickory, the Cegga axe has a hard time penetrating into the wood.

Overall, this is a beautiful tool. Every aspect of it has been touched up. The head is uniformly polished and the lines are smooth and continuous; and the handle is perfectly finished. The decreased head weight, however, also decreases performance, and so does the thicker grind of the bit. For the same overall weight, the Wildlife Hatchet manages to outperform the Cegga axe, at least in hard wood. Also keep in mind (and this is true with all axes where the head is not protected by paint or patina), you have to clean and oil the head. The clean shiny finish is a magnet for rust, and this is something you will have to keep an eye on. I think the conclusion of all this is that Cegga does good work, and that if you are lucky enough to be able get him to make you a custom axe, go for it, but make sure you give him the specifications that work for you.