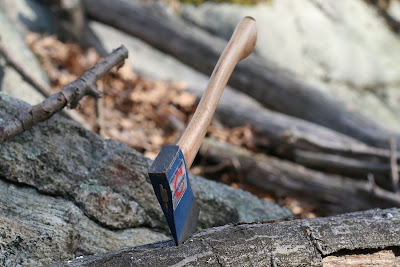
When judging the weight of an axe head, we most often go by the manufacturer’s specifications. Often, there is no need to doubt that when they say an axe has a two pound head, it in fact has a two pound head. Over time however, some things have not been adding up. Several axes which are supposed to be of the same weight, are not. That is why I decided to just find a way to measure the weight of the heads myself. The axes that I wanted to look in particular are the line of Gransfors Bruks axes because I use them as a point of comparison so often. The ones I will look here are the Wildlife Hatchet, the Small Forest Axe, the Scandinavian Forest Axe, and the American Felling Axe. For comparison pictures, see here. I will also take a look at the Husqvarna Traditional (Multi-Purpose) Axe, since it is the reason I became skeptical about certain axe weights.
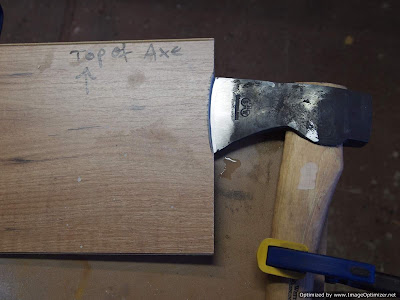
The method I used the measure the weight of each head is to buy a handle for that particular model axe. I then measured the weight of the whole axe and that of the handle, and subtracted one from the other. The results are fairly accurate, although there will be a small margin or error.
Gransfors Bruks Wildlife Hatchet:
Total Axe Weight: 1 ½ lb
Handle Weight: ½ lb
Axe Head Weight: 1 lb
Gransfors Bruks Small Forest Axe:
Total Axe Weight: 2 1/8 lb
Handle Weight: 5/8 lb
Axe Head Weight: 1 ½ lb
Gransfors Bruks Scandinavian Forest Axe:
Total Axe Weight: 2 ½ lb
Handle Weight: 7/8 lb
Axe Head Weight: 1 5/8 lb (most likely 1 3/4 lb)
Husqvarna Traditional (Multi-Purpose) Axe:
Total Axe Weight: 3 lb
Handle Weight: 1 lb
Axe Head Weight: 2 lb
Gransfors Bruks American Felling Axe (35 inch handle):
Total Axe Weight: 5 lb
Handle Weight: 1 3/4 lb
Axe Head Weight: 3 1/4 lb
With most axes the results were as expected. All the head weights, with the exception of the Scandinavian Forest Axe and the Husqvarna Traditional (Multi-Purpose) Axe were as listed by the manufacturer. The Scandinavian Forest Axe however, has a head weighing closer to 1 3/4 lb rather than the 2 lb specified by the manufacturer. The Husqvarna Traditional (Multi-Purpose) Axe has a 2 lb head, rather than the advertised 1.87 lb head. It appears that had the manufacturers switched axe heads, the advertised weights would have been correct.
Friday, April 29, 2011
Thursday, April 28, 2011
Fox Hunting With a Golden Eagle
In this video you see a Kazakh hunter using an eagle he has just trained to hunt a fox in the Altai Mountains of Mongolia. The video is a small part of a series called Human Planet, which currently airs on Discovery and the BBC. The series documents people all over the world living in extraordinary conditions. While the focus is mostly a sociological one, it contains some good information about the way non-industrial cultures live.
I hope that they use all the footage they have to make a more extensive series. Each one of the cultures they visit, deserves at least a whole episode.
I hope that they use all the footage they have to make a more extensive series. Each one of the cultures they visit, deserves at least a whole episode.
Wednesday, April 27, 2011
The Gear of Horace Kephart

The first thing that becomes clear when reading the book is that while it was inspired by the example of Nessmuk, it is a much more detail oriented and thought out account of the necessary gear and skills. The length of the book, and the amount of material covered can at times be daunting, but it gives us a much clearer picture of the tools Kephart carried. I will look at two different configurations here-his summer, or warm weather gear, and his winter gear.
SUMMER PACK
Pocket/Belt Carry-Map, compass, waterproof matches, pocket knife, bandana, watch, pipe, and sheath knife on the belt, along with another pouch of waterproof matches. Kephart states that he does not like possibles pouches because they get in the way. He prefers to hold important items in his pockets. I completely agree with him on this one.
Backpack-Duluth pack-It is made of canvas. It is 24 inches by 26 inches and weighs 2lb 4oz.
Clothes-Woolen shirt, woolen drawers, woolen socks, army overcoat, khaki trousers, silk neckerchief, army shoes, army leggings, hat. Kephart advocates against carrying a wool coat, but rather using a thick sweater/stag shirt covered by a rubber cape reaching to the knees or some other waterproof shell. He also carries extra socks and drawers, but they are not included in the weight of the pack provided below.
Shelter:
Shelter cloth/tarp-Waterproof canvas, 9ft by 7ft. It weighs 2lb 4oz. Elsewhere in the book he also recommends a tarp made of waterproof balloon silk, 8ft by 7ft. The same weight is given for the silk tarp.
Blanket-Made out of wool. For summer, a light blanket 66 inches by 84 inches weighs 3lb. For colder whether a thicker blanket is required, which can weigh up to 5lb.
Mosquito net-68 inches by 72 inches in size. It weighs 4oz.
Browse bag-This is an empty cotton bag which gets stuffed with leafs and other materials to function as a sleeping mat. It is 32 inches by 78 inches, and weighs 1lb.
Pillow bag-It functions exactly like the browse bag. It measures 20 inches by 30 inches, and weighs 3oz.
Tools:
Pocket knife-Kephart recommends a jackknife, with one of the blades being about 3 inches long.

Tomahawk-Kephart states that when there is a full size axe in camp, he will only bring a small tomahawk with him. Total weight of the tomahawk that is given in some places is 12oz, but in Volume 1, where he provides more detail about the tool, he specifies that the tomahawk he uses has a 12 oz (3/4 lb) head. The handle is about a foot long. Kephart tries to describe the design of the head, and states that the blade should be narrow, so that the force is concentrated for better penetration. This seems to describe a modern hawk design, but then he goes on to say that a design like the Nessmuk hatchet is ideal. As you’ve seen from the etching in Nessmuk’s book, his axe closely resembles the design of a modern double bit axe. It appears that he simply carries a hatchet/hawk with a 3/4 lb head, something similar to the Gransfors Bruks Outdoor Axe.
Pliers-Weight 4oz. It appears that if he was camping these days, his pocket knife and pliers might have been quickly merged into a multi tool.
Whetstone-4 inches by 1 inch by ½ inch in size and weighs 2oz.
Twine, nails and tacks-4oz in weight.

Together the cooking kit weighs 2lb 3oz. There is an interesting cooking set which is attributed to Kephart, that can be seen here and here.
First aid kit-5oz in weight. A detailed list of the contents can be seen on page 33 of Volume 1, but technology has long surpassed those items.
Other Items:
Wallet fitted with small scissors, needles, sail needle, awl point, two waxed ends, thread on card, sail twine, buttons, safety pins, horse-blanket pins, 2 short fish lines, extra hooks, sinkers, snare wire, rubber bands and she laces. The total weighs 6oz.
Comb, tooth brush, tiny mirror, soap in a waterproof bag, rolled in a small towel and secured by a rubber band. Total weight is 6oz.
Fly dope (2oz), talcum powder (1oz), toilet paper (1oz), extra matches (2oz), electric flasher (I’m assuming a flashlight) (5oz).
This list of gear can be found on page 105 of Volume 2 of Camping and Woodcraft. The total weight given for the pack and its contents is 18lb 3oz.
The above list does not provide for any water storage or purification gear. Elsewhere Kephart states that he prefers a US Army 1 qt aluminum canteen with a felt-lined canvas cover. When more water is needed, he recommends a collapsible rubber water container. As 1L of water weighs about 2.2lb, adding 2L of water to the above weight, along with a canteen, will add another 5lb to the pack. This still does not reflect any water purification gear.
Food:
Bread or prepared flour, cereal, milk powder, butter, bacon, cheese, egg powder, dried fruit, sugar, chocolate, coffee, tea. The total weight of two days of rations is given as about 5lb.
This brings the total weight of the pack, including two (2) days of food and 2L of water to 28lb.
WINTER PACK
The winter gear outlined by Kephart, is shown in an abbreviated list on page 145 of the second volume. It closely resembles the summer gear with some specific alterations. Here I will go through the changes or additions that he recommends for winter camping.
Shelter:
The first significant change is to the shelter system. The tarp that was recommended for milder weather is exchanged with a canvas half tent of approximately 4 lb in weight. The reason given is that a tarp is too breezy.
The second change to the shelter system is the replacement of a blanket with a sleeping bag. Earlier in the first volume of the book, Kephart explained that to carry enough blankets to equal the warmth provided by a sleeping bag would be weight prohibitive. For that same reason he recommends the change to a sleeping bag. The weight of the sleeping bag is given as 8 lb. Keep in mind that here he is referring to 100 year old sleeping bag technology.
The last change to the shelter system is the removal of the browse bag. Instead of this bag, Kephart recommends bringing an axe which you can use to gather the necessary bedding materials.
Tools:
The major change in tools is the one pointed to above. The small tomahawk is replaced with an axe. Kephart speaks of a full size axe with a 3 ½ lb head, but the weight measurement he provides is 1 lb 12oz. This would make the axe similar to the size of a Small Forest Axe. In Volume 1 he states that a good axe for heavy work that can be taken on a canoe trip where no full size axe is available in camp, would have a 2 lb head and a 18 inch handle. He seems to like a Hudson Bay or Damascus pattern axe. He also recommends the use of a small file for sharpening.
Clothing:
The additional clothing that is recommended is a Mackinaw shirt, spare underwear and spare socks, moccasins, and German socks.
Other Items:
The additional items that are listed are a folding lantern and candles, along with some extra matches.
Kephart points out that it is not uncommon that with food, a winter pack may weigh 50 or 60 lb. He recommends that a hunter out during winter carry enough food for a few days until he can start providing himself with food from hunting.
I’ll leave this post with a quote from Kephart that I find to be very true, and is largely why I follow my style of backpacking: “The man who goes afoot, prepared to camp anywhere and in any wether, is the most independent fellow on earth. He can follow his bent, obey the whim of the hour, do what he pleases whenever he pleases, without deference to anybody, or care for any beast of burden or obedience to the course of any current. He is footloose and free. Where neither horse nor boat can go, he can go, seeing country that no other kind of traveler ever sees.”
When compared to Nessmuk, I found Kephart’s approach to gear selection to be well documented and thought out. The weight of every piece of gear is properly recorded, and the lists are complete and vary depending on the environmental conditions. If we go through his gear lists, and update each item with its modern equivalent (an act of which I believe he would approve), we would see a set of gear, which can be readily found on the trails today. As with Nessmuk, the only piece of gear that is common today, which is no where to be seen in Kephart’s writings is a water purification system.
Tuesday, April 26, 2011
The Axe Manual of Peter McLaren
In the early 20th century, Peter McLaren could chop through a piece of wood with an axe faster than any other man. He broke numerous records and became very well known. He stated that he only used Plumb axes, which of course was the greatest imaginable advertisement for Plumb. They forged a special head with McLaren’s image on it, and encouraged him to write this axe manual, which they published in the 1930s.

The manual is a short booklet on axe care and use. It is very well illustrated and provides great information in a very compact and direct way. As far as I know the book is in the public domain, and a copy can be found here (PDF), here and a number of other places online.

The manual is a short booklet on axe care and use. It is very well illustrated and provides great information in a very compact and direct way. As far as I know the book is in the public domain, and a copy can be found here (PDF), here and a number of other places online.
Monday, April 25, 2011
Hultafors GK Review
The Hultafors GK is another Scandinavian knife that has seen some popularity in recent months. There is a good amount of material on its lighter weight cousin the Hultafors HVK, including some destruction tests, which show it to be a robust blade. I wanted to give you some comparison pictures, so you can see how it stacks up against some of the knives with which we are more familiar.

Specifications:
Knife Length: 8 3/4 inches (222 mm)
Blade Length: 3 5/8 inches (93 mm)
Blade Thickness: 1/8 inches (3 mm)
Blade Width: 7/8 inches (22 mm)
Blade Material: Unknown Japanese carbon steel
Blade Hardness: HRC 58-60 on the Rockwell Scale
Type of Tang: Partial concealed
Blade Grind: Scandinavian with a small secondary bevel
Handle Material: Plastic
Sheath Material: Plastic
Cost: $16.00

The knife is cheap. It is in the same cost category as the old school Mora knives. Even though I had to get it shipped from the UK, the overall cost was under $20. You can find the knife here.
When compared to the Mora 1, the Hultafors GK is a much more robust knife. While the blade is a little bit shorter, it is noticeably thicker and wider. The curve at the tip of the blade on the GK is more pronounced than that of the Mora, which I find shortens the working surface of the blade, making the GK feel like a shorter knife. The blade has a small secondary bevel, again, making it more robust that the Mora. The handle is very large when compared to the Mora 1. I am sure that some people will like that, but I find it to be unnecessary bulk. The handle also has a very poorly positioned finger guard. It is or noticeable size, and on top of that is rather thick. This makes the knife uncomfortable to use in a number of positions. If I had any interest in using the knife, I would have to grind it down.


The knife has a concealed partial tang. Here you can see a picture of it. The picture was not taken by me. The connection between the blade and the handle felt very secure, and I did not feel any movement at any point during testing.

Just like with all other knives, I took it out for some testing. I put it through some of the regular tasks for which it might be used.
The knife did well with batoning. The blade is of course very short, coming in at under four inches. This significantly limits the size of wood which you will be able to split. The relatively thick blade had no problem going through the wood.

Similarly, when truncating, the knife is robust enough to take the pounding without much fear of it falling apart.

As with any sharp knife the feather sticks were not a problem, although the finger guard made some of the process harder by not allowing me to choke up on the blade. As I mentioned above, I find this to be a big problem with a knife which will do a good amount of wood working.

The knife comes with a good quality plastic sheath. The knife is held securely inside, although it feels somewhat bulky.
I think that overall, this has been my problem with the whole knife. It is just too robust for what it is. I find the blade to be too thick and wide considering that it is so short. The short length limits much of the force that you will b able to put on the blade, and as such, there is no need for it to be nearly as thick or wide. Unless you plan on using it to split concrete, it is a bit of overkill. I am sure that since it is intended to be a utility knife, that may very well be the intended use, but as a bushcraft knife, the added bulk when compared to the Mora 1 seems unnecessary. Similarly, I find the handle to be way too big. I am sure that there are guys out there with large hands who will live the handle, but for my average size hands, most of the handle did not see much use.
Overall, I find this knife hard to recommend over the usual Mora knives. The price is about the same, but I would rather have a Mora 1, or even a Mora Clipper instead of Hultafors GK as a bushcraft knife. There is a certain simplicity and bare practicality to the old school Mora knives, which is missing in the GK. Granted, this is intended to be a heavier work knife. The lighter HVK model will probably be better suited for bushcraft tasks.
Friday, April 22, 2011
Bahco/Sandvik 19 inch Rucksack Axe Review
In this review I would like to take a look at two sightly different axes. A while back I came across a small axe with the name Sandvik on it. I bought it for about $20. Recently, I noticed that a very similar axe is being sold under the Bahco name. After some reading, it became clear that Bahco had purchased Sadvik. I bought one of the Bahco axes, so I can see if there have been any modifications made from the Sandvik model. In this review I will switch between the two axes.

Specifications:
Manufacturer: Bahco/SNA Europe
Axe Head Weight: 1 3/4 lb
Axe Length: 19 3/4 inches
Axe Head Material: Unknown Swedish steel
Handle Material: Ash
Cost: $40 for the Bahco version

What you see in the above in the first picture is the Sandvik Axe, and in the second picture is the Bahco version.
The two axes are nearly identical. Aside from color, there are only two differences, both in the head. The first difference is that the poll of the Bahco version has been made heavier. It still doesn’t provide ideal balance, but it is an improvement over the Sadndvik version, which had a very small poll. The second change is of questionable value. For some reason, Bahco changed the attachment method, ans is now using a plastic wedge to attach the head. Even more bizarre is the fact that the wedge has some sort of attachment loop on it. During testing the head stayed on securely, but this choice is hard to explain.

Otherwise, both axes are the same size, and are comparable to the Gransfors Bruks Small Forest Axe. Here you can see the axes next to each other.


The handle grain is hard to see because of the paint on the handle, but it is good on both axes. The handle is the same length as that of the Small Forest Axe, but it is noticeably thicker, too thick for my liking.
The head of the Bahco/Snadvik axe is a quarter of a pound heavier than that of the Gransfors Bruks Small Forest Axe. It also has a very strange shape. It almost appears to have been designed as a splitting axe. While the bit is fairly thin, the head quickly widens in the cheeks, making it appear almost triangular. It reminds me of an old Stiletto head of similar size that I have.

While it would be possible to do some work with a file on the bit of the axe, how much can be done is limited by the abruptly widening cheeks, which get in the way. If you wish to re-profile the axe, you may have to grind down the cheeks.

Because of this “splitting” design, the Bahco/Sandvik axe falls behind the Small Forest Axe when it comes to chopping. Here I had sharpened the axe, but had made no effort to re-profile the bit. I am sure that with some work, the axe can at least match the performance of the Small Forest Axe. I don’t know how easy that would be to do considering that the cheeks expand so rapidly from the bit. In splitting of course, the added weight of the head, combined with the wide head design, the Bahco/Sandvik axe shines.

The balance of the Sandvik axe was terrible, as the poll was very small.

I am very glad that the Bahco version has an expanded poll. It still doesn’t balance out the axe completely, because of the short handle (I like to see 1 3/4 lb heads on a 25 inch handle rathern than a 20 inch one), but it is a huge improvement over the Sandvik version.

I am not really sure how to judge the Bahco axe. It is a very peculiar design. In some respects it shows a lot of promise. The bit is fairly thin, and the overall size of the axe makes it very portable. The price is also very reasonable. On the other hand, the wide cheeks make it more suited for splitting than chopping. The attachment method that is used int eh Bahco version is just bizarre. I don’t know what to say about it. It held together during testing, but just looks like something you can pull out (I tried-I couldn’t pull it out). As it is, it can not outperform the Gransfors Bruks Small Forest Axe. With some work however, the potential is there.
Bahco also makes different size axe including a version with a 26 inch handle and a 2 1/4 lb head.
Wednesday, April 20, 2011
The Gear of George Washington Sears/Nessmuk

As is the case with most people to whom we look up, idolization soon follows. A fair amount has been said about what Sears believed and what he did, but it is hard to find many statements that are actually supported by his writings. In this post I attempted to go through Woodcraft and Camping and see if I can outline a coherent list of the gear that Sears used or advocated.
The first challenge that I encountered, is that Sears is admittedly trying to write a book which captures his more than fifty years of experience as an outdoorsman. As a result, much of his writing contains contradictory or incomplete statements. At times he will say that he uses only minimal gear, and a few pages later he will proceed to give cooking instructions using items which are nowhere to be found in the kit to which he referred earlier.
I will also disregard the weights that he gives for his combined gear and its volume. Measurements of individual items are presumably correct, but when he starts to give estimates for the total weight of his gear, some of the numbers are hard to believe. For example, on page 6 of the book, he states that his canoe, extra clothing, blanket-bag, two days rations, pocket axe, fishing rod and backpack never exceeded 26 lb. Even assuming a ten pound canoe, this leads even Kephart to assert that this must have been only possible in summer. There are other similar instances throughout the book, which give me pause when looking at the numbers he provides. I will attempt to provide available measurements from contemporary examples, whenever possible.
Possibles Pouch (What Sears calls a ditty-bag):
He states that it is 4 inches by 6 inches in size. It contains a dozen hooks, four lines of six yards each, three darning needles and a few common needles, dozen buttons, sewing silk, thread, ball of yarn, sticking salve, shoemaker’s wax, beeswax, sinkers, a file for sharpening hooks, a vial of fly medicine, a vial of pain killer, and two or three gangs of hooks on brass wire snells, water-proof match safe, strings, compass, bits of linen and scarlet flannel (for frogging), copper tacks, and other light duffle. He states that it weighs 2 ½ ounces, but that seems highly unlikely. Maybe he is referring to the weight of the empty pouch.
Backpack (knapsack):
Made from oil cloth (according to Kephart, from canvas), with no frame and no hip belt. He specifies that it weight 12 ounces, and is half a bushel in capacity (35 liter, 2150 cubic inches). This is a fairly small pack. The size is what today we would consider a day pack, comparable to a Coleman RTX. A modern pack of that size weighs about 1.5 lb, so a 12 ounce weight is not unreasonable for a very basic pack It is unlikely that he consistently fit all of his gear in such a small pack, but he writes that it holds his blanket-bag, shelter tent, hatchet, ditty-bag, tinware, fishing tackle, clothes and two days’ rations. To me this seems a rather extraordinary claim.
Clothing:
Two woolen shirts, two pair of woolen drawers, two pair of woolen socks, woolen coat, woolen vest, woolen pants, hat, and boots. This set of clothing will leave one extra pair of socks, an extra shirt, and an extra set of drawers.
Shelter:
Blanket bag-Sears states that it is made of Mackinaw (misspelled in the book as “Mackinac”) wool, large enough to cover a man’s body, and open on the top and bottom. It appears to be made of one or possibly two blankets that has been sawn together on one side. The weight of a modern wool blanket, size 5 ft by 7 ft is about 4 lb. If the bag is made of two blankets, the weight would be about 8 lb. Sears states that all his clothing, his blanket-bag and his tarp weigh 8 lb total. This seems highly unlikely as a single blanket will weigh over 4 lb alone, and the tarp about 2 lb. The number is possible if by clothing he only means the extra clothing, and his blanket-bag is made from only a single blanket.
Tarp/Tent-Sears gives three different tarp and tents systems that he appears to use. One is mentioned on page 6 of the book and is a waterproof cotton cloth (most likely canvas) size 6 ft by 8 ft. Judging by the weigh of his other tarp, this one probably weighs about 2 lb. The second tarp he describes on page 20, and is a 9 ft by 7 ft strong cotton waterproof tarp (again, most likely canvas). He gives the weight of this tarp as 2 1/4 lb. The last shelter system he describes is a tent for which he provides the specifications on page 17. It appears to be open on one side to take advantage of the fire. In size it is 9 ft by 4 ½ ft, with covered sides. He gives the weight of the tent as 3 lb, with additional 5 ounces for the nail/tacks. He states that it will take an experienced person three (3) hours to put up this tent properly. He also gives specifications on how to waterproof the tent using alum and other chemicals.
Pillow bag-This is just an empty bag that is stuffed with leafs, moss or grass to make a pillow.
Cooking Gear:
The cooking gear comprises of five pieces of tinware. The largest one seems to be a 2 quart kettle, along with a number of smaller nesting dishes. The total weight provided by Sears is 2 lb. This is certainly possible if the items are very, very thin. In comparison, a single 14 cm Zebra pot weight 1 lb 10 oz. When backpacking, Sears states that he only carries two of the pots, one being 6 inches my 2 inches high, and the second one being smaller.
Tools:

Belt knife-Much has been written about this Nessmuk pattern knife, and people have tried to apply its shape to just about every use, from wood carving to any other general bushcraft use. The description that Sears provides for this knife is “The one shown in the cut is thin in the blade, and handy for skinning, cutting meat, or eating with”. It does not appear anywhere that he actually used this knife for woodwork or general bushcraft. It has the shape of a hunting/skinning knife, and the uses listed by Sears seem to support that. That would certainly be an important use of the knife for Sears considering that most of his outings relied heavily of hunting or fishing. I’ve looked at some other sources, and it appears, that typically, wood work was done with a small folding knife, not a belt knife such as the one described here.
Folding knife-This is a double bladed pocket knife. Sears states that together with the sheath knife, it is all that is needed for camp use.
Fishing/hunting gear-The fishing equipment that Sears used seems varied as would be expected from any fisherman. As an example, one of the rods he lists, weighs 5oz according to him. In several places he speaks of his muzzle loading rifle as well.
Food:
The food lists that Sears provides are lengthy and diverse. Some of the items he speaks of regularly are ham, bacon, potatoes, tomatoes, bread, butter, canned food, beans, and other types of meat. Hunting and fishing also appears to be a very important source of food for him. The weigh of his food must have been massive. It is very likely that many of the trips he describes were undertaken by canoe or mule train.
All of the above items are compiled from anecdotes and interspersed references in the book. In only one location do we ever get a description of a specific trip along with a detailed gear list. That can be found on page 53. The trip is a solo backpacking expedition, which he planned to take about seven (7) days. The items he took on the trip were: rifle, hatchet, compass, blanket-bag, knapsack, knife, one loaf of bread, two quarts of meal, two pounds of pork, one pound of sugar, with tea, salt, etc. and a supply of jerked venison. One tin dish, twelve rounds of ammunition and bullet mold.
There are several things which can be noted from this one trip into the woods. The first is, once again, the massive weight of his food. Along with two pounds of pork and one pound of sugar, the weigh of his food must have exceeded five pounds. On top of that, he describes killing three deer on his ten day trip, so he can have sufficient food. Apparently, dried foods such as rice were not in the picture.
The second notable thing is the absence of any shelter. This seems to have been a deliberate omission designed to save weight, although clearly inadvisable. In fact, at the end of the chapter, Sears writes: “Nothing but the exceptionally fine, dry weather rendered such a trip possible in a wilderness so cut up with swamps, lakes, marshes and streams. A week of steady rain or a premature snow storm...would have been most disastrous. Reader, if you ever are tempted to make a similar thoughtless, reckless trip-don’t do it.”
Another notable thing about Sears, which can be seen in the whole book is the total lack of any water purification or even water storage system. From what I saw, no where did he mention any type of water bottle or method for cleaning water. It appears that people had stronger stomachs in the good old days, and that he relied heavily on natural sources of water. Most likely however, the water bottle has simply been omitted.
I was also struck by the way Sears camped. First of all, his style of camping requires large use of natural resources. Almost every camp he sets up requires the chopping down of at least three trees about a foot in diameter, if not more, and the killing of a deer or some other animal for food. These days, few of us can afford that type of camping. The second interesting thing I saw was the incredible amount of time it takes to set up a camp. His tent alone takes three (3) hours to put up according to him. On page 40 he additionally describes a camp stove which takes one (1) hour to make. This does not include the gathering of fire wood, or the preparation of his sleeping surface. The setting up of a camp seems to have taken at least half a day.
Whenever I read other people’s writings about Sears, I always end up with the impression that he was a rough woodsman and that his writings reflect the golden age of camping and bushcraft. The more I read his own writings however, the more I reach the conclusion that he was a regular guy, just like any on us. He spent just as much time and money finding the “perfect” gear, and found the wilderness just as challenging. The fact that he considers a ten (10) day trip off the trail to be some type of an extreme adventure, makes me reconsider the rest of his accounts.
I want to end this post with a quote from Sears which I really like:
“...there are some who plunge into an unbroken forest with a feeling of fresh, free, invigorating delight... These know that nature is stern, hard, immovable an terrible in unrelenting cruelty. When wintry winds are out and the mercury far below zero, she will allow her most ardent lover to freeze on her snowy breast without waving a leaf in pity, or offering him a match; and scores of her devotees may starve to death in as many different languages before she will offer a loaf of bread. She does not deal in matches and loafs; rather in thunderbolts and granite mountains. And the ashes of her camp-fires bury proud cities. But, like any tyrant, she yields to force, and gives the more, the more she is beaten. She may starve or freeze the poet, the scholar, the scientist; all the same, she has in store food, fuel and shelter, which the skillful, self-reliant woodsman can wring from her savage hands with axe and rifle.”
This is certainly not the modern, politically correct view of nature, but I find it the closest to reality.
Monday, April 18, 2011
Removing an Axe Handle in the Woods
Back in March I did a post about making a replacement handle for an axe in the woods. You can see the post here. Inevitably, the question was brought up about how to remove a broken off handle if part of it is still securely attached to the head. The method I recommended was to use an amber to burn out the wood in the eye, just like you would a spoon. Unfortunately, this is a time consuming method. An easier approach was recommended, where the head of the axe is placed in a fire and the handle burnt out. I was skeptical about this approach because if the axe head is overheated, the temper of the blade can be ruined. I figured however that I would give it a try, and see if it works. I followed the approach outlined by Kephart in Camping and Woodcraft.
I started out with an old Colling hatchet. The head was securely attached to the handle.
I buried the head of the hatchet up to the eye in the soil.

I then built a fire on top of it. The fire was large enough to cover the head. The wood used was oak. I continued the burn for 15 minutes.

I then pulled the head out of the fire. The handle had burnt off, but surprisingly, the head appeared untouched by the fire in the areas that were buried.

I used a piece of split wood that I had left from making the fire, and with the help of a baton, I pushed the handle through the eye from the bottom. As you can see, the area on top of the eye was not too charred, ut the bottom part had been burnt much more severely. To punch out the part of the handle in the eye, just prop one end of the head on the ground, and the other end on a log. That should create enough free space under the eye for you to push it out.

With very little effort, the head of the axe was free from the handle.

When I returned home, I sanded off some of the paint/protective cover, and put the head in vinegar. What that does is to reveal the temper line of the axe head. Here it is clearly visible, and seems unchanged. At the very least, there are no areas where you can see that high heat advanced and changed the temper. It is possible that the temper was uniformly changed throughout the head, retaining the temper line, but I hav eno way of testing for that.

I was shocked by how little the head was effected by the fire. Most of it retained its original paint, and even the rust appeared to be untouched. While the head got hot, it never even came close to being hot enough for the temper to be substantially effected. Even the poll of the axe, which was directly exposed to the flame, never got red hot. Despite my scepticism, this appears to be a very effective way to remove an axe handle while in the woods.
I started out with an old Colling hatchet. The head was securely attached to the handle.

I buried the head of the hatchet up to the eye in the soil.

I then built a fire on top of it. The fire was large enough to cover the head. The wood used was oak. I continued the burn for 15 minutes.

I then pulled the head out of the fire. The handle had burnt off, but surprisingly, the head appeared untouched by the fire in the areas that were buried.

I used a piece of split wood that I had left from making the fire, and with the help of a baton, I pushed the handle through the eye from the bottom. As you can see, the area on top of the eye was not too charred, ut the bottom part had been burnt much more severely. To punch out the part of the handle in the eye, just prop one end of the head on the ground, and the other end on a log. That should create enough free space under the eye for you to push it out.

With very little effort, the head of the axe was free from the handle.

When I returned home, I sanded off some of the paint/protective cover, and put the head in vinegar. What that does is to reveal the temper line of the axe head. Here it is clearly visible, and seems unchanged. At the very least, there are no areas where you can see that high heat advanced and changed the temper. It is possible that the temper was uniformly changed throughout the head, retaining the temper line, but I hav eno way of testing for that.

I was shocked by how little the head was effected by the fire. Most of it retained its original paint, and even the rust appeared to be untouched. While the head got hot, it never even came close to being hot enough for the temper to be substantially effected. Even the poll of the axe, which was directly exposed to the flame, never got red hot. Despite my scepticism, this appears to be a very effective way to remove an axe handle while in the woods.
Friday, April 15, 2011
Guest Post: How to Reprofile Axes and Hatchets, by the Wandering Axeman
In the past six months or so, there has been significant increase is talk about axes, as more and more people come to appreciate their utility. Unfortunately, actual knowledge about the tools and their use is hard to come by. Today’s guest post is by a person who has demonstrated a great debt of knowledge about axes. While we do not always agree, I greatly respect his opinion. The work he does with axes goes beyond anything that I am capable of doing, or have been able to demonstrate here, so I was very happy when he gave me permission to publish his tutorial. It’s a great example of higher level work on axes. Make sure to check out his blog, The Wandering Axeman for more great posts on more sophisticated axe work.
Over the last several years, the number of threads on forums regarding axe and hatchet re-profiling have increased. Some of these contain useful info, most though talk about it, but never show how it's actually done. Even fewer still explain why it makes an axe cut better and how the profile differs between an axe for softwood, and an axe for hardwood. Changing the edge geometry of an axe is NOT reprofiling the axe. This is merely sharpening the axe. Anyone who tries to tell you differently is trying to sell a story to make themselves look more knowledgable than they actually are.
I initially became interested in reprofiling axes about 4 years ago. I had always been keen to learn this black art because as a child I had been to country fairs in Queensland where I witnessed axe racing. It is something special to see one of these axes slice through a large block of wood like butter. I was always impressed at the large chunks of wood these axes managed to throw and knew there was something special about them. When compared to a regular axe, they had a different shape, profile and were highly polished. I always knew this was no coincidence.
Why reprofile an axe?
It seems like an axe should be able to perform properly straight from the box right? I mean we don't need to reprofile knives. The truth is that most axe companies forge the heads, then look at the cheapest and easiest option. This usually involves leaving the bit of the axe thick. this is done so that the heat treat is easier and cheaper steel can be used. You see, the finer the edge, the more necessary quality steel and heat treat becomes. Axes need to be left reasonably thick at the bit because heat treating thin metal is very difficult. Once the heat treat is done, they should then be ground and polished so that the profile is correct, and the edge geometry is right. Unfortunately, to cut down on work all the smith does is put the edge on a belt grinder and gives it a very obtuse edge and then call it a "convex edge". At this point it would pay to look at the following diagram:

If you look where the cheeks are, these should also be hollowed out. If they are not, then the axe will bind due to friction when you try to take deep cuts. This is a tricky thing to do correctly though. When the bit initially cuts in, the wood compresses. As the bit continues to cut in, the wood ramps up on the wedge shape of the bit, then it reaches the cheeks. At this point the wood loses contact with axe, allowing the momentum of the axe to drive the bit in deeper without the wood slowing it at the cheeks. Wood is elastic to a point, and when it passes the union of the bit / cheeks, it decompresses slightly. When hollowing out the cheeks, you need to make sure you hollow it out enough so when the wood decompresses, it does not bind at the cheeks. The following rudimentary diagram illustrates the point:

This diagram is a top down view of an axe head. many start out like the axe on the left. After a reprofile, they look like the axe on the right. The transition between the cheeks and the eye MUST be smooth. If it isn't you will have binding occuring at this point when you try to split wood.
Difference between hardwood and softwood axes
There is a difference between axes meant for hardwood as opposed to softwood. Softwood is more "spongy" in a sense, so when you make your second cut, you need a wider blade to clear the cut and eject the chip of wood out. This does not mean thicker, but, from the edge to where the cheeks start will be a greater distance than on a hardwood axe. I typically make this distance anywhere up to 1 1/2" on axes used for birch or pine. If the blade is narrow, then the wood will simply compress and not split along the grain. This results in having to twist the axe in the wood to try clear the cut. Hardwoods are more brittle so you don't need such a broad "wedge" to cause the wood to crack and be ejected. On hardwoods I tend to leave about a 1/2" blade.
Lets reprofile an axe
So what tools do we need? Here is a list:
1) Angle grinder with grinding disk.
2) Flap disks ranging from 60 - 120 grit.
3) Drill with paint stripping wheel.
4) Bucket of water or snow. I prefer snow.
5) Sanding pads.
6) A belt grinder is preferrable but not absolutely necessary.
7) Quick clamps
8) Bastard file and tape
9) Ear and eye protection
10) Straight edge
Now lets see what we have to work with. As you can see it's a pretty standard Wetterlings axe. It has the forged finish and rough look to it. I hand selected this one as it had the least deformed and unbalanced head of the lot. This is not saying much for the quality control.


Once the axe is laid on the table and a straight edge is used, you soon see how bad the transition between the cheeks and the eye actually is.

What we need to do is thin down the bit so we have a chisel grind instead of an obtuse convex first. Then hollow out the cheeks, being mindful to blend them in to the eye and poll. Here is a side view where the dent from the smith's hammer is evident between the poll and cheeks.


This is where you even up each side of the blade. Manufacturers like to boast a "convex" edge. This is usually a rounded edge that has been convexed to hide the poor edge geometry and inconsistancy. We need to take away the very obtuse convex until we have a "scandi" grind. We can do this with files, or use a belt grinder. I have made a cheap and nasty rig for my grinder that the poll can rest on while the blade is ground flat.
If you use a file, you can set up your axe like in the following picture.

The tape will protect the poll as you draw file. If you have a belt grinder, you need to make a jig so that the poll is raised off the belt slightly so that you can grind the blade of the axe. I don't have a picture of this but I just use vice grips and a piece of angle iron on my grinder. Remember to cool the metal REGULARLY!!
Once you have the blade of the axe ground so that the convex edge is gone, you can assess how unbalanced the axe is. This is what I was left with.


As you can see, the top picture shows that there is much more meat on that cheek than on the other side. We need to make it symmetrical.
Now we move onto hollowing out the cheeks. The first step is to make bumpers to stop us running the angle grinder to close to the edge. I do this by finding a scrap piece of laminate.

Placing the edge onto the laminate, trace around the edge and then grind it out with the angle grinder or bench grinder.
Now clamp your axe to the bench using quick clamps. Measure a half inch from the edge and clamp the bumper onto the blade. Now with the angle grinder, carefully blend the poll with the cheeks. This stage is critical. Constantly check the progress and how much has been removed. You won't grind all the way up to the bumper, so 1/2" will translate to about an inch when it's done.

At this point it is very easy to overheat the head. Keep cooling it. Once one side looks good, go to the belt grinder or the paint stripping wheel on the drill. Starting from the poll, grind down to the edge to smooth out and polish out grind marks. REMEMBER, you will need to reverse the drill's spin depending on the edge you are grinding against. If you don't, it will grab and you will injure yourself. Once you have an even finish, inspect the axe in a good light.
Now one side has been blended, repeat the process on the other side.

This side looks good, now it's time to do the other. Keep checking that the work is symmetrical. Once done, give the head a final polish with the sanding blocks / pads. Give the edge a final sharpen, eliminating the wire edge you got from the grinder or files. You will be left with this:


As you can see, the profile looks much better and the transition from cheek to poll is smooth. The edge is also thinner, which will prevent deflection if you chop at shallower angles. The only recommendation now are that you put a very small convex or secondary bevel on the edge to prevent chipping. Also, work harden the edge before use by lightly chopping some wood after you have sharpened it. If cutting in cold weather, put the head under your jacket to warm it first before you start cutting otherwise you can also damage the edge. this is good practice with any axe, not just one that has been re-profiled. Any questions or comments are welcome.
Over the last several years, the number of threads on forums regarding axe and hatchet re-profiling have increased. Some of these contain useful info, most though talk about it, but never show how it's actually done. Even fewer still explain why it makes an axe cut better and how the profile differs between an axe for softwood, and an axe for hardwood. Changing the edge geometry of an axe is NOT reprofiling the axe. This is merely sharpening the axe. Anyone who tries to tell you differently is trying to sell a story to make themselves look more knowledgable than they actually are.
I initially became interested in reprofiling axes about 4 years ago. I had always been keen to learn this black art because as a child I had been to country fairs in Queensland where I witnessed axe racing. It is something special to see one of these axes slice through a large block of wood like butter. I was always impressed at the large chunks of wood these axes managed to throw and knew there was something special about them. When compared to a regular axe, they had a different shape, profile and were highly polished. I always knew this was no coincidence.
Why reprofile an axe?
It seems like an axe should be able to perform properly straight from the box right? I mean we don't need to reprofile knives. The truth is that most axe companies forge the heads, then look at the cheapest and easiest option. This usually involves leaving the bit of the axe thick. this is done so that the heat treat is easier and cheaper steel can be used. You see, the finer the edge, the more necessary quality steel and heat treat becomes. Axes need to be left reasonably thick at the bit because heat treating thin metal is very difficult. Once the heat treat is done, they should then be ground and polished so that the profile is correct, and the edge geometry is right. Unfortunately, to cut down on work all the smith does is put the edge on a belt grinder and gives it a very obtuse edge and then call it a "convex edge". At this point it would pay to look at the following diagram:

If you look where the cheeks are, these should also be hollowed out. If they are not, then the axe will bind due to friction when you try to take deep cuts. This is a tricky thing to do correctly though. When the bit initially cuts in, the wood compresses. As the bit continues to cut in, the wood ramps up on the wedge shape of the bit, then it reaches the cheeks. At this point the wood loses contact with axe, allowing the momentum of the axe to drive the bit in deeper without the wood slowing it at the cheeks. Wood is elastic to a point, and when it passes the union of the bit / cheeks, it decompresses slightly. When hollowing out the cheeks, you need to make sure you hollow it out enough so when the wood decompresses, it does not bind at the cheeks. The following rudimentary diagram illustrates the point:

This diagram is a top down view of an axe head. many start out like the axe on the left. After a reprofile, they look like the axe on the right. The transition between the cheeks and the eye MUST be smooth. If it isn't you will have binding occuring at this point when you try to split wood.
Difference between hardwood and softwood axes
There is a difference between axes meant for hardwood as opposed to softwood. Softwood is more "spongy" in a sense, so when you make your second cut, you need a wider blade to clear the cut and eject the chip of wood out. This does not mean thicker, but, from the edge to where the cheeks start will be a greater distance than on a hardwood axe. I typically make this distance anywhere up to 1 1/2" on axes used for birch or pine. If the blade is narrow, then the wood will simply compress and not split along the grain. This results in having to twist the axe in the wood to try clear the cut. Hardwoods are more brittle so you don't need such a broad "wedge" to cause the wood to crack and be ejected. On hardwoods I tend to leave about a 1/2" blade.
Lets reprofile an axe
So what tools do we need? Here is a list:
1) Angle grinder with grinding disk.
2) Flap disks ranging from 60 - 120 grit.
3) Drill with paint stripping wheel.
4) Bucket of water or snow. I prefer snow.
5) Sanding pads.
6) A belt grinder is preferrable but not absolutely necessary.
7) Quick clamps
8) Bastard file and tape
9) Ear and eye protection
10) Straight edge
Now lets see what we have to work with. As you can see it's a pretty standard Wetterlings axe. It has the forged finish and rough look to it. I hand selected this one as it had the least deformed and unbalanced head of the lot. This is not saying much for the quality control.


Once the axe is laid on the table and a straight edge is used, you soon see how bad the transition between the cheeks and the eye actually is.

What we need to do is thin down the bit so we have a chisel grind instead of an obtuse convex first. Then hollow out the cheeks, being mindful to blend them in to the eye and poll. Here is a side view where the dent from the smith's hammer is evident between the poll and cheeks.


This is where you even up each side of the blade. Manufacturers like to boast a "convex" edge. This is usually a rounded edge that has been convexed to hide the poor edge geometry and inconsistancy. We need to take away the very obtuse convex until we have a "scandi" grind. We can do this with files, or use a belt grinder. I have made a cheap and nasty rig for my grinder that the poll can rest on while the blade is ground flat.
If you use a file, you can set up your axe like in the following picture.

The tape will protect the poll as you draw file. If you have a belt grinder, you need to make a jig so that the poll is raised off the belt slightly so that you can grind the blade of the axe. I don't have a picture of this but I just use vice grips and a piece of angle iron on my grinder. Remember to cool the metal REGULARLY!!
Once you have the blade of the axe ground so that the convex edge is gone, you can assess how unbalanced the axe is. This is what I was left with.


As you can see, the top picture shows that there is much more meat on that cheek than on the other side. We need to make it symmetrical.
Now we move onto hollowing out the cheeks. The first step is to make bumpers to stop us running the angle grinder to close to the edge. I do this by finding a scrap piece of laminate.

Placing the edge onto the laminate, trace around the edge and then grind it out with the angle grinder or bench grinder.

Now clamp your axe to the bench using quick clamps. Measure a half inch from the edge and clamp the bumper onto the blade. Now with the angle grinder, carefully blend the poll with the cheeks. This stage is critical. Constantly check the progress and how much has been removed. You won't grind all the way up to the bumper, so 1/2" will translate to about an inch when it's done.

At this point it is very easy to overheat the head. Keep cooling it. Once one side looks good, go to the belt grinder or the paint stripping wheel on the drill. Starting from the poll, grind down to the edge to smooth out and polish out grind marks. REMEMBER, you will need to reverse the drill's spin depending on the edge you are grinding against. If you don't, it will grab and you will injure yourself. Once you have an even finish, inspect the axe in a good light.
Now one side has been blended, repeat the process on the other side.

This side looks good, now it's time to do the other. Keep checking that the work is symmetrical. Once done, give the head a final polish with the sanding blocks / pads. Give the edge a final sharpen, eliminating the wire edge you got from the grinder or files. You will be left with this:


As you can see, the profile looks much better and the transition from cheek to poll is smooth. The edge is also thinner, which will prevent deflection if you chop at shallower angles. The only recommendation now are that you put a very small convex or secondary bevel on the edge to prevent chipping. Also, work harden the edge before use by lightly chopping some wood after you have sharpened it. If cutting in cold weather, put the head under your jacket to warm it first before you start cutting otherwise you can also damage the edge. this is good practice with any axe, not just one that has been re-profiled. Any questions or comments are welcome.
Thursday, April 14, 2011
Hultafors Too Afraid to Sell Axes to Americans
Some time ago I did a review on a Hultafors axe that you can see here. As you know, Hultafors now owns Hults Bruk, a very well known axe manufacturer. I got a lot of feedback from the review, showing interest in this line of axes, and the same level of interest has been generated by Sportsman’s Guide, which offers used military surplus axes, many of which appear to be from the same line of Hults Bruk axes.

For some reason however, their axes are impossible to find in the US. I had to have mine shipped to me by a store in Germany. So, I started contacting people to see what can be done. I even contacted Hultafors, but got no answer. Finally, one distributor managed to get through to them and try to buy some of their axes and sell them in the US.
The answer he received from Hultafors was that they do not sell their axes in the US because they are afraid of our product liability laws. In their words, an axe in the wrong hands can mean trouble for them. They refuse to sell any axes to a US distributor.
It is rather sad that a large manufacturer like Hultafors would have such a sub-par legal department as to reach this absurd conclusion about the legal environment in the US. Apparently every other axe manufacturer in the world has no problem selling axes in the US, but Hultafors think they know better.
Let’s hope that one day they hire some lawyers that are actually worth the money. Maybe then we’ll see their axes in the US.
Subscribe to:
Posts (Atom)