Monday, December 22, 2014

Wood Trekker on Instagram

As you guys know, I’ve been busy lately, which hasn’t given me much time to post, or even access my computer. I have been messing around on my phone though, and opened an Instagram account.

IMG_20141221_213421

I’m slowly putting up some photos there. For those of you who have been following the blog all along, you have probably seen most of them. Over time I hope to post more. You can find me under the name wood_trekker. You can see the page on your computer here, or, if you are already a user of the app, you can look me up there.

Monday, December 15, 2014

Trip Report: Vernooy Kill State Forest 12/13/14 – 12/14/14

I’ve had my eye on the Vernooy Kill State Forest for some time now, but have never had the time to actually go and explore it. I finally decided to check it out this past weekend. What makes this forest particularly interesting is that it is a relatively recent acquisition by the NY Department of Environmental Protection. This 5,400 acre plot of land was acquired by the State in 2002 and made part of the Catskill Forest Preserve. Prior to that is was the private property of NY restaurateur Frederick W.I. Lundy and was known as the Lundy Estate prior to its acquisition. If we go even further back in history, the land was owned by several Dutch families and there are stories of abandoned town, Potterville, from that time being hidden somewhere in the forest. Since the land was in private ownership for so long, the information on it is still not particularly good, and much of it has changed as the land was been reclaimed by the forest. So, I decided to take a look and see as much of it as I could.

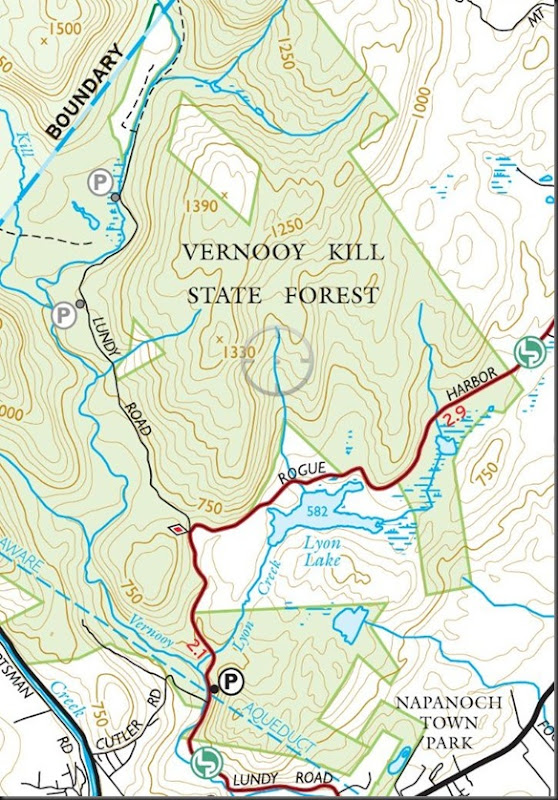
The first problem in planning my trip was that the available maps differ significantly. When people look at something like Google Maps, they imagine that the green portions on the map are forest, while the white portions are not. That is only partially true. The green portions are publically owned land. The forests themselves are much larger, but the portions in while are privately owned. Well, when it comes to the Vernooy Kill State Forest, the lines differ significantly based on what map you look at. On top of that, significant features such as lakes are present on some maps and not others. Based on my trip this past weekent, I can tell you that Google Maps is way off. The most accurate map (still, only somewhat accurate) is the NY-NJ Trail Conference Map #143.

Screenshot_2014-12-15-07-32-23

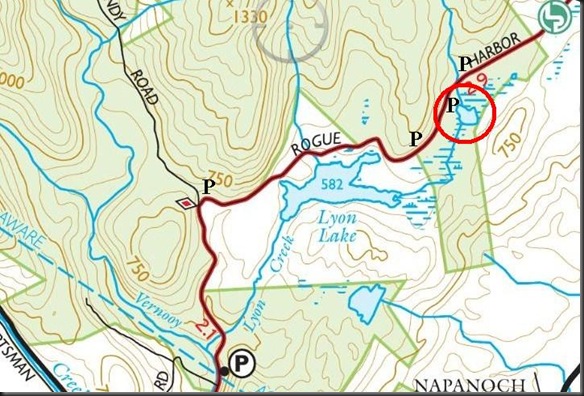
I accessed the forest from the south, using Lundy Road. The first parking area (P) you see on the map is exactly where it is indicated. It will fit three or four cars. I continued to drive up and in effect following the Long Path, marked in red on the map above, taking the turn onto Rogue Harbor Road. My goal was to explore Lyon Lake, which on Google Maps is marked as being public land. Well, it’s not. As indicated on the above map, it is privately owner and clearly marked. There are however several small parking spots (flat pieces of ground) along the road that you don’t see on the map, which I’ve marked on the image below. My ultimate goal was that smaller unnamed lake east of Lyon Lake. That is where my trip would start, circled in red.

Copy of Screenshot_2014-12-15-07-32-23

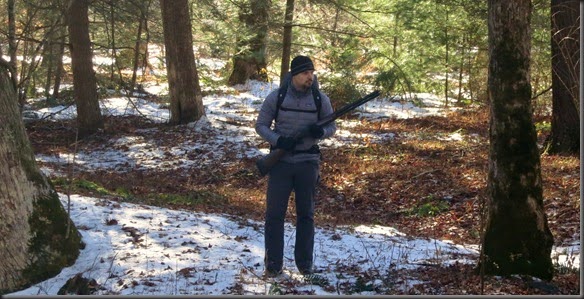
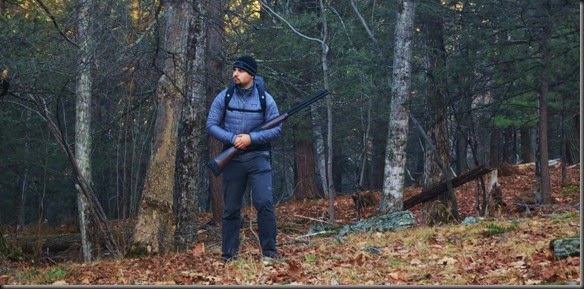
Luckily, there was a small area where I could pull over from the dirt road near the lake. It was a bit over 32F (0C). We have had temperatures fluctuate a lot lately, going from a lot of snow and cold to rain and warmer temperatures. Some small game is still in season, so I brought my shotgun just in case. I also brought my portable trapping kit. I haven’t had a chance to do any testing with it, so I figured I would at least see how easily it can be carried on this trip.

IMG_0862

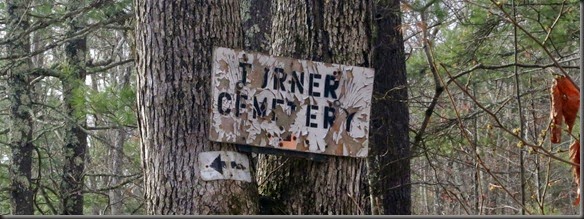
As I was about to head towards the lake, I noticed a worn out sign on a tree on the side of the road. It is visible only from the east.

IMG_1166

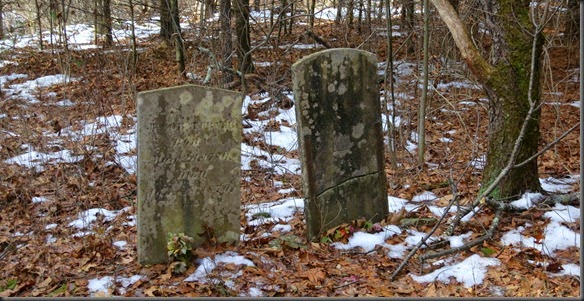
I started bushwhacking in the general direction of the arrow. There were no further signs or indications of direction, but after some roaming around I stumblem across two graves.

IMG_1156 

One of the stones was completely worn out, but the other indicated that this was the grave of Jacob Turner, born May 24, 1786, and died January 28, 1870.

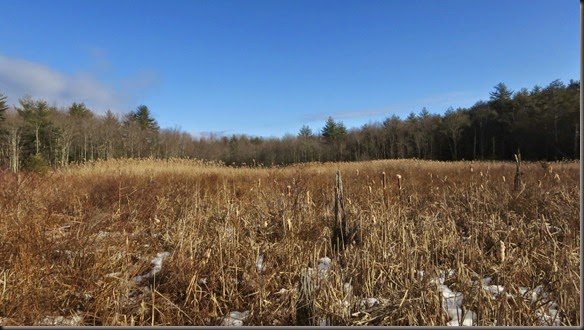
Since I was already headed in the direction of the lake, I kept bushwhacking south. Fairly quickly I reached the “lake”. Well, it turns out it’s not actually a lake, but rather a marsh.

IMG_1149

IMG_1145

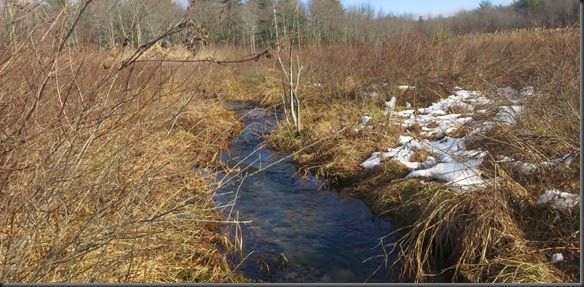
I walked across the whole area, so other than some small streams intersecting the area, there is no lake here.

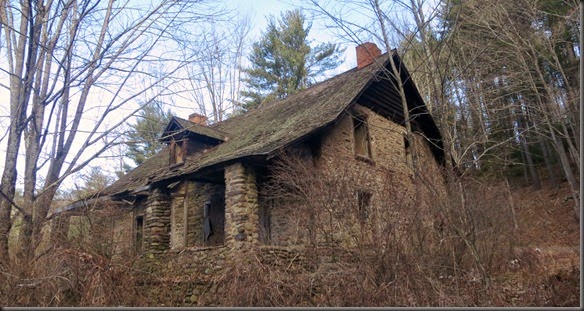
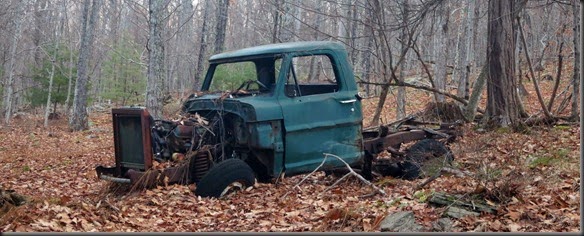
My curiosity satisfied, I decided to start moving north. There are two small lakes marked on the map, and I wanted to see them. I followed the dirt road north. Along the way you can see some indications that this was privately owned land. There are a few abandoned structures dispersed along the road and through the forest.

IMG_1107

IMG_1078

I walked north until I reached the place marked as the most northern parking spot on the map, which is just a small piece of leveled ground next to the dirt road. From there I cut west towards the first lake.

Copy of Screenshot_2014-12-15-07-32-23

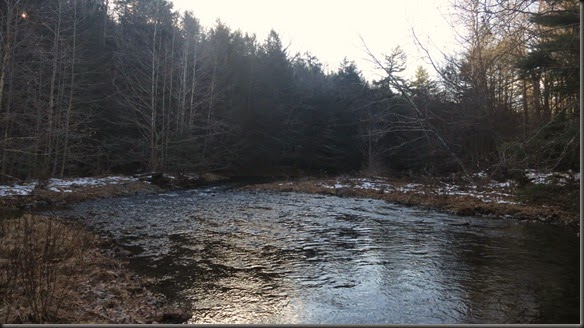
The river you see next to the road on the map actually turned out to be much wider and deeper than I had expected. I got pretty wet during the crossing.

IMG_1095

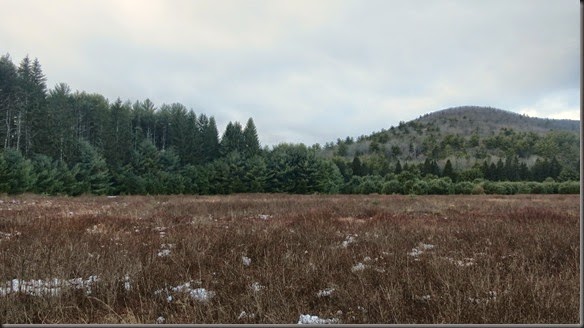
After pushing through the forest on the other side, the land opens up into what clearly used to be fields. The DEP website indicates that this forest is stocked with pheasant. I’m assuming that this is the area where they are released.

IMG_1015

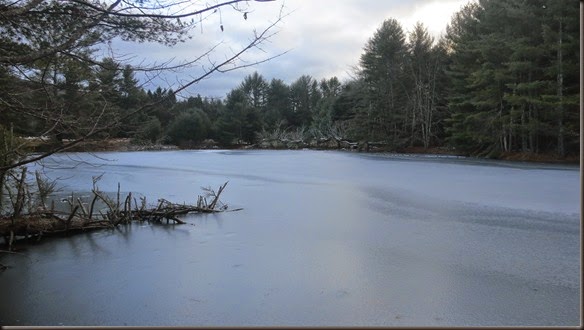
After pushing through some more forest, I reached the lake. It was frozen over.

IMG_1017

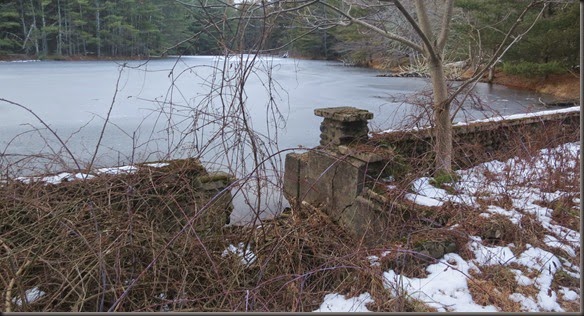
The lake was clearly created artificially with the use of an old dam. I doubt it will last much longer. It was already falling apart and moving under my feet as I walked over it.

IMG_1031

There are a few spots in the forest that are still privately owned. The big one around Lyon Lake I mentioned previously, and some smaller spots you see as white plots on the above map. Again, Google Maps fails to account for those property lines, but they are clearly posted.

I doubled back and crossed the river again. I started following it up towards the next lake marked on the map. For part of the way the river parallels the trail/dirt road and then turns east. I bushwhacked along the river until I reached the lake. The terrain is easy because it is predominated by large pine trees, which give you plenty of room to travel.

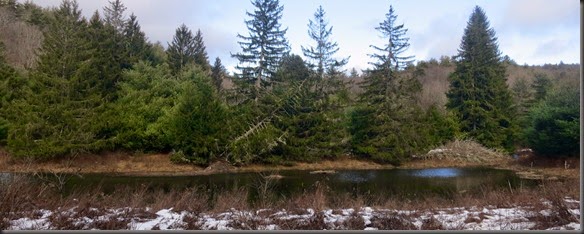
The lake itself was a nice surprise. Based on a previous two lakes, and the fact that this one appeared much smaller on the map, I was expecting either a frozen puddle or a swampy marsh. Instead, I found a good size lake fed by a fast moving river.

IMG_1001

IMG_1006

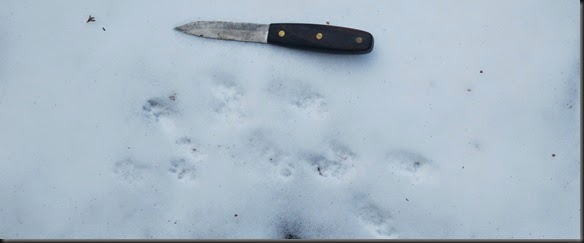
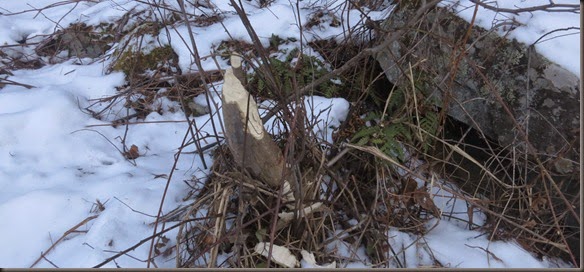
There were a lot of bear tracks and sign in the area as well as what looked to be mink activity. I saw very few signs of muskrat, which disappointed me as it looked like good muskrat territory. There is probably at least one colony there though.

IMG_1000

IMG_0924

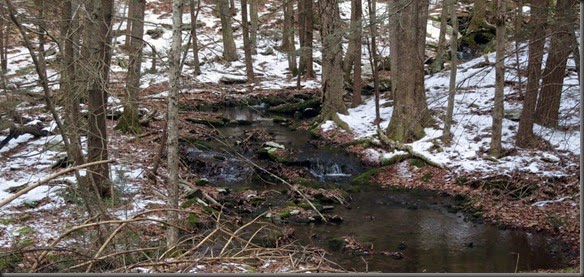
I kept following the river upstream. Gradually it diminished in size and turned into a stream.

IMG_0947

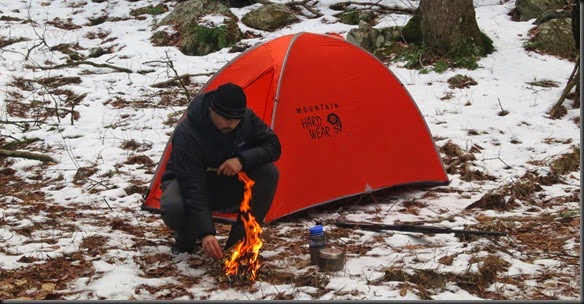
I figured that’s as good of a place as any to set up camp for the night. I built a small fire for cooking and in case there were any bears hanging out nearby.

I had some thoughts about going back to the lake and setting up some traps, but it was getting too late, so I decided not to bother.

IMG_0969

I had only brought my three season sleeping bag. I figured that together with my coat I would be warm enough. During the night the temperature dropped to about 20F (-7C), and at times I was a bit cold.

The next day I just made my way out of the forest. I bushwhacked the whole way because I wanted to see if I could get a squirrel or two. Squirrel activity actually wasn’t bad at all, but unfortunately all the ones I could spot flushed out out of range.

IMG_1084

So, these are my notes on the Vernooy Kill State Forest. Maybe next time I’ll go further up north and look for that abandoned town.

The only new set of gear was my trapping kit. I didn’t end up using it due to time constraints, and didn’t really expect to. I mainly wanted to see how easy it would be to carry. It packed down surprisingly small, and fit with the rest of my winter gear in the 40L pack. Obviously it adds some weight, but it wasn’t all that noticeable during the trip.

Thursday, December 11, 2014

Where Has Wood Trekker Been?!

Hey guys. I’m sorry that I have been gone for so long. I know that many of you have reached out to see if I’m okay. Not to worry, I’m doing just fine.

IMG_7948

The reason why I have not posted on the blog in a while, and have been absent from all the other places where I usually write is that I have just been very busy these past few months.

For starters, I got engaged to my girlfriend of three years, Tara. All the arrangements surrounding that were fairly time consuming.

On top of that, we are in the process of trying to buy a house, which has been extremely time consuming. We have been doing little else for the past two months. As a result, I haven’t been able to go out as much as I would like, and I certainly haven’t had time to take pictures and write posts.

If everything goes as planned we should be able to get the house and move in some time in February. Assuming there are no problems, I hope to be able to resume my regular writing around that time.

A big plus will be the fact that the house is located right next to two of the forests where I often backpack. That should make getting out much easier. Currently I have to drive about hour and a half to three hours to get to the forests you usually see in my posts. After we move, I will be walking distance from the woods. And… I’ll finally have some room for all of my gear.

I thank all of you who have reached out and those who have worried about my absence. I’m sorry that I have not been able to respond more quickly.

Thursday, October 23, 2014

Trip Report: Stewart Forest Pheasant Hunt 10/19/14

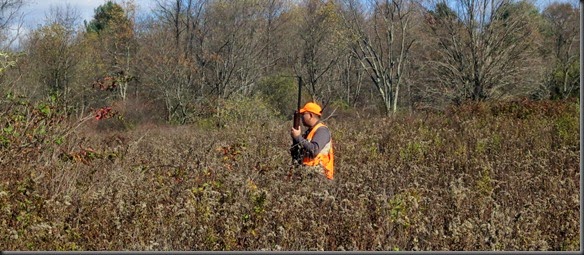
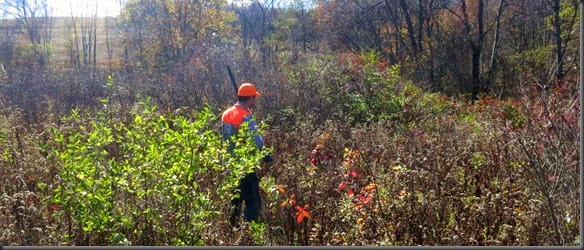
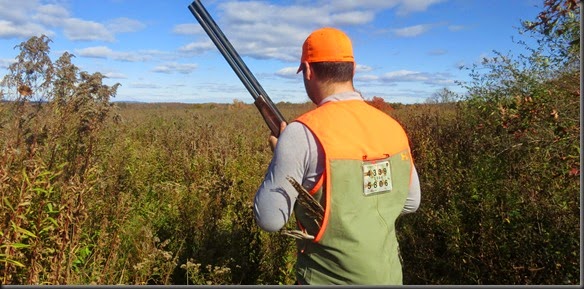
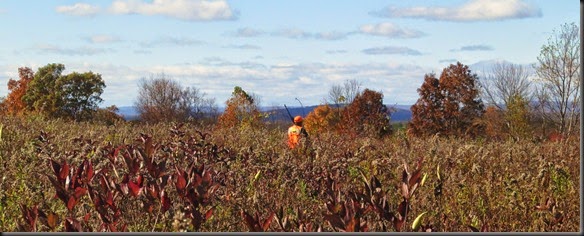
Since the pheasant hunt from the other week didn’t work out too well due to the rain, I was eager to get out again and give it another try. This past weekend looked good weather wise. It was dry, and temperatures were around 50F (10C). There was a strong wind, but conditions are never perfect.

Rich, I and the dog headed out for another try. The wind was stronger than expected, so we had to stick close to the dog. With high winds the birds tend to spook more easily, and can flush out further away from you and the dog than then ordinarily would.

IMG_0631

IMG_0637

For the first part of the day we didn’t have much luck. We started to think that it would be a repeat of the pervious hunt. We covered a lot of ground, but couldn’t flush anything out.

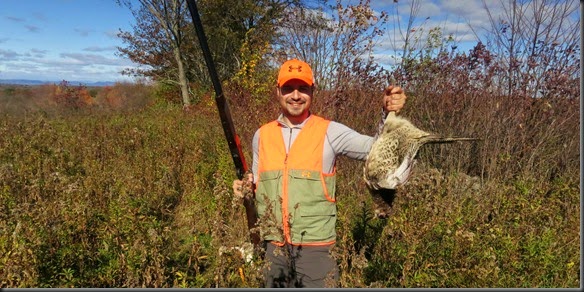
Luckily, while rich and the dog were moving ahead of me, I got stuck in a patch of thorn bushes. While I was trying to get out, I heard something moving. I waited fro about twenty minutes for Rich to bring the dog around. I tried to flush out the bird myself, but couldn’t push through the brush in the area. Once Rich was back, we did a pincer move around the patch and sent in the dog. It took some work, but eventually the dog flushed out a bird, a good distance ahead of us, maybe 30-35 yards. I was shooting high brass shells out of an improved cylinder choke, so I managed to tag it at that distance.

IMG_0665

IMG_0676

We continued to hunt for the rest of the day. We had a few more birds flush out, but way ahead of us.

IMG_0645

IMG_0649

IMG_0657

IMG_0696

We hit several different fields within the forest, but couldn’t connect with anything other than thorn bushes.

IMG_0644

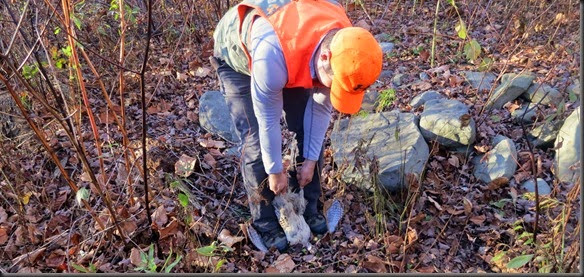
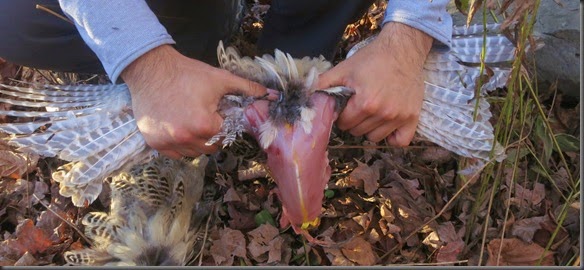
Eventually we made our way out. I took the opportunity to field dress the bird. The way I do it is to step on the wings, grab the bird by the legs, and pull up until the rid pulls apart in two sections.

IMG_0709

Usually the bird will separate into two parts. One part will have the wings and breast meat. The other part will have the thighs, legs, and the back. The pulling process removes most of the skin. This bird was hit in the rib cage, so it didn’t separate as cleanly, requiring me to do some extra work. Here you see the breas meat with the wings.

IMG_0715

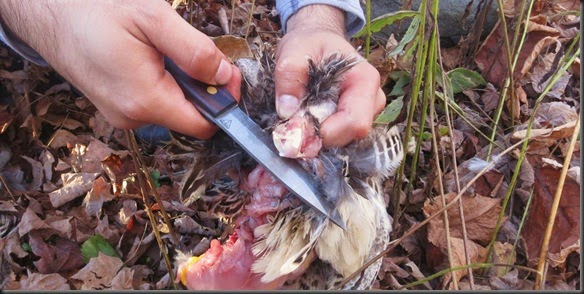
There isn’t much meat on the wings, so I cut them off at the joint.

IMG_0719

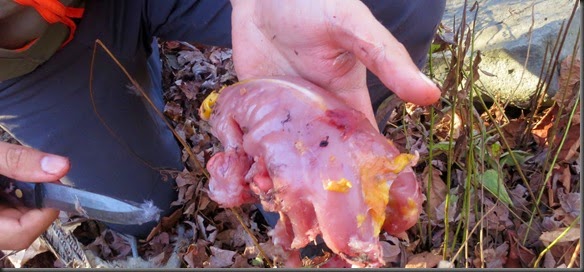
That will leave you with the breast meat. In the process, remove and save the gizzard, heart and liver.

IMG_0725

Usually when you pull apart the bird, the skin will come off the back and thighs and leave it as an almost finished back section. Because this bird was hit center mass, it pulled apart too easily and most of the skin remained on the back portion, so I had to remove it.

IMG_0732

I cleared the skin off the thighs and legs. I didn’t keep the back portion this time because there isn’t that much meat on it. I cut of the feet at the joint below the leg, and then cut off the thigh at the point where it meets the body. That leaves the cleaned leg and thigh.

IMG_0735

What you are left with is the parts that contain most of the meat, or at least the parts that I bother eating.

IMG_0737

This is obviously not how you would prep a bird if you needed to get every calorie out of it, but that’s not the scenario here.

Anyway, it was an exhausting hunt, but we did get a bird out of it. Big props to Rich for working the dog the whole day. Without her it would have been a tough day.

Monday, October 20, 2014

CZ Upland Ultralight Shotgun Review

One’s choice of shotgun is a very personal decision. I find that the fit and feel of a shotgun matters much more to one’s marksmanship than it does when it comes to rifles. The reason is that during most applications, shotguns are pointed, not aimed. Shots are ordinarily taken with both eyes open, relying on proper alignment of the shotgun rather than aiming to get the shot on target. How a shotgun fits with your body and shooting style can make all the difference.

As a result, recommending a shotgun is a difficult task. There are certain criteria which can be measured and objectively judged, but the way a shotgun fits a shooter and swings in their hands is a very personal thing that does not necessarily cross well from shooter to shooter.

For the past year I have been shooting the CZ Upland Ultralight over/under shotgun. I selected it as my shotgun due to a combination of tangible and measurable characteristics, as well as the more intangible ones. In short, it did what I needed it to do and it felt right in my hands. I find that I am very particular about the feel of a shotgun, and this was on a very short list for me.
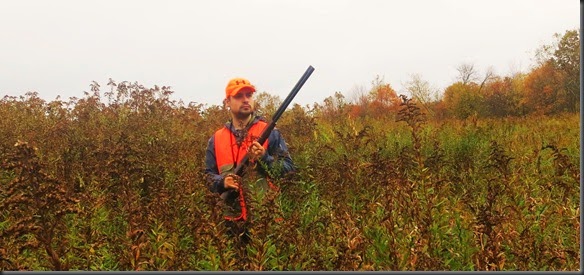
Copy of IMG_0558

The CZ Upland Ultralight is manufactured by CZ USA, a subsidiary of the Czech firearms manufacturer ÄŒeská Zbrojovka Uherský Brod, so… let’s stick with CZ. While CZ is well known for their rifles and handguns, few people associate the company with shotguns. The reality is that CZ actually outsources their shotgun manufacture to a Turkish company called Huglu Hunting Firearms Cooperative, or Huglu for short. While Turkish shotguns are not prominently featured on the US market, they do have a good reputation, and that is reflected in the surprising quality of the shotguns produced for CZ.

The shotgun comes only in 12 gauge, but does offer a choice of 26 or 28 inch barrels. The one I have is the 28 inch barrel version. I have found the extra length to not be an issue at all. In fact, the shotgun feels short when compared to pump and semi-auto shotguns with similar barrel lengths. The reason is that with a break-open action you do not have the bolt mechanism which adds several inches onto a pump or semi-auto shotgun. As with other break-open shotguns, the result is a shortened overall length while keeping barrel length the same.
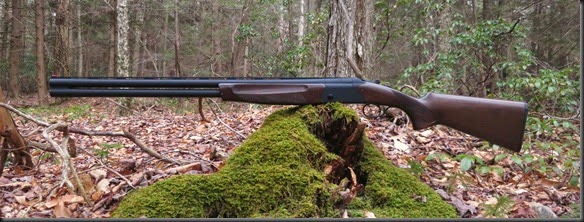
IMG_9132

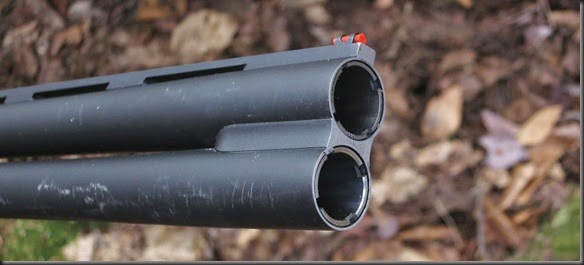
The CZ Upland Ultralight is capable of chambering 2 3/4 and 3 inch shells. It comes standard with five interchangeable choke tubes (F,IM,M,IC,C). I have purchased a second set so that I can shoot the same choke in each barrel if I want. I also have a turkey choke (0.065) for the gun. While most stores will not stock chokes for CZ shotguns, they can be easily found online by searching for Huglu choke tubes. You will find full selections from manufacturers like Trulock and Briley. From my own tests, for what it’s worth, the thread pattern for the chokes is the same as for Baretta/Benelli chokes.
IMG_9213

As the name indicates, the CZ Upland Ultralight is a lightweight shotgun. In fact, at 6 lb the CZ Upland Ultralight is one of the lightest 12 gauge shotguns currently on the market. For me that was a big selling point. When I hunt I carry my guns over considerable distances. Weight matters. Shaving off several pounds from the gun has significant value to me. The weight reduction comes from an aluminum frame, lack of a mid-rib between the barrels, and a hollowed out stock. While the aluminum stock may initially be a concern when compared to a stainless steel one, after thousands of rounds, not only is there no damage or wear, but not even the protective anodized coating has suffered any noticeable wear. I have been completely sold on the change. The removal of the mid-rib, while intended simply to remove weight, has had the added benefit for me of improving my sight picture by removing the obtrusion between the barrels. I find that it makes a difference on fast moving targets.

The weight savings of course come with a penalty. For one, a light, fast swinging shotgun is not always the ideal choice. While such characteristics may be beneficial to the hunter, on a trap or skeet field, a slower swinging shotgun may be a better choice. And of course, we can not forget the recoil. There is no avoiding it, this shotgun kicks. Shooting 3 inch 2 ounce shells requires some determination. Three rounds of trap (75 shots) with this shotgun is the most I can handle without serious bruising.

I say the above, being someone who uses this shotgun for everything. This is my trap and skeet gun, it is my turkey hunting gun, it is my upland game gun, and I have turned quite a few heads shooting slugs with it at the range. Other than the recoil, the shotgun has performed admirable in all of those roles.
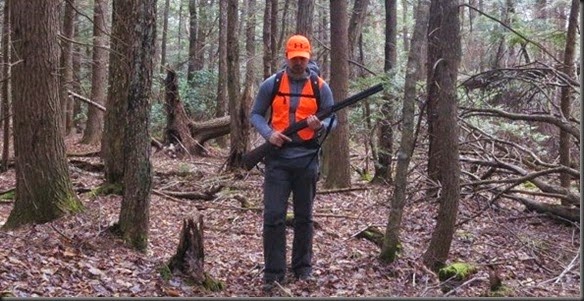
IMG_92673

The CZ Upland Ultralight uses extractors rather than ejectors for the shells. I’m sure that also results in some weight savings. I personally prefer the extractors because it makes the shotgun smoother to open and let’s me keep better track of my spent shells.

IMG_9144

The shotgun uses a manual tang safety with integrated selector switch. As with most other over/under shotguns, this allows you to select which barrel will be fired first. It is a useful feature, allowing you to load different shells in each barrel, or utilize different chokes in each barrel, and then fire the one best suited for the target. The selector can only be operated when the safety is on. I find that slightly annoying, although I’m sure it’s a safety feature.
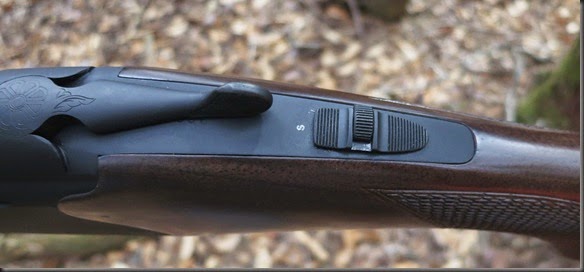
IMG_9167

Disassembly is very easy, and can be done without the use of any tools. A lift of a single latch on the bottom of the forearm grip allows for its removal and the extraction of the barrels.
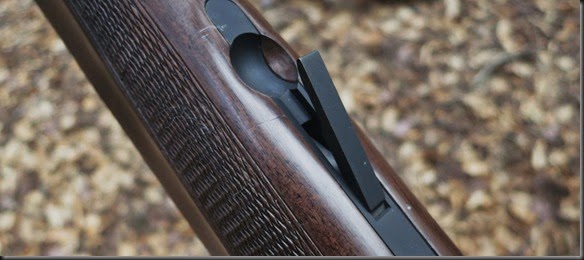
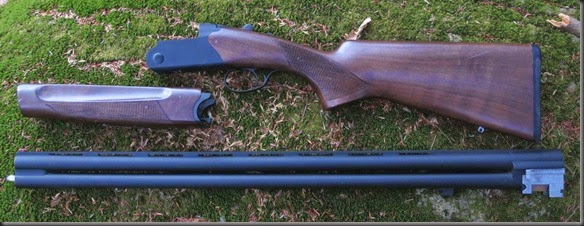
IMG_9190

IMG_9196

I have made two modifications to the shotgun so far. The first has been to add a screw-in sling attachment to the stock, and with the help of a rope loop between the barrels, I can attach a sling for when I need it.
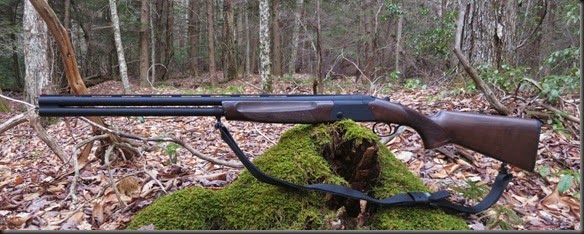
IMG_9221

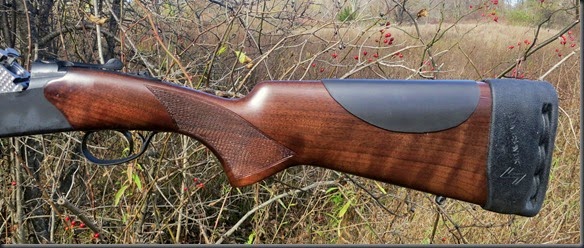
The second modification has been to lengthen the stock and add recoil reduction accessories. The project originally started with me just buying a LimbSaver recoil pad to see if it would soften the recoil. It was one of the slip on pads, size medium. It fit perfectly over the stock. Aside from the recoil reduction, I definitely liked the extra length the pad added to the stock. The pads are about one inch thick, and when put over the factory recoil pad, it made the stock an inch longer. This immediately improved the alignment of the shotgun when mounted. It seems that for me, the factory stock was a bit short. The problem was that with the factory rounded recoil pad still in place, the LimbSaver pad would slide around. The recommended solution is to remove the factory pad, but that would reduce the length again. My solution was to cut out several layers of sheath-making leather into the shape of the factory pad, and glue them together until they became the thickness of the factory pad. I then epoxied them to the inside of the LimbSaver pad, and screwed the whole thing back onto the stock using the original screw holes. I have been very happy with the result. After several hundred rounds the recoil pad is staying firmly in place.

Copy of Copy of IMG_0580

While the LimbSaver recoil pad protects the shoulder well, there was still excessive recoil felt on the area of the stock contacting the cheek. In an effort to soften that impact, I added a 1/16” Cheek-Eez recoil pad. The pad consists of a stick on urethane sheath that you place on the side and top of the stock. It comes in different thicknesses. I opted for the 1/16 inch because I didn’t want my alignment to be thrown off too much. I think the 1/8 inch pad would have been fine too.
IMG_0625

I know that for many making such alterations to an over/under shotgun is a cause for anxiety. I would feel the same way if we were talking about a $6000 engraved work of art shotgun. The CZ Upland Ultralight however is a purely utilitarian design. Nothing on the gun has been placed there to make it look better or to make it more exclusive. Every part is there to perform a function. This utilitarian approach allows the shotgun to retail for $762.00. If you are not exposed to a lot of O/U shotguns, this probably still seems absurdly expensive, but it’s an entry level price into the market.

The above wraps up the tangible description of the gun. These factors are important, but for me at least, are not the only factors for selecting a shotgun. I shoot the CZ Upland Ultralight because it fits me and the way I use shotguns.

When it comes to fit, a shotgun is very much like a pair of boots. Sure, you can wear different designs, but when one fits right, you know it. Being able to mount the shotgun and make it fit smoothly into your shooting stance is very important. I’ve tried out and shot many different designs, a lot of them much more expensive than the CZ Upland Ultralight, but they just didn’t feel right in my hands. This shotgun did. I wasn’t specifically looking for an over/under shotgun, nor a shotgun from any specific maker, or in any specific price range. The CZ Upland Ultralight just worked for me, so I started shooting it. That of course is an intangible, personal factor. It will be different for each person.
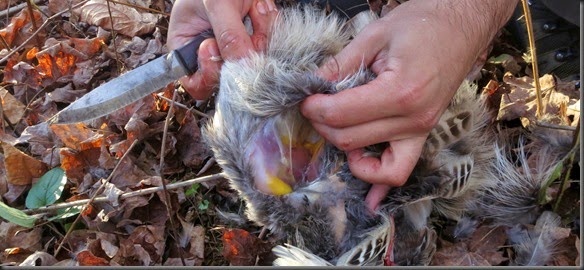
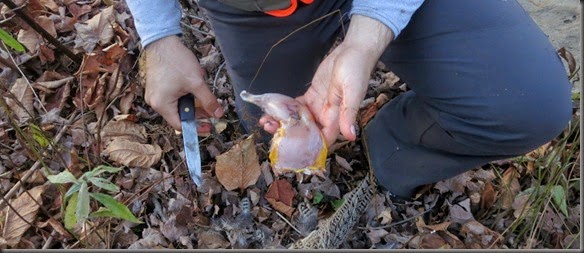
The CZ Upland Ultralight also fit my style of shotgun use. My primary interest in guns is for hunting use. I do shoot a fair amount of trap, but that is only so that I can become a better hunter. As such, I use the same shotgun for shooting trap or skeet as I use for hunting. My hunts usually involve traveling over extended distances and can last for days while I live out of my backpack. The result is that I need a light gun. I also need the shotgun to have the capability of using ammunition designed for anything from squirrel, to turkey and duck, to large game. As such, I needed a gun that can chamber at least up to 3 inch shells, of course with interchangeable chokes. In theory, a gun that can chamber up to 3 1/2 inch shells would be preferable, but with a light gun I am not capable of handling the recoil. Lastly, I need a gun that is easy to maintain in the woods.

The CZ Upland Ultralight U/O shotgun met all of those requirement for me. It is light, it can chamber 2 3/4 and 3 inch shells, comes with a decent selection of choke tubes, and is easy to maintain. Lastly, it feels right in my hands. There are other shotguns that will do the same job admirably, but this one felt right to me. Will it be right for you? I have no idea. It is designed to fit a specific function. If that is what you seek to do, it may be the right fit.