Thursday, October 23, 2014

Trip Report: Stewart Forest Pheasant Hunt 10/19/14

Since the pheasant hunt from the other week didn’t work out too well due to the rain, I was eager to get out again and give it another try. This past weekend looked good weather wise. It was dry, and temperatures were around 50F (10C). There was a strong wind, but conditions are never perfect.

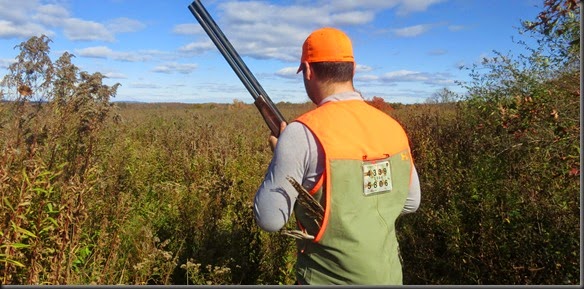
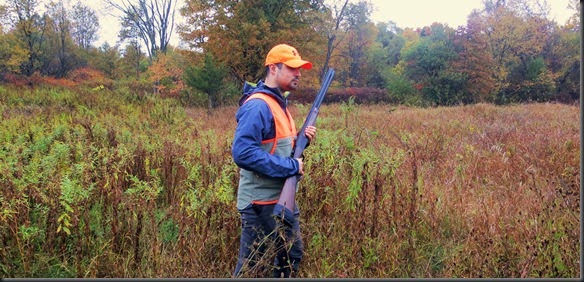
Rich, I and the dog headed out for another try. The wind was stronger than expected, so we had to stick close to the dog. With high winds the birds tend to spook more easily, and can flush out further away from you and the dog than then ordinarily would.

IMG_0631

IMG_0637

For the first part of the day we didn’t have much luck. We started to think that it would be a repeat of the pervious hunt. We covered a lot of ground, but couldn’t flush anything out.

Luckily, while rich and the dog were moving ahead of me, I got stuck in a patch of thorn bushes. While I was trying to get out, I heard something moving. I waited fro about twenty minutes for Rich to bring the dog around. I tried to flush out the bird myself, but couldn’t push through the brush in the area. Once Rich was back, we did a pincer move around the patch and sent in the dog. It took some work, but eventually the dog flushed out a bird, a good distance ahead of us, maybe 30-35 yards. I was shooting high brass shells out of an improved cylinder choke, so I managed to tag it at that distance.

IMG_0665

IMG_0676

We continued to hunt for the rest of the day. We had a few more birds flush out, but way ahead of us.

IMG_0645

IMG_0649

IMG_0657

IMG_0696

We hit several different fields within the forest, but couldn’t connect with anything other than thorn bushes.

IMG_0644

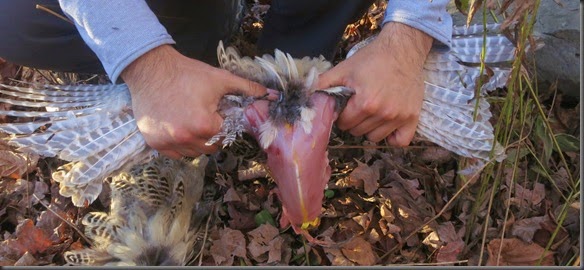
Eventually we made our way out. I took the opportunity to field dress the bird. The way I do it is to step on the wings, grab the bird by the legs, and pull up until the rid pulls apart in two sections.

IMG_0709

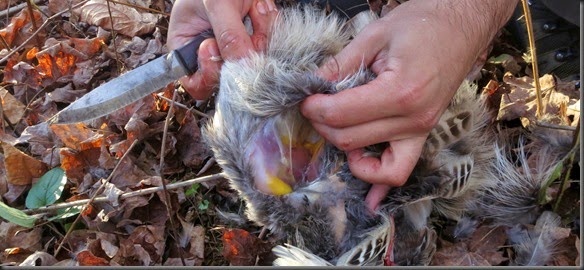
Usually the bird will separate into two parts. One part will have the wings and breast meat. The other part will have the thighs, legs, and the back. The pulling process removes most of the skin. This bird was hit in the rib cage, so it didn’t separate as cleanly, requiring me to do some extra work. Here you see the breas meat with the wings.

IMG_0715

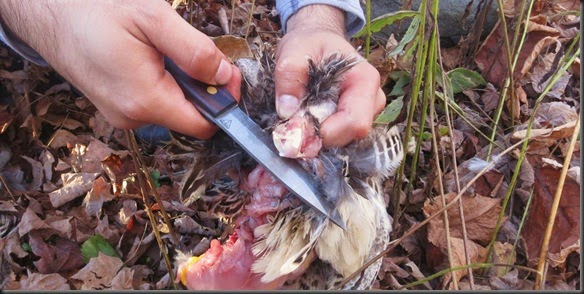
There isn’t much meat on the wings, so I cut them off at the joint.

IMG_0719

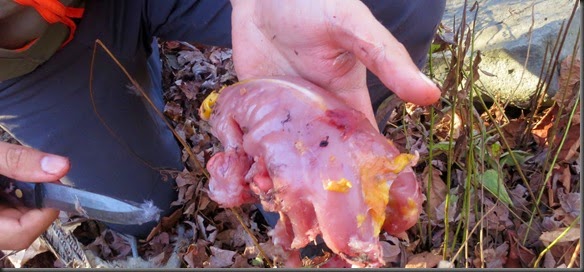
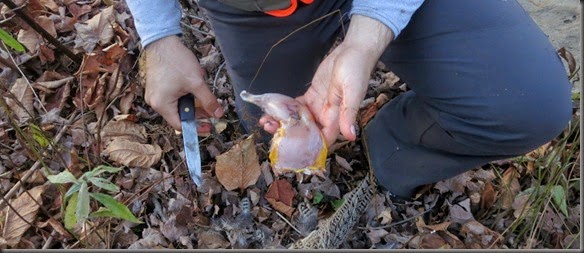
That will leave you with the breast meat. In the process, remove and save the gizzard, heart and liver.

IMG_0725

Usually when you pull apart the bird, the skin will come off the back and thighs and leave it as an almost finished back section. Because this bird was hit center mass, it pulled apart too easily and most of the skin remained on the back portion, so I had to remove it.

IMG_0732

I cleared the skin off the thighs and legs. I didn’t keep the back portion this time because there isn’t that much meat on it. I cut of the feet at the joint below the leg, and then cut off the thigh at the point where it meets the body. That leaves the cleaned leg and thigh.

IMG_0735

What you are left with is the parts that contain most of the meat, or at least the parts that I bother eating.

IMG_0737

This is obviously not how you would prep a bird if you needed to get every calorie out of it, but that’s not the scenario here.

Anyway, it was an exhausting hunt, but we did get a bird out of it. Big props to Rich for working the dog the whole day. Without her it would have been a tough day.

Monday, October 20, 2014

CZ Upland Ultralight Shotgun Review

One’s choice of shotgun is a very personal decision. I find that the fit and feel of a shotgun matters much more to one’s marksmanship than it does when it comes to rifles. The reason is that during most applications, shotguns are pointed, not aimed. Shots are ordinarily taken with both eyes open, relying on proper alignment of the shotgun rather than aiming to get the shot on target. How a shotgun fits with your body and shooting style can make all the difference.

As a result, recommending a shotgun is a difficult task. There are certain criteria which can be measured and objectively judged, but the way a shotgun fits a shooter and swings in their hands is a very personal thing that does not necessarily cross well from shooter to shooter.

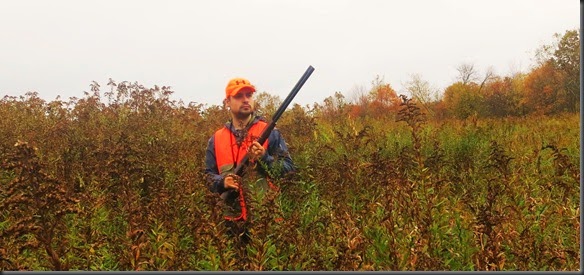
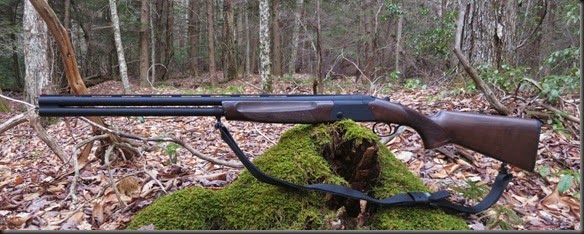
For the past year I have been shooting the CZ Upland Ultralight over/under shotgun. I selected it as my shotgun due to a combination of tangible and measurable characteristics, as well as the more intangible ones. In short, it did what I needed it to do and it felt right in my hands. I find that I am very particular about the feel of a shotgun, and this was on a very short list for me.
Copy of IMG_0558

The CZ Upland Ultralight is manufactured by CZ USA, a subsidiary of the Czech firearms manufacturer Česká Zbrojovka Uherský Brod, so… let’s stick with CZ. While CZ is well known for their rifles and handguns, few people associate the company with shotguns. The reality is that CZ actually outsources their shotgun manufacture to a Turkish company called Huglu Hunting Firearms Cooperative, or Huglu for short. While Turkish shotguns are not prominently featured on the US market, they do have a good reputation, and that is reflected in the surprising quality of the shotguns produced for CZ.

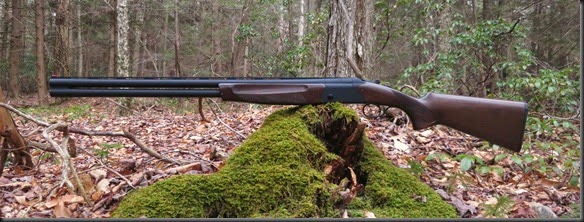
The shotgun comes only in 12 gauge, but does offer a choice of 26 or 28 inch barrels. The one I have is the 28 inch barrel version. I have found the extra length to not be an issue at all. In fact, the shotgun feels short when compared to pump and semi-auto shotguns with similar barrel lengths. The reason is that with a break-open action you do not have the bolt mechanism which adds several inches onto a pump or semi-auto shotgun. As with other break-open shotguns, the result is a shortened overall length while keeping barrel length the same.
IMG_9132

The CZ Upland Ultralight is capable of chambering 2 3/4 and 3 inch shells. It comes standard with five interchangeable choke tubes (F,IM,M,IC,C). I have purchased a second set so that I can shoot the same choke in each barrel if I want. I also have a turkey choke (0.065) for the gun. While most stores will not stock chokes for CZ shotguns, they can be easily found online by searching for Huglu choke tubes. You will find full selections from manufacturers like Trulock and Briley. From my own tests, for what it’s worth, the thread pattern for the chokes is the same as for Baretta/Benelli chokes.
IMG_9213

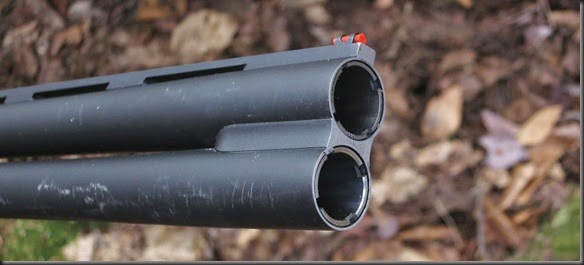
As the name indicates, the CZ Upland Ultralight is a lightweight shotgun. In fact, at 6 lb the CZ Upland Ultralight is one of the lightest 12 gauge shotguns currently on the market. For me that was a big selling point. When I hunt I carry my guns over considerable distances. Weight matters. Shaving off several pounds from the gun has significant value to me. The weight reduction comes from an aluminum frame, lack of a mid-rib between the barrels, and a hollowed out stock. While the aluminum stock may initially be a concern when compared to a stainless steel one, after thousands of rounds, not only is there no damage or wear, but not even the protective anodized coating has suffered any noticeable wear. I have been completely sold on the change. The removal of the mid-rib, while intended simply to remove weight, has had the added benefit for me of improving my sight picture by removing the obtrusion between the barrels. I find that it makes a difference on fast moving targets.

The weight savings of course come with a penalty. For one, a light, fast swinging shotgun is not always the ideal choice. While such characteristics may be beneficial to the hunter, on a trap or skeet field, a slower swinging shotgun may be a better choice. And of course, we can not forget the recoil. There is no avoiding it, this shotgun kicks. Shooting 3 inch 2 ounce shells requires some determination. Three rounds of trap (75 shots) with this shotgun is the most I can handle without serious bruising.

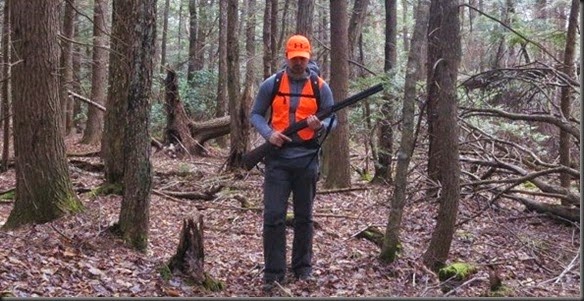
I say the above, being someone who uses this shotgun for everything. This is my trap and skeet gun, it is my turkey hunting gun, it is my upland game gun, and I have turned quite a few heads shooting slugs with it at the range. Other than the recoil, the shotgun has performed admirable in all of those roles.
IMG_92673

The CZ Upland Ultralight uses extractors rather than ejectors for the shells. I’m sure that also results in some weight savings. I personally prefer the extractors because it makes the shotgun smoother to open and let’s me keep better track of my spent shells.

IMG_9144

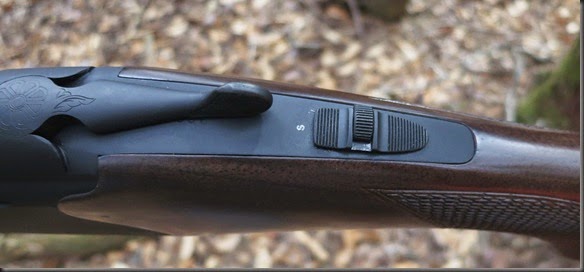
The shotgun uses a manual tang safety with integrated selector switch. As with most other over/under shotguns, this allows you to select which barrel will be fired first. It is a useful feature, allowing you to load different shells in each barrel, or utilize different chokes in each barrel, and then fire the one best suited for the target. The selector can only be operated when the safety is on. I find that slightly annoying, although I’m sure it’s a safety feature.
IMG_9167

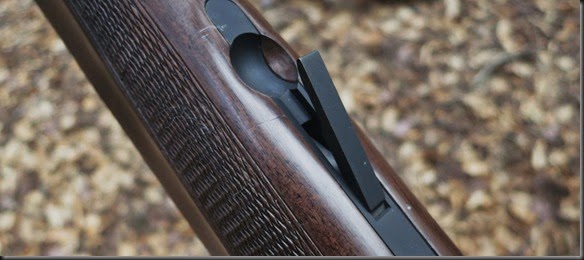
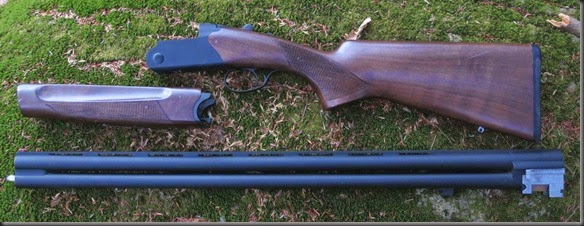
Disassembly is very easy, and can be done without the use of any tools. A lift of a single latch on the bottom of the forearm grip allows for its removal and the extraction of the barrels.
IMG_9190

IMG_9196

I have made two modifications to the shotgun so far. The first has been to add a screw-in sling attachment to the stock, and with the help of a rope loop between the barrels, I can attach a sling for when I need it.
IMG_9221

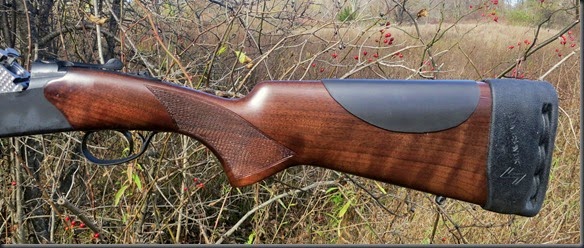
The second modification has been to lengthen the stock and add recoil reduction accessories. The project originally started with me just buying a LimbSaver recoil pad to see if it would soften the recoil. It was one of the slip on pads, size medium. It fit perfectly over the stock. Aside from the recoil reduction, I definitely liked the extra length the pad added to the stock. The pads are about one inch thick, and when put over the factory recoil pad, it made the stock an inch longer. This immediately improved the alignment of the shotgun when mounted. It seems that for me, the factory stock was a bit short. The problem was that with the factory rounded recoil pad still in place, the LimbSaver pad would slide around. The recommended solution is to remove the factory pad, but that would reduce the length again. My solution was to cut out several layers of sheath-making leather into the shape of the factory pad, and glue them together until they became the thickness of the factory pad. I then epoxied them to the inside of the LimbSaver pad, and screwed the whole thing back onto the stock using the original screw holes. I have been very happy with the result. After several hundred rounds the recoil pad is staying firmly in place.

Copy of Copy of IMG_0580

While the LimbSaver recoil pad protects the shoulder well, there was still excessive recoil felt on the area of the stock contacting the cheek. In an effort to soften that impact, I added a 1/16” Cheek-Eez recoil pad. The pad consists of a stick on urethane sheath that you place on the side and top of the stock. It comes in different thicknesses. I opted for the 1/16 inch because I didn’t want my alignment to be thrown off too much. I think the 1/8 inch pad would have been fine too.
IMG_0625

I know that for many making such alterations to an over/under shotgun is a cause for anxiety. I would feel the same way if we were talking about a $6000 engraved work of art shotgun. The CZ Upland Ultralight however is a purely utilitarian design. Nothing on the gun has been placed there to make it look better or to make it more exclusive. Every part is there to perform a function. This utilitarian approach allows the shotgun to retail for $762.00. If you are not exposed to a lot of O/U shotguns, this probably still seems absurdly expensive, but it’s an entry level price into the market.

The above wraps up the tangible description of the gun. These factors are important, but for me at least, are not the only factors for selecting a shotgun. I shoot the CZ Upland Ultralight because it fits me and the way I use shotguns.

When it comes to fit, a shotgun is very much like a pair of boots. Sure, you can wear different designs, but when one fits right, you know it. Being able to mount the shotgun and make it fit smoothly into your shooting stance is very important. I’ve tried out and shot many different designs, a lot of them much more expensive than the CZ Upland Ultralight, but they just didn’t feel right in my hands. This shotgun did. I wasn’t specifically looking for an over/under shotgun, nor a shotgun from any specific maker, or in any specific price range. The CZ Upland Ultralight just worked for me, so I started shooting it. That of course is an intangible, personal factor. It will be different for each person.

The CZ Upland Ultralight also fit my style of shotgun use. My primary interest in guns is for hunting use. I do shoot a fair amount of trap, but that is only so that I can become a better hunter. As such, I use the same shotgun for shooting trap or skeet as I use for hunting. My hunts usually involve traveling over extended distances and can last for days while I live out of my backpack. The result is that I need a light gun. I also need the shotgun to have the capability of using ammunition designed for anything from squirrel, to turkey and duck, to large game. As such, I needed a gun that can chamber at least up to 3 inch shells, of course with interchangeable chokes. In theory, a gun that can chamber up to 3 1/2 inch shells would be preferable, but with a light gun I am not capable of handling the recoil. Lastly, I need a gun that is easy to maintain in the woods.

The CZ Upland Ultralight U/O shotgun met all of those requirement for me. It is light, it can chamber 2 3/4 and 3 inch shells, comes with a decent selection of choke tubes, and is easy to maintain. Lastly, it feels right in my hands. There are other shotguns that will do the same job admirably, but this one felt right to me. Will it be right for you? I have no idea. It is designed to fit a specific function. If that is what you seek to do, it may be the right fit. 

Thursday, October 16, 2014

Portable Trapping Kit – Gear and Modifications

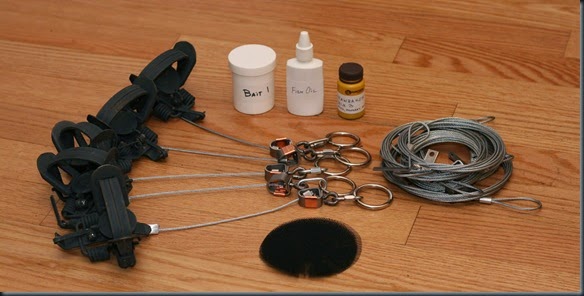
As I’ve been saying all along in my posts on trapping, this year, and hopefully going forward, I’ll try to play around with the idea of creating a trapping set up that is backpack portable. By that I mean, a set up with which a person can travel over long distances in the wilderness while trapping and possibly hunting and fishing as well. What I need to achieve is a lightweight trapping kit. 
Naturally, trapping does not lend itself well to this idea. Trapping requires a lot of heavy equipment, and as a result it is often done from a more established base of operations where gear can be transported by means other than human power, or near populated areas where access by car is easy. Having a trapping kit that can be carried along with all of your other overnight gear is a great challenge. And let me be clear, here I am not talking about bringing some wire as an emergency trapping kit. I am talking about a kit with which you can legally trap long term. I’m still not sure it can be done, or how successful the result will be, but here is my attempt:

IMG_0028

Before I get into the details of the gear you see in the picture above, let me say a bit about the theory here.

First, why foothold traps? Well, other than the fact that I like them, I think they are the most effective trap for the weight that I am allowed to use in my area. Technically, snares are a lighter and a very productive option, but they are illegal in my state, and they do get damaged quite often when they catch an animal, making them hard to maintain over longer periods. The other main option, body grip traps (Conibears) are actually much heavier considering what they can actually trap. As an example, let’s say that a #1 foothold trap and a 110 body grip trap weigh about the same (unmodified), about 15 oz each. So far they are the same. However, the #1 foothold trap is rated to take muskrat, mink, opossum, and raccoon; the 110 body grip trap is rated to take only muskrat and mink. For opossum and raccoon, you have to move up to 160 or 220, which is heavier. Sure, each type of trap can occasionally catch a larger animal, but they are not rated for it. So, for the same weight a foothold trap will give me a much larger range of animals I can trap. It’s not always easier to use, but it’s more productive for the weight.

Second, since I am using foothold traps, I have four different target groups of animals, for which I would use different set ups:

  • Squirrel
  • Mink, muskrat, opossum, and raccoon
  • Fox, coyote, and fisher
  • Beaver and otter 

For each category I use a different size trap. So, when deciding on a portable trapping kit, I had to prioritize which animals to target. Which type of trap would give me the biggest bang for the buck. I decided that my best chance for productive trapping was to go after the second category, i.e. mink, muskrat, opossum, and raccoon. For all four species I use a #1 foothold trap. Not only are the animals easier to trap, but the traps themselves are relatively small and light. Squirrel is relatively abundant, and I do have a lightweight way of trapping them, although there aren’t always regulations that allow for squirrel trapping. As such, I will leave it for another post. Those traps can easily be added to this kit to supplement it. Fox and coyote are very hard to trap, especially when you have limited time. Most coyote trappers I know have to leave the traps set for at least a few days before they have a chance to trap one. As far as beaver, while it is a big return on investment, the traps are just too heavy. Bringing several 330s or #4 foot holds would just be prohibitively heavy. So, for this kit I focused on using #1 foothold traps in order to target mink, muskrat, opossum, and raccoon.

Leaving the theory aside, let me give you the run down on the gear in the above picture and the corresponding weights:

Item

Model

Weight

Trap (x5) Oneida Victor #1 (modified) 10.8 oz (54.0 oz for 5 traps)
Lure (full) Hawbaker’s Big 3 1.0 oz
Bait Canister Plastic screw top jar 0.8 oz
Fish Oil (full) Commercial fish oil 2.4 oz
Trap Covers (x5) Fiberglass pan covers 0.1 oz for 5
Drown line (x5) 10’ 3/32” drown lines 3.4 oz (17 oz for 5)

The total weight for the kit, including the drown lines is 4lb 11.3oz. If you do not need the drown lines, then the weight drops down to 3lb 10.3oz. In some instances the drown lines will be worth the extra weight, in other instances they will not. I’ve included them here because I think they are a good idea. If you are trapping away from water, then you would not need them.

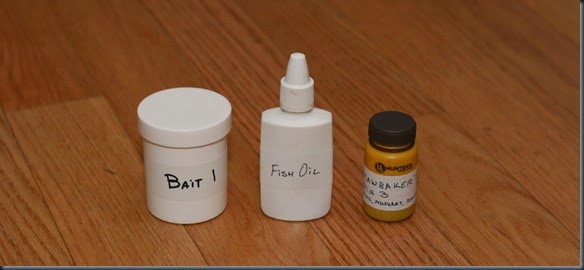
IMG_0029

The lure I use (or at least will stick to this year) is Hawbaker’s Big 3 Lure. To me it seems heavy on muskrat musk, which if fine by me. I keep it in a canister designed for deer lure. They sell them empty in packs of three at most hunting supply stores. It is a lighter and more durable option that the glass bottle the lure originally comes in. I also like Blackie's Blend Moneymaker Lure, but it’s more liquid than Hawbaker’s so I find it harder to apply. Both lures are designed to work on mink, muskrat, and raccoon, and everything works on opossum. I also carry a nasal spray bottle filled with fish oil. I use it as a trailing lure. Ideally I would want more of it, but weight reduction was the name of the game. I usually carry several baits, but this year I will stick with raw chicken or other meat just to simplify things. I’ll see if it works. 

The only other item I may consider carrying is a jar of antifreeze. I’ll see if I can get away without it. I plan on using the same type jar as the bait jar. Filled with antifreeze it weighs 4.0 oz.

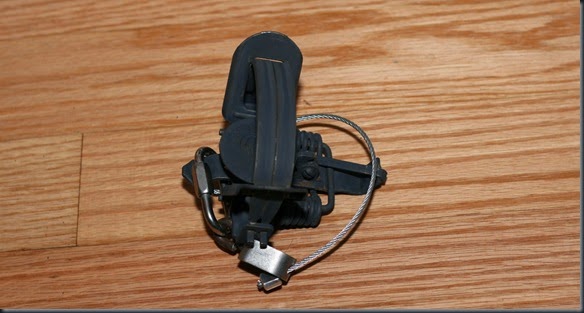
The traps themselves are a modified version of the same model Oneida Victor #1 foothold traps you’ve seen in previous posts. I’ve put a night latch trigger on all of them, and they have been dipped, much like on all my other traps. The main difference is the chain. In fact, there is no chain at all. It has been replaced by cable. The cable I chose is 3/32” aircraft aluminum cable. It has a breaking strength of 920lb, which is higher than most chains, so I hope it works out okay. I imagine I would have to change out the cable from time to time, but I think it’s worth it.

IMG_0095

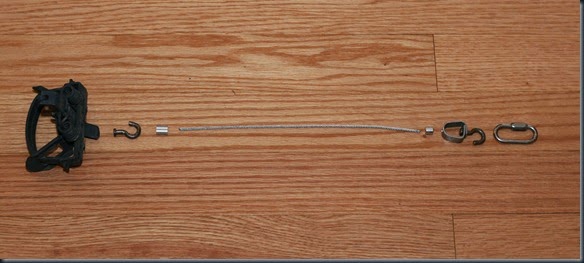
Step one is to remove the chain as with a normal modification, and relocate the J-hook to the center of the trap. Then, align all the parts:

IMG_0033

The components I used to put the trap together are:

As with my previous posts related to trapping gear, I’ve provided links to the items from Fur Harvester’s Trading Post, so it’s easier to get everything together, and because I like the place.

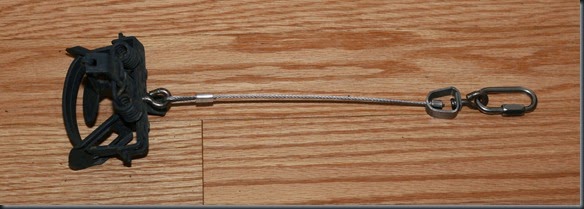
Then, just put everything together. Place the J-hook on the trap and close it; Thread the cable through the J-hook and close the loop using the double ferrule. I just pounded it with a hammer until it was secure. Then thread the other end of the cable into the opening of the swivel, and secure it with the single ferule, which will act as a stop. Finally, close the swivel J-hook around the quick link attachment.

IMG_0090

IMG_0106

IMG_0077

All that’s left to do it add your tags if required by your state. The modification is pretty easy to do, and drops the weight of each trap to 10.8 oz.

Obviously this is a very basic kit. It is missing many things, in particular tools. As you can see, there are no stakes. In the top picture you see large metal rings attached to the quick links. They are there to be used with wooden stakes when drown lines are not a good option. Of course that means I have to make my stakes on the spot. It’s not too difficult with only five traps, but it’s not the norm. I also don’t have any digging tool or hammer. That is also a sacrifice made in the interest of reducing weight. A typical trapper’s tool will weight nearly 5lb, which is prohibitive. Considering all of that, a hatchet might be a good idea to carry when trapping with this set up, although you can certainly do without it.

So, five modified traps (#1 Oneida Victor), five drown lines (10’ 3/32” cable with locks), five trap covers (fiberglass), a bottle of lure (Hawbaker’s Big 3), a bottle of trailing lure (fish oil), and a bait jar. Less than five pounds of gear that can be carried in a pack with the rest of your kit. Will it work? I don’t know. The challenge here is not only the reduced gear, but also the manner in which the trapping is to be done. This assumes a scenario where you would backpack over certain distance to a location, set up traps, leave them overnight or possible for two or three days while you camp in the area, and then pack up everything again and get going. This truncated time table is not a trapper’s friend. It is best to leave the traps out for longer periods, but this method will not allow for it. For me it’s an experiment to see what’s possible.  

Monday, October 13, 2014

Bushcraft, Woodsmanship, and Stupid Number Rules

Have you guys noticed how bushcraft, woodsmanship, wilderness self reliance, etc are filled with random number rules? Rules of three, five items you must have, ten essentials you must carry, etc. Am I the only one who finds these number guides to be ridiculous? Not only do I find these numbers to be arbitrary, but they carry absolutely no meaning.

10-items-or-less-504b2a8f9a67d

Take for example The Ten Essentials. That concept has been around for a long time. It sounds very important: the ten things you should always have with you when in the woods! Fine, except that have you ever actually looked at the recommended lists? No two are the same. On half of the lists part of the items seem to be nothing more than filler designed just to get the number up to ten, while on the other half of the lists, important items are missing. So why ten items? Why not eight or thirteen? Are we such children that everything we carry has to be in threes, fives, and tens so that we don’t get confused?

Or how about the tool trio combinations, or concepts like the 5Cs or any other variant of the same thing? Why are we so drawn to such uselessly vague concepts? Why do we insist on putting silly restrictions on ourselves? Then we sit and perform mental gymnastics to fit all the tools we actually need into these arbitrary numbers, more often than not adding tools we don’t need or leaving out tools we do need just so we can get to this magical number.

Oh no, you carry four tools with you?!?! But that neither fits in the Nessmuk Trio, nor in Dave Canterbury’s Five Tool Rule. Clearly you have done something wrong! Clearly you must be an inexperienced n00b, who has no place in the woods. Unless… you carry four tools because you need four tools, and know enough about what you are doing not to leave one of them behind so you can fit into a random trio, or add an item you don’t need to match somebody’s random tool number requirement. How mind blowing would it be if we were guided in what gear we carry not by random numbers picked by some person out of a hat (I’m sorry, from their many years of wilderness experience), and instead were guided by what gear we actually need? 

I know, I know, but new people need everything to be in basic numbers so that they don’t forget. Really? Do we think that little of people? They can remember ten items, but eleven?!? No way!

I like to put forward the theory that these number rules carry no practical significance or use, but rather function just as means of attracting readership or viewers. For some reason people are drawn to titles with nice round numbers: The Three X, The Best 5 Ys, The 10 Zs of Woodsmanship, etc. Such posts and videos attract more readers and viewers. However, they serve no practical purpose, and just cause people to waste their time trying to fit the tools and gear they actually need into arbitrary number categories.

I’ll go even further and say that numbers are not a valid criteria for selecting your gear list. I say that because the number count of the number of items you have on your back when you are in the woods has zero bearing on what you are doing in the woods or how successful you will be. The actual practical considerations are weight, volume of gear, and whether you have the tools you need for the task. Whether you have three, five, seven, ten, eleven, twenty, or a hundred items makes no difference. The considerations that actually matter are whether you have the tools you need for the trip you have undertaken, and whether you are capable of carrying those tools.

There is no such thing as “the best number of tools to carry”, or “the numbers of tools you really need”. Such rules are the domain of armchair woodsmen. Sure, as a theoretical exercise, it is fun to play games like “Which three; which five; which ten items would you take if you were going to…” As a practical guide to what you should bring with you into the woods however, I find them to be of no value.

Thursday, October 9, 2014

Back to Back Episode 2: The Cost of Backpacking Gear

For those who didn’t see the first post, I’m doing a series of video conversations with Cesar from Cesar and The Woods regarding backpacking and woodsmanship. For the second set of videos, we decided to ramble a bit about the cost of backpacking gear. There is a perception that backpacking is an expensive activity, and especially if you want to reduce the weight of your gear.

I am under the belief that good backpacking gear doesn’t have to be expensive. I believe that you can have an ultralight or nearly ultralight complete gear list for around $500 for three season backpacking. By reducing the number of items you carry, and making careful choices about your gear, you can reduce both the weight and the price. $500 is not cheap either, but Cesar makes a good point that we spend that much on a new smart phone each year and don’t think twice about it. Here are the videos:

Part 1:

Part 2:


So, I finished watching the videos, and quickly realized that we managed to talk for a combined time of half an hour and tell you absolutely nothing about how to actually get a low cost lightweight kit together. It appears that Cesar reached the same conclusion independently as he posted a gear list on his blog designed to address that lack of information. In all honesty, it is just very difficult to get into specifics in a video. It is much easier to put it in writing, and it should be easier to reference as well.

I previously did two posts on low cost light weight gear. One was for three season backpacking and the other for winter backpacking. I recently updated the three season list with some available options. Follow the links below to the two posts:

Beginners Guide to Affordable Bushcraft and Backpacking Gear

Low Cost Ultralight Winter Backpacking Gear List

The first link provides a three season list, and goes into some of the details that will get you started as a backpacker or woodsman. With the selections I made from the list, I was able to put together a complete kit that weighs 12lb 7.2oz and costs $531. If you do not use the hatchet, you get a sub 10lb ultralight gear list for under $500.

The second link shows my attempt at a low cost, low weight winter gear list, and assuming no axe being carried, I was able to put together a 10lb 11.2oz gear list for $741. With the additional of some small items you see in the three season gear list such as a repair kit, the weight will get bumped up a bit.

Same is true for both gear lists. You will inevitably add some more items that you feel are important. With all of that however, you should be able to end up with a sub 15lb gear lists for both three season and winter use, and you should be able to keep the cost very reasonable.

More importantly, you can do this with commercially available gear that you can pick up at any outdoor store. No, it is not top of the line gear for each and every piece, but using similar gear lists people have done a lot more than most of us will ever do. This is gear that you will regularly see being used on the trail, and can utilize with confidence.

Tuesday, October 7, 2014

Trip Report: Pheasant Hunting 10/4/14

Pheasant season opened on October 1st. Neither my friend nor I were able to take the day off, so we had to settle for the weekend. Rich, his dog and I headed up to Stewart State Forest to try to do some hunting even though the weather reports promised 100% chance of rain. We went up Friday night so we can get a good spot in the morning. We slept in the car, which is what we usually do there. In the morning we headed out at sunrise.

Copy of IMG_0555

Everything was wet. Rich ended up wearing an old pair of waders in order to keep dry.

Copy of IMG_0521

It kept raining the whole day, and the birds just refused to fly. The dog just couldn’t pick up the scent, and birds that would have otherwise taken off, were keeping low. I occupied my time by taking pictures of plants instead.

Copy of IMG_0528

Copy of IMG_0565

Copy of IMG_0534

Copy of IMG_0573

We kept it up for a while, trying several different fields, but with no luck.

Copy of IMG_0497

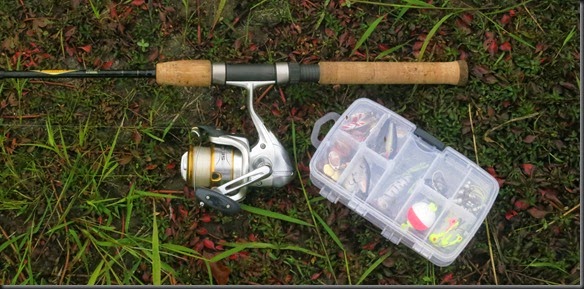
We ended the day with a little bit of fishing. In the last post I mentioned that I had an 8lb set up for my spin fishing kit, so I figured I would show you a picture.

Copy of IMG_0609

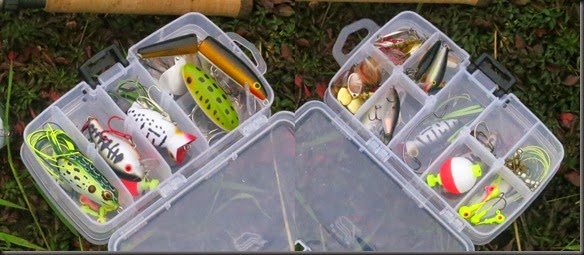
The reel is a Shimano Sedona 2500FD. It is rated for line from 6-10lb. I keep 8lb line on it. It weighs 9.5oz. The tackle box has two compartments, one on each side. I also have a small bag of gummy lures.

Paint IMG_0603

Anyway, not much luck hunting. We weren’t even able to flush out any birds. We did hear a handful of shots throughout the day, but others didn’t seem to be having much luck either. The birds just weren’t flying in the rain, and the dogs had a hard time picking up the scent.

Oh, and since this is a post about upland hunting rather than fishing, the shotgun in my hands was a CZ Upland Ultralight. I spent the rest of the weekend at the trap range, shooting down unsuspecting clay pigeons.

Thursday, October 2, 2014

Ultralight Fly Fishing Kit

Some time ago I did a post on my ultralight spin fishing kit. You can read the post here. The outcome was a set up that weighs 13.6 oz for a 4lb test line. I have another reel that I use for 8lb test line, which adds several more ounces, and which I use if I am going after larger fish, along with a slightly more robust tackle set up. It has worked out well and has been very portable. Lately, I have been playing around with doing the same type of set up with my fly fishing gear. Now, the term “ultralight” is a bit difficult to place in this context because before we can start talking about weight, we have to determine what type of fly fishing one wants to do.

Copy of IMG_0392

For most people the notion of an ultralight fly fishing kit includes a short rod, maybe a reel, some line, and a few flies. Indeed, such a set up can be made very lightweight, and can truly be called “ultralight”. However, I wanted to do more with my fly fishing kit. I wanted to put together a lightweight, portable fly fishing kit that would allow me to fish without limiting the areas where I could actually do it. So, while my set up includes the expected rod, reel, line, flies, etc, for when I am just casually fishing during backpacking trips, it also includes things like waders and wading boots for more serious fishing trips. The rod and reel themselves are intended to be able to take any fresh water fish I could potentially go after in the northeastern US and consequently heavier than they could theoretically be. The result is a kit that doesn’t automatically bring the word “ultralight” to mind, but I think it is applicable considering the type of fishing it allows.

So, in this post I will divide the gear into two parts. The first part will be the rod, reel, line, and flies. These tools can be used by themselves to fish smaller bodies of water, or from the bank. The second part will address my waders and wading boots, which are required if fishing in deeper waters.

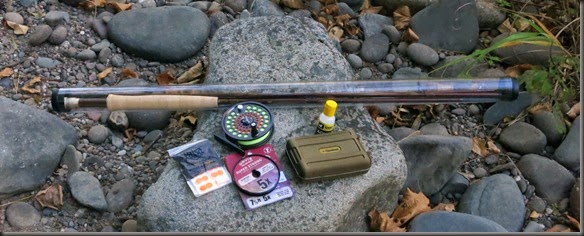
For the first part, the entirety of the set up looks like this:

IMG_0339

The rod in the case gets strapped onto the side of my pack, and everything else goes in a small stuff sack, inside my backpack. Here is each component and the corresponding weight:

Item

Model

Weight

Rod Orvis Access 9ft 5wt Fast Action Rod 2.5 oz
Reel Orvis Battenkill III Reel 3.2 oz
Fly Line and Backing Orvis Access 5wt Fly Line 1.5 oz
Fly Box and Flies Unknown Brand 1.2 oz
Leader Orvis 7 1/2ft 5X Leader Doesn’t register on scale
Tippet Orvis 5X Tippet (roll) 0.5 oz
Indicators Palsa Pinch On Floats Doesn’t register on scale
Floatant Loon Outdoors Aquel Floatant 0.8 oz
Rod Case DIY Case 1.8 oz
Stuff Sack Unknown Brand 0.4 oz

Total


12.0 oz

You can see above that the leader (in the packaging) and the indicators did not register on my scale. I’ve added 0.1 oz for the two combined when calculating the total. The rod case was a DIY project. You can see exactly how I make my rod cases here. This rod fit perfectly within the tube without the need for any cut outs.

So, 12 oz for the complete kit is not bad. You can certainly go lighter. A tenkara rod, if you are careful not to use any add-ons such as line holders, tippet, rod case, floatant, etc, can be several ounces lighter. Similarly, if you use a shorter rod, or a lighter reel like the Battenkill II, you can shave off a few ounces. I didn’t go that route for two reasons. The first is that I just don’t care. For a completed kit, an ounce or two is not something over which I wish to obsess. More importantly however, I wanted a kit that could be used without any compromise. A 9ft 5wt rod will let me fish any water here in the northeastern US. With this set up I can fish anything from small streams to large rivers, and I can do it without having to pull any tricks or change out gear.

IMG_0358

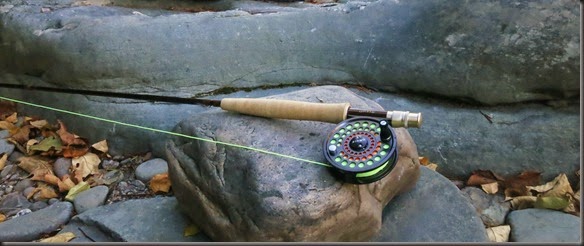
One place where I did save weight was the reel. I went with an old school click-and-pawl reel, meaning that it does not have a disc drag system. The result is that you have limited drag adjustment, and no external adjustment knob. This gives a lightweight reel that is very affordable. Considering that I virtually always control the line with my hand rather than the reel, the lack of external drag adjustment didn’t really matter to me.

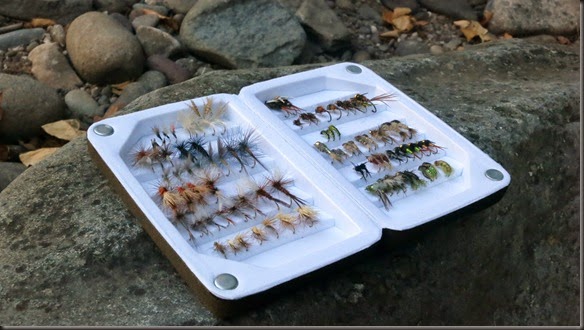
The fly box is something I picked up at a local store. It is a foam box of basic design. I have an assortment of flies, including Adams Parachutes, Pheasant Tails, BWOs, Sulfurs, Cadis nymphs and emergers, etc.

IMG_0352 

As you can see, I don’t have any streamers. I haven’t really gotten into using them. If I think I will need to do that type of fishing I just bring my spinning set up.

So, that is for the first stage of my kit. For 12 oz I get a complete set up that allows me to fish comfortably for anything available in my area, of course with the limitation that I can not go into deep water.

That is where the second stage of my fly fishing kit comes into play. As I mentioned above, I wanted to put together a complete set up with which I can fish wherever I wanted, while at the same time being portable enough for me to carry in my pack over long distances. Of course that is not something I would bring just in case I wanted to cast the line a few times. However, if I was actually backpacking to a location where I plan on doing more serious fishing, then I would bring the completed set up.

So, there are two big items which are needed to complete the kit. The first is the waders, and the second the wading boots.

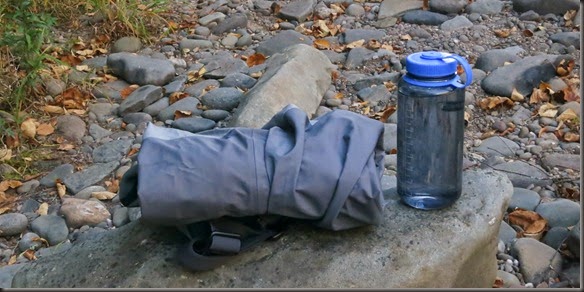
The waders are not too difficult. Fortunately, the lighter the waders the cheaper they tend to be. The trade off of course is the durability. Lightweight waders are not designed for bushwhacking or long distance treks. If you plan on backpacking in your waders, or doing serious bushwhacking, then you need something more serious. For my purposes however, where my fishing gear including the waders is stored in my pack for the whole trip and only comes out when I start fishing, lightweight waders are ideal. I use the Patagonia Rio Azul waders. They are very minimalistic, but even so, weigh 2lb 3.2oz (35.2 oz). They are light when compared to other waders, but clearly they are a serious piece of kit at over two pounds. They compress very well. When folded up they are about the size of my winter jacket. In the picture below you see them just loosely folded next to a Nalgene bottle.

IMG_0324

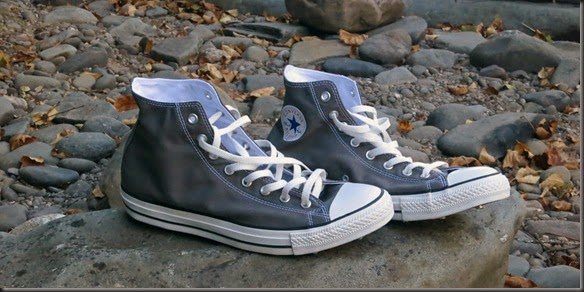
The wading boots gave me quite a few problems. The big issue for me was not the weight, but rather the size. You can find fairly lightweight wading boots these days from many manufacturers. However, while they are light, they have the feel and fit of actual backpacking boots. The result is that there is no easy way to pack them in your backpack. You have to somehow tie them to the outside and just let them hang there. Well, that was not my idea of backpack portable set up, so I decided to look outside the box. My solution, as silly as it sounds, was to buy and modify a pair of Converse All Star boots.

IMG_0308 

IMG_0312

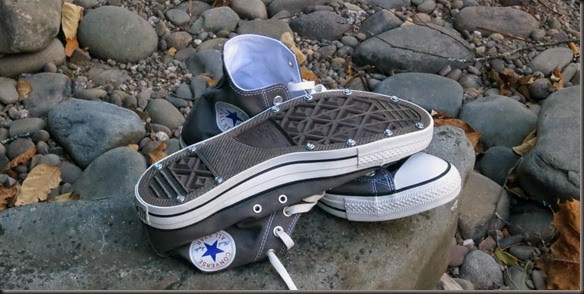
I bought a pair that was larger than I need so that it could fit over the waders. I’m a size 10 1/2, but got a size 12 shoe. I then screwed in studs on the bottom of the shoes. The studs are simply some #8 3/8 inch hex head screws. I got them at Home Depot. The 3/8 inch length was perfect. It was long enough to keep them on securely, while not going through the shoe. They significantly improved the grip of the shoes. I also added some extra insoles to improve the comfort.

IMG_0448

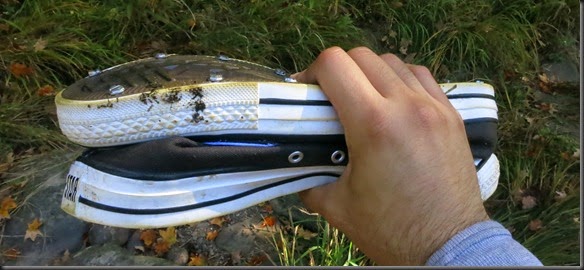
You can see the main benefit of the shoes in the above picture. Since the shoes are made from nothing more than thin canvas, they can fold up completely flat. That makes them easy to fit in a backpack. The weight is not that light at 2lb 5.3oz (37.3 oz). The drying time is similar to that of other wading boots. While they are thinner than other wading boots and made only of a single layer, the canvas is very slow drying, so the overall drying time is about the same. That’s not an issue for me since I don’t backpack in these boots at all.

IMG_0302

So, all of the gear combined gives me a weight of 5lb 4.5oz. Everything, together with my overnight gear, two and a half liters of water, and three days of food fits inside my Black Diamond Speed 40, 40L pack.