Friday, May 30, 2014

Integrating Bushcraft With Modern Outdoor Life by Paul Kirtley

Paul Kirtley is a UK bushcraft instructor, and runs Frontier Bushcraft, a well recognized school. He also has an excellent blog that you can see here. Typically, I don’t care much for bushcraft instructors, as I find many of them to simply use flowery talk about unity with nature combined with a few knife tricks they have seen in a Ray Mears DVD, to sell a product to people who think that picking berries lets them “thrive in nature”. Paul however is a different sort, and while time does not permit me to travel to the UK to attend his classes, I’ve been reading his writings for a while and I have a lot of respect for him.

At the 2014 Bushcraft Show, he gave a presentation, which you can watch by following the link or clicking on the picture below, titled Integrating Bushcraft With Modern Outdoor Life.

Paul-Kirtley-Bushcraft-Show-2014-Presentation

I thought the presentation was very interesting and very well put. He speaks at length about how in many respects bushcraft has unnecessarily become isolated from more general outdoor pursuits. He describes his approach, which involves using the skills which bushcraft gives him and the deeper understanding of his surroundings that provides, within the context of a larger outdoor experience, involving longer, more mobile trips into the wilderness.

In many respects, he describes my thinking on The Modern Woodsman, and how all of these outdoor skills can be incorporated into one larger outdoor experience and a more well rounded woodsman, rather than the cliché little subgroups we have created. 

Tuesday, May 27, 2014

Trip Report: Cook Forest 5/24/14

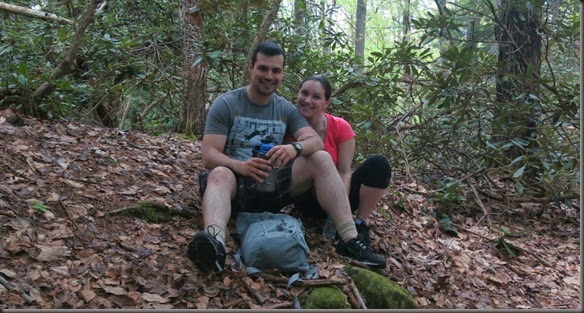
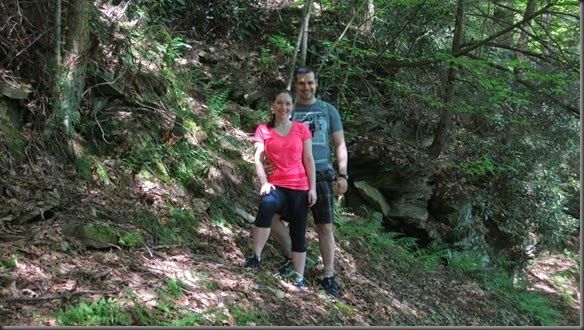
This memorial day weekend I found myself again in Pennsylvania with my girlfriend. On Saturday we did a day trip into Cook Forest, so I figured I would share a few pics. The woods are not really her thing, but she’s a good sport.

IMG_9453

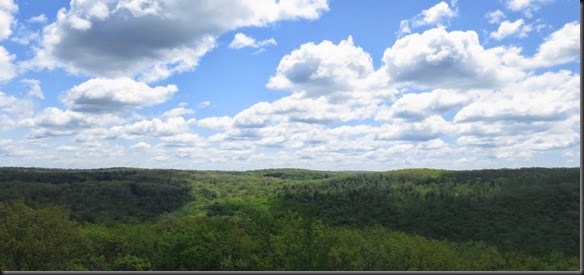
We hiked up to a fire tower on the top of one of the mountains. We were alone the whole way up, and didn’t see anyone else in the forest. It turns out that there is also a road that goes up to near the top of the mountain, which is how everyone apparently chooses to get there. As a result there were plenty of people at the top.

IMG_9515

IMG_9519

Not too far from the fire tower it was possible to see the Clarion River.

IMG_9532

We left the mountain and started on our way down. Soon enough we there was no one near us. We stopped for a bit to get some water.

IMG_9544

I carried my usual day kit:

  • Pocket kit: tinder, matches, lighter, mini flashlight, repair kit, water purification tablets, and some pills;
  • Knife: custom Mora #2 clone;
  • Nalgene water bottle with a nesting titanium cup (Stoic 700ml Ti Kettle); I had a second bottle for my girlfriend;
  • Bahco Laplander saw;
  • Emergency blanket;
  • Some food that does not require cooking (power bars, etc);
  • Extra clothing: rain jacket, fleece insulation layer for each of us.

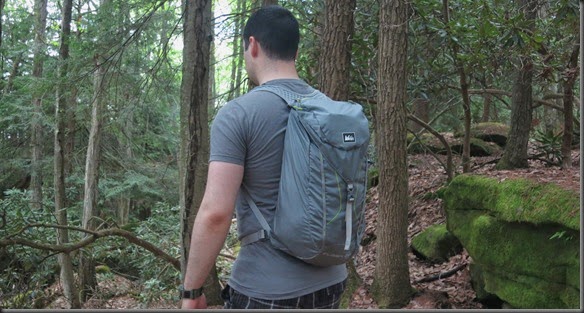
I carried all of the items in a REI Flash 22 backpack. I’ve removed the side pockets from the pack as I didn’t need them. I find the pack large enough for day trips even during winter.

IMG_9560

When we got to the base of the mountain, we spent some time by the river. The water levels were pretty high because of recent storms.

IMG_9581

And that’s it. I’m back in NY now, trying to catch the end of turkey season if I can find the time.

Thursday, May 22, 2014

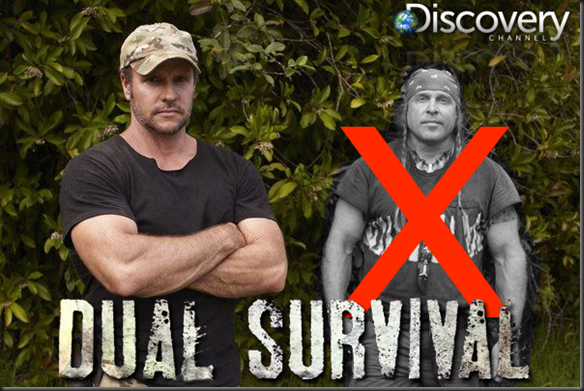
Cody Lundin States That Discovery Channel Lied About Why He Was Fired From Dual Survival

So, in this latest installment of the Dual Survival soap opera, the Discovery Channel and Cody Lundin are facing off in the media as well as in a potential lawsuit.

As many of you know, last night the Discovery Channel aired an episode of Dual Survival titled Journey's End to a New Beginning, explaining why Cody Lundin was fired and what lead to that outcome. The episode primarily focused on a number of incidents from seasons three and four of the show where Cody and his co-host Joe Teti were arguing, or where Cody refused to shoot the show, or acted in a strange manner. The producers made it seem as if though they had no idea why Cody was acting in such a way, or what his problem might have been. Their explanation was that the stress of filming the show probably got to him.

dual

For those of us who have been following along, the explanation that Discovery provided just seemed strange and very staged. It was clear that the instances provided were taken out of context, and it wasn’t even difficult to imagine what that context was. Today Cody Lundin released a statement on his Facebook page, titles “Dual Survival Defamation”, stating that the Discovery Channel lied about what happened, and that he will be pursuing legal measures against them. Here is the full statement:

Hi Campers,

Taking the high road does not involve letting disingenuous people dump on you. I have heard that Discovery Communications and Original Media (the production company) tried their best to defame me on last night’s program, even dredging back into season three. Like herpes, just when one thinks the last boil is gone, another one appears. A cease and desist letter for defamation was sent to both companies by my attorney weeks ago. It seems this was ignored. For executives to purposely pick and edit footage out of context at my and the viewers expense, all the while knowing the real back story, is without conscience. Once again, these actions are uncalled for and have forced my hand to defend my professional reputation.

What Dual Survival fans don’t know is that last night’s “behind the scenes” episode was Discovery’s “Plan B” at attempting to explain why I am no longer on the show. “Plan A,” which I refused to participate in, is far more interesting, informative and damning to those involved.

On a positive note, I am overwhelmed by the support I have received from fans. Thousands of you have sent notes of well wishing in letters, emails, voice mails, facebook, and on my blog. Many of you expressed sadness at my parting, but were grateful for the integrity. One couple who had used my role on the show to teach their children outdoor skills is now using my termination as a teaching point to remind their kids to be true to themselves regardless of the apparent cost. Brilliant! We can all lose jobs, we can all lose friends, but if we lose our integrity and honor, we all lose. I appreciate your supporting qualities that cannot be bought.

Remember, the Light never fails!

Stay true, Cody

At this point it’s not exactly clear what the truth is, but it’s certainly not what was portrayed on the show last night. The whole “Cody is acting strange and refusing to film the stuff we tell him to, but we have no idea why” is just not passing the smell test. My guess: Cody was clearly tired of being on the show and being asked to shoot fake, staged, and unrealistic b.s. and the producers were tired of Cody giving them a hard time about making “good TV”. Both sides were probably staying on because of the contract between them. Eventually Cody got in their face one too many times about the silliness that was being filmed and we have all become accustomed to, and they decided that they would be better off firing him.

One thing that did become clear last night was that Dual Survival is a complete joke of a show when it comes to both reality TV and survival instruction. It is rare that a reality TV show fails on the reality aspect, but Dual Survival certainly seems to have managed it. Apparently every aspect of the show is staged and scripted. Where they go, what route they take, even where they stand for the shots is apparently scripted. They take prolonged brakes, even for days in between scenes, and appear to be moving around with a crew of at least a dozen people. I am not sure why the Discovery Channel decided to show that much of what is going on behind the scenes, but it was enough to demonstrate that the show and all of the drama on it is completely staged. It made Man vs Wild look like the real deal… which is sad.

I feel bad for Matt Graham who is stepping into this debacle. I wish him luck. 

For some of Cody’s prior statements about this issue, check out:

Dual Survival Clarification by Cody Lundin and New Host Announcement and

Cody Lundin Fired From Dual Survival

Cody Lundin Explains The Various Forms of Survival Skills

Cody Lundin recently posted an article on his website titled: Dual Survival: Explaining the Various Forms of Survival Skills. The article itself has very little to do with Dual Survival from which Cody was recently fired and replaced by Matt Graham. He simply uses it to describe one particular type of survival skills.

cody-lundin-dual-survival

In particular, the article outlines several general categories of survival skills:

  1. Modern Outdoor Survival Skills: Short term survival in a rural or wilderness environment (usually of a three day or less duration).
  2. Primitive Living Skills: Long term living in a wilderness environment using indigenous technology.
  3. Urban Preparedness: Short term living in an urban or suburban environment.
  4. Wilderness Living Skills (more commonly referred to as Bushcrafting or Campcraft): Short or moderate term living in a rural or wilderness environment.
  5. Homesteading: Long term living in a rural or wilderness environment.

According to Cody, while survival skills can be implemented in all of the above scenarios, the way the skills are applied will differ depending on the type of scenario you find yourself from the above list. Consequently, Cody asserts that when learning, or even teaching survival skills, one should first decide which one of the above scenarios they are training for, and then learnt he survival skills in the appropriate context.

The example Cody gives is that of fire lighting. Friction fire lighting is an indigenous skill, best used in a primitive living scenario. Relaying on the same skill for fire lighting in a modern outdoor survival scenario, like those seen on Dual Survival, where time is of great importance, and you body and mind may not be functioning optimally, may not be a good idea.

I think the article is worth a look. You can read it at the above link. 

Tuesday, May 20, 2014

12 Gauge Shotgun Chamber Adapters: The Good, The Bad, and The Ugly

In recent years the shotgun, and in particular the single shot 12 gauge shotgun has quickly gained popularity. The main area where they have seen increased use is as wilderness survival or self reliance guns. Theoretically, these are situations where you would be making your way through the woods, carrying your gear on your back, for a moderate period of time, and relying on the gun you have with you to mainly procure food and to a lesser extent for defense against predators.

In that role, the simple and inexpensive single shot 12 gauge shotgun performs very well. They are simple to operate and maintain, and they can take just about any game imaginable, and do it legally. You can use shells with small loads of 8 shot to take squirrels and rabbit; you can use high brass shells to wing shoot birds like pheasant; you can use larger 3 and 3 1/2 inch shells to take turkey, and with non-toxic shot, ducks and geese; with rifled slugs, you can take deer and other large game.

While this post is not about the single shot 12 gauge, I would mention that I would strongly recommend that if you decide to buy one, you buy a model with interchangeable chokes and decent barrel length (at least 26 inches). These days most shotguns come with interchangeable chokes, but some of the very cheap ones come only with fixed chokes. That will severely limit the versatility of your gun, as it fixes the effective range to more or less one distance. For those of you not familiar with chokes, they are just screw on tubes that go on the end of the barrel, which tighten the pattern to some degree. By changing from a cylinder choke to a turkey choke, the effective range of your shotgun (being able to get over 65% of the shot in a 30 inch circle) can be altered from 25 yards to 75 yards, with chokes available for any distance in between. With a fixed choke, you don’t have that option. Why get a versatile gun if you will then limit its versatility?

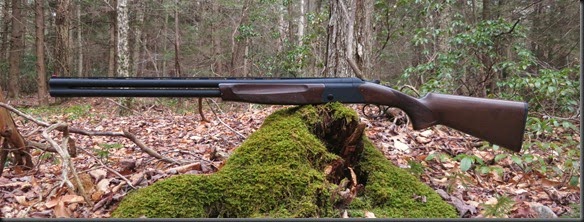
Even worse, I’ve seen some people cut down the barrels of their shotguns and just leaving it as a cylinder choke. Doing that, will reduce the effective range of your gun to about 20 yards, something which I don’t consider to be a good idea. Single shot models like the H&R Topper Deluxe have interchangeable chokes and 28 inch barrels, which in my opinion makes them a very good choice for a wilderness self reliance or survival gun. If you have some extra money, an over/under shotgun like the CZ Upland Ultralight that I shoot is an even better option. It weighs the same as the single shot H&R Topper Deluxe, but gives you two shots; you can use different chokes in each barrel, and you can select which barrel you want to fire first. That way you can use a modified choke with bird shot in one barrel, and a cylinder choke with a slug in the other, letting you take whatever game crosses your path.
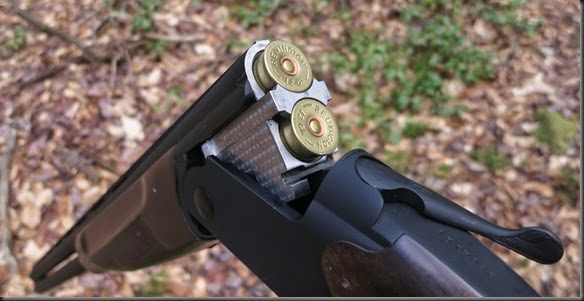
IMG_9132

IMG_9144

So, at this point you are probably wondering, if the shotgun is such a great tool, what are these adapters I am talking about, and why are they needed at all.

Well, for all of its versatility, the shotgun has a serious disadvantage. That disadvantage is the weight of its ammunition. Even the lightest of shells (for example, a 2 3/4 shell with 1oz load) weighs 1.4 oz. That weans that 11 shells will weigh a pound. That is not to mention the heavier shells like turkey and duck loads where five shells can easily weigh a pound. As you can see, for a wilderness self reliance scenario of moderate duration the weight of your ammunition will become prohibitive very quickly. In comparison, if you were using a rifle chambered in something like .22LR, the weight of each round would be 0.1 oz. The weight advantage of the .22LR round when compared to shotgun shells is unquestionable.

As a result, some people would advocate for the use of a .22LR rifle for such wilderness self reliance or survival situations. While it may not be legal in most jurisdictions to take a deer or a duck with a .22LR bullet, it is certainly capable of the task, and in an emergency, legality may not be your primary concern.

After some thought, people came up with a solution, which would allow them to shoot rifle ammunition, including .22LR, through their shotguns, in effect, giving them the best of both worlds. You can carry a few shells for when you need them, but the rest of the time you can use the much lighter .22LR rounds. The solution which allowed for such use is the shotgun adapters a/k/a chamber adapters.

A shotgun adapter, mainly used for brake-open shotguns, is an insert that you place into the breach, which allows you to transition to the use of a smaller shell like 20 gauge or .410 bore, and can even be rifled to shoot ammunition like .22LR bullets. Here I will go through some of the available options, and give you my evaluation of their usefulness, both in terms of whether they work and whether they are practical to use. To the best of my knowledge, Short Lane a/k/a GunAdapters is the main producer of this technology, and they are the adapters I have used, so I will refer to their models as examples here.

12 Gauge Rifled Chamber Adapters

The first type of chamber adapter I want to discuss is the rifled chamber adapter. The rifled chamber adapters are designed to allow you to shoot rifle ammunition through your shotgun, as discussed above. You can get adapters for different rifle and handgun ammunition. I will use the .22LR as an example here. The adapter is a metal tube, with the outside bore being sized to fit into the 12 gauge shotgun chamber. The inside bore of the tube is sized to the desired ammunition, in this case 22 caliber, and made the chamber .22LR cartages. The inside bore is rifled so that when the bullet is fired, it will be imparted a twist like you would from a rifle barrel.
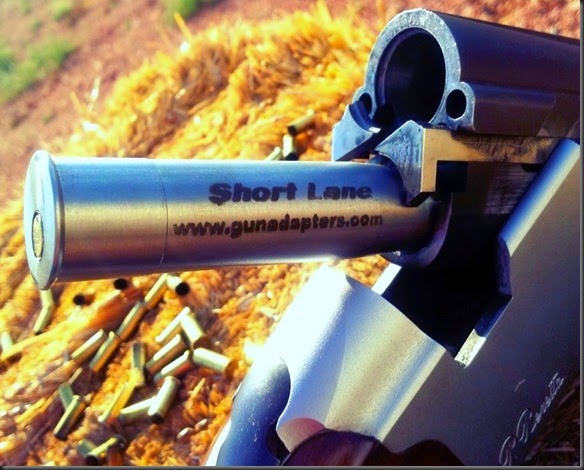
IMG_0146

The original Short Lane 12 Gauge to .22LR Rifled Adapters are 3 inches long, weigh 7 oz and cost $40. They come in rifled and smooth bore variants. The one in the picture below is the smooth bore variant, even though the one in the link and the one I’ve used is the rifled version, which I would recommend over the smooth bore one.
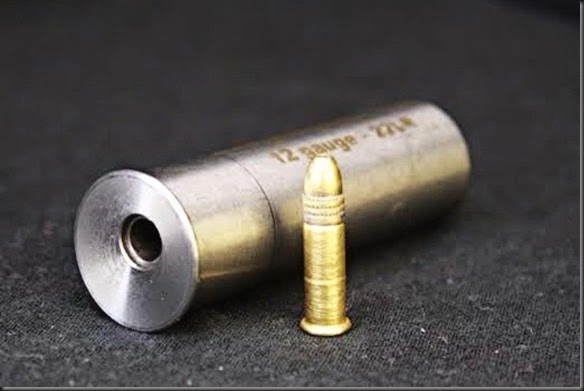
1_12_g_to_22_LR__88471.1390333354.1280.1280

Short Lane has also release their Dave Canterbury line of rifled adapters, which feature an extended rifled section. The 12 gauge to .22 LR Extended Length Rifled Adapters (Dave Canterbury line) are 8 inches long, weigh 18 oz and cost $100.
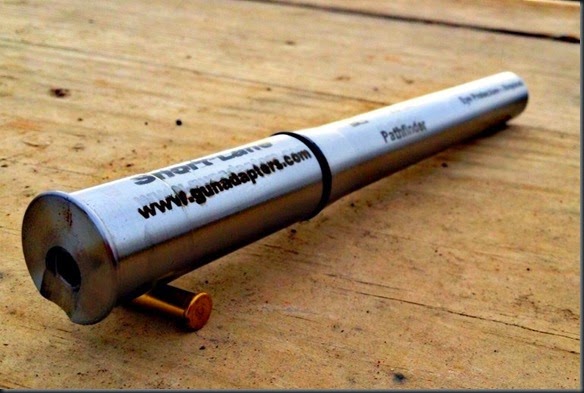
IMG_0260__46340.1387404772.1280.1280

Does it work? Not really. Yes, the adapters will let you shoot the desired ammunition. In that sense they do work. However, this is a prime example of how just because you can shoot something out of a gun, it doesn’t mean you should. The reason why I say that they do not work is because of the atrocious accuracy. I suppose accuracy is a relative thing, and for a pipe gun (which is what this combined with the shotgun actually is) it is fairly accurate, but by rifle standards, it is horribly inaccurate.

This should be no surprise for any rifle shooter. Using such an adapter is the equivalent of shooting a pistol with a loose barrel. All of the things that we spend so much time on in order to achieve accuracy: bedding the action, free floating the barrel, measuring tolerances, are not only not done here, but rather what we have is quite the opposite. We have an insert which gives us a firing platform separate from the action, it’s position changes with each shot and even every movement of the gun, and the insert is not bedded properly, touching the barrel and moving around under the pressure of the detonation. Most people blame the inaccuracy on the short barrel (either 3 or 8 inches depending on the model), but that is not the main problem. Many handguns like the Ruger Mark II and the Browning Buck Mark will shoot close to 1 inch groupings at 50 yards all day long. The mechanism of the shotgun rifled chamber adapters however, prevents such accuracy regardless of the length of the insert.

The lack of accuracy is not a product of poor quality either. The adapters are very well made and are good quality with attention paid to the details. Unfortunately, the technology itself can only be pushed so far.

The manufacturer specifies that you can more or less expect sub 1 inch groupings at 30ft with the rifled adapters with premium ammo. That is 30 feet folks, not 30 yards. 30ft translates to 10 yards. With the extended Dave Canterbury adapters, you might be able to get an extra yard or so, although my experience has been that there is no measurable difference. That’s it! At 25 yards you are getting about 7 inch groupings, and at 50 yards you are lucky to hit the board. Now, I know that sometimes you can do a lot better. I’ve seen a guy hit dead center at 100 yards with a 3 inch adapter, but those are the exceptions that prove the rule. Even a broken clock is right twice a day. Sometimes everything comes together right, and you will get decent groupings. However, getting consistent sub 1 inch groupings with these 12 gauge shotgun rifled chamber adapters is unrealistic past 10 yards.

If you purchased a rifle that was unable to shoot sub 1 inch groupings at anything over 10 yards, that rifle would be considered not only inaccurate, but also horribly defective. Even the cheapest, most unsophisticated rifle will give you sub 1 inch grouping at at least 30 yards. Both my Savage Rascal and Crecket modified backpacking single shot rifles will shoot sub 1 inch grouping at 50 yards.

In my opinion taking shots at an animal at anything over 10 yards with these adapters is not only a waste of ammunition, but I would also consider it highly unethical.

Is it practical? Not really. If the adapters worked, then they would be extremely practical. A 7 oz insert that lets you accurately shoot .22LR up to 50 yards out of a shotgun would be amazing. You wouldn’t find any ammo in the forest, but you can certainly carry a good amount of .22LR without a problem. However, an adapter that shoots accurately only under 10 yards, in my opinion is not worth the weight of the adapter, nor the weight of the ammunition you plan on using in it. At that distance I would consider a throwing stick or a rock.

There are some instances where these adapters might be practical. If your main gun is a shotgun, and you are checking trap lines, and need something with which to dispatch trapped game, a .22LR adapter would be a very good choice. For any hunting however, I wouldn’t recommend it.

So, is there a better option Mr. Smartypants? Yes there is. There are several rifles currently on the market which weigh under 16 oz, lighter than the 18 oz Dave Canterbury adapters, shoot .22LR accurately up to 100 yards, and will certainly give you sub 1 inch groupings at 50 yards. One example is the Ruta Locura Pack Rifle Kit, which I reviewed earlier, or if you don’t want to build your own, you can grab a Pack Rifle. Both of these option will weigh about 16 oz total. That way for the weight of a single insert you get an actual gun, which will shoot properly. I consider that a much more versatile and practical option. And, at the cost of $100 per adapter, the prices are not that crazy either. 

12 Gauge Shotgun Chamber Adapters

The second type of chamber adapter I want to discuss is the simplest chamber adapter, the shotgun shell adapter. These adapters allow you to transition between different types of shotgun shells of smaller gauge. So, if you have a 12 gauge shotgun, you can get an adapter which will let you shoot 20 gauge, 28 gauge, .410 bore, etc.
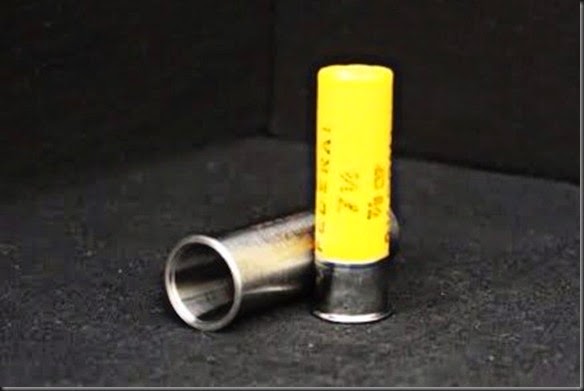
2_12_g_to_20_g__06210.1390331040.1280.1280

The principle is simple. You simply have a tube where the inside bore is for a 20 gauge shell, or any other desired size, while the outside bore is fitted for a 12 gauge. You insert the adapter into the breach, loach the smaller shell inside the adapter, close the breach and fire.

Does it work? Yes. These adapters, at least in my experience, work very well. The patter you will get out of the shotgun will not be amazing (it will be similar to shooting out of a cylinder choke), but at 20 yards and maybe even more, a 20 gauge shell shot out of a 12 gauge shotgun will give you a decent pattern. When you start to go to smaller shells like the .410, the pattern will degrade much faster because of the bigger difference between the 12 gauge barrel and the .410 shell, but it will get the job done.

Is it practical? Not really. The theory behind these chamber adapters is that you get the added versatility of using whatever shells you can find. While that is true in theory, we are talking about wilderness self reliance or survival here. When is the last time you were somewhere in the wilderness, and found a box of ammunition… any ammunition? The answer is probably “never”. A Short Lane 12 Gauge to 20 Gauge Shotgun Adapter weighs 3 oz and costs $25. It will work as it is designed, but if you don’t have a realistic chance of finding 20 gauge ammunition in a wilderness survival or self reliance situation, then it is dead weight. If on the other hand your idea of wilderness involves houses, farms, and gun stores, then maybe this would be a good option. With prices of 20 gauge ammo often being higher than that for 12 gauge ammo, the benefit is not clear to see.

The only circumstance that I can think of where such an adapter could be of practical use, is if you are out hunting with your 12 gauge, and your hunting partner is using a 20 gauge, and you want to be able to bum ammo from him. Then a 3 oz adapter makes sense, and can be quite handy.  

12 Gauge Black Powder Chamber Adapter

Another adapter offered by Sort Lane is a 12 Gauge Black Powder Chamber Adapter. This is a very interesting tool. It is a metal shell, that you can insert into the chamber of your shotgun. In the shell you can place your powder and shot, and on the back you can place your primer. This is not a muzzleloader adapter. You fill it up like you would if you were reloading a shotgun shell with black powder, and you load it into your shotgun as you would a shell.
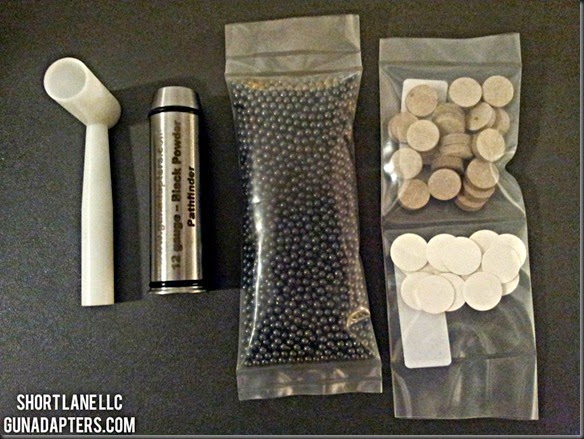
20130430_114427__54067.1373472941.1280.1280 

This adapter comes as a kit. It includes the adapter, powder/shot measurer, 20 over powder wad, 40 over shot card, enough #5 shot for 20 reloads. The kit will cost you $60 and weigh 21 oz. The advertised accuracy, or more precisely, pattern integrity is up to 20 yards.

Does it work? Yes. I am not a black powder shooter, but I have seen it used, and it works as advertised. Obviously there are no quick reload times here, and you are not going to be bringing down any ducks 60 yards out, but for someone who wants to shoot close range and use black powder and whatever other materials happing to be at hand, this is a perfectly functional option.

Is it practical? Somewhat. In terms of pure game-getting efficiency, I suppose it’s not the most practical option. When you factor in the weight of the black powder, the adapter, the shot, and all of the other components, there are no significant weight saving over just bringing the equivalent number of shotgun shells. That being said, if you enjoy shooting black powder, this option is a lot of fun.

12 Gauge Shotgun Muzzle Loader Chamber Adapters

The last type of chamber adapter I want to mention is the 12 Gauge to 209 Muzzle Loader Adapter. As the name indicates, this adapter allows you to convert your shotgun to a muzzle loader.
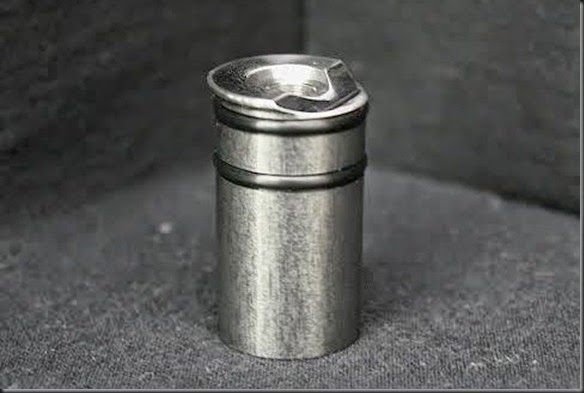
3_12_g_ML___23274.1389484878.1280.1280 (1)

The muzzle loader adapter weighs 3 oz and costs $30. It is designed to use 209 primer, is intended to shoot black powder only, and the manufacturer specifies that it should only be used with shot, not slugs.

Does it work? Yes. Again, I am not a black powder shooter, so if you are interested in these adapters, speak to someone who uses them, but I have seen them used, and they work. Of course, there are some issues, such as having to carry a separate rod from your shotgun, but it will in fact let you convert your shotgun to a muzzle loader.

Is it practical? Yes. If you have been thinking about taking advantage of the muzzle loader season in your area, but don’t have a dedicated muzzle loader, this may be a good way to try it out. Make sure you check with your jurisdiction if such an adapter will qualify for the muzzle loader season in your area. Unfortunately, you can not shoot slugs with it, which limits your ability to go after big game, but I suppose buckshot might be a good option for such hunting. I have not used it myself, or done any comparisons, but I wouldn’t expect the same type of precision as a dedicated muzzle loader. Even so, getting an extended hunting season for just $30 is not a bad option. 

Well, that’s my overview of the available shotgun chamber adapters that I have seen. I’ve personally used the first two, but have not myself shot the black powder ones, so keep that in mind. All of these adapters are very well made, fun to use, and a great addition to any shotgun kit. However, be aware of their limitations, and don’t fall into the trap of thinking that just because you can shoot something out of a gun, it is a good idea to do so.
Friday, May 16, 2014

Shotgun Shell Survival and Fire Lighting Kits

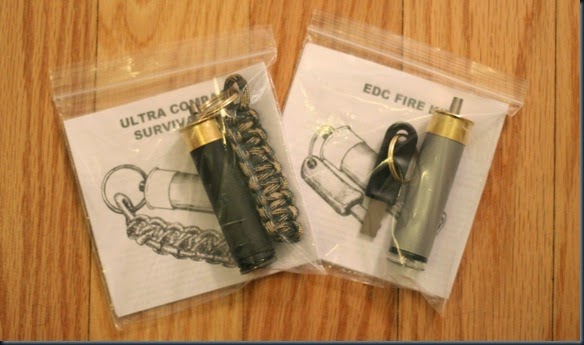
I am usually not a big fan of prepackaged fire lighting kits, or most survival kits for that matter, but these were just too much fun not to share with you guys. The two kits I will look at in this post are by a small British manufacturer called Polymath Products. Both kits are designed to be contained in a 12 gauge shotgun shell. When I first saw them, I knew I had to have them. Shipping cost from the UK was about $6, the service was prompt and polite.

IMG_0068 

To be honest, when I first ordered them, I expected something that a guy had put together in his garage. When they arrived however, it became clear that this was a professional business. Great attention was was paid to detail and both kits arrived packaged with good instruction booklets.

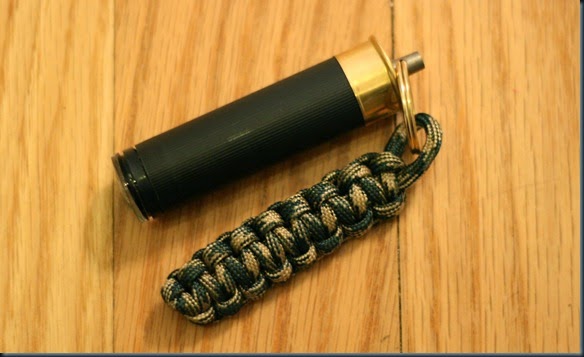
Let’s start with the survival kit. It costs about about $15 at current exchange rates, and weight 1.6oz.

IMG_0101

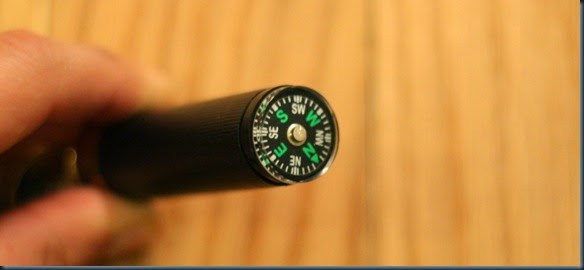
Using a 25mm split ring, the kit is attached to 1m (3.3ft) of braided paracord. You can select several colors for the paracord. On the bottom of the shell you have a liquid filled button compass.

IMG_0115 

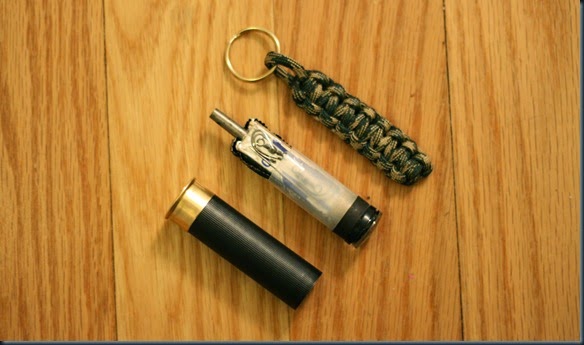
By removing the split ring, and pushing on the top of the ferro rod, you can remove the contents of the kit.

IMG_0142

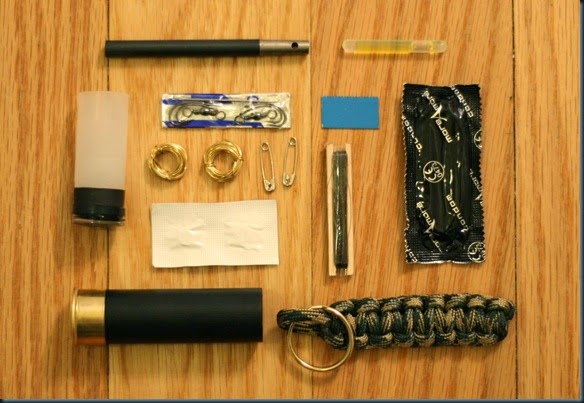
There is quite a bit of stuff packed into this small survival kit. The contents include:

IMG_0148

  • 1m (3.3ft) Paracord, 550lb
  • Split Ring, 25mm
  • Cartridge
  • Ferrocerium Fire Steel Rod, 6.5mm Ø
  • Liquid-filled Compass (on the outside of the shell)
  • Water Carrier (Condom)
  • Scalpel Blade, #10 (contained in a package with the hooks and swivels)
  • 2x Water Purification Tablet
  • Fire Steel Striker (piece of hacksaw blade)
  • 2x 1m (3.3ft) Brass Snare Wire
  • Glow Stick
  • 8m (26ft) Fishing Line, 6lb
  • 2x Swivel, Size 10
  • Hooks: 2x Size 10, 2x Size 8
  • Sewing Needle
  • 2x Safety Pin

Now, is that what you would want in your survival kit? Probably not. Everyone has different ideas. You can certainly make changes to it though.

Let’s move on to the fire lighting kit. The kit costs almost as much as the survival kit, coming a bit under $15. It weighs 1.4oz.

IMG_0180

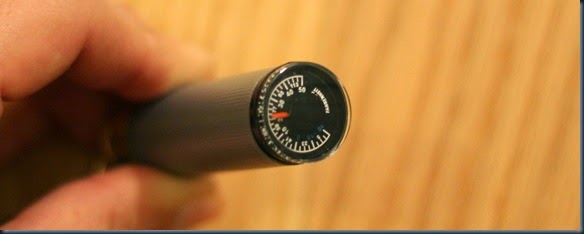
The fire lighting kit is set up the exact same way as the survival kit, except that to the split ring is attached a striker rather than paracord. Additionally, on the bottom of the shell, instead of a compass, you have a small button thermometer, both in Fahrenheit and Celsius.

IMG_0177  

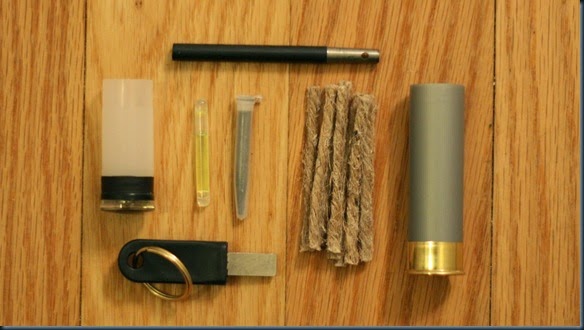
The kit opens the same way, but contains much fewer items than the survival kit. In all honesty however, the items are much more practical. The kit contains:

IMG_0198

  • Fire Steel, 6.5mm Ø
  • Super Alloy Striker
  • 8x 6cm (2.4in) Tinder Stick (waxed jute twine)
  • 1g Fire Powder vial
  • Cartridge
  • Split Ring, 25mm
  • Liquid-filled Thermometer
  • Mini Glow Stick

Again, some of the items are not what I would have chosen, such as the glow stick and the striker, but the rest of the kit is quite good. I’m a big fan of the waxed jute twine tinder, and there is a good amount of it in the kit. I would probably replace the tinder powder and glow stick with some matches.

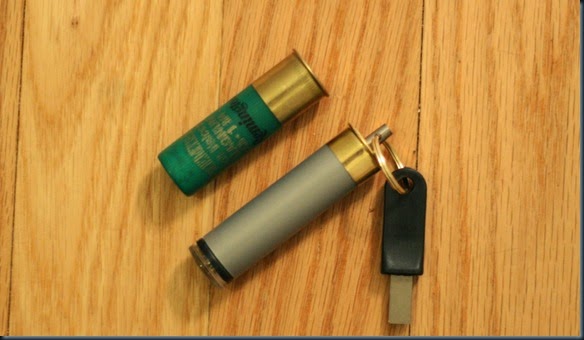
Here you can see the kit compared next to a 3in 12 gauge shell. Clearly it is a little longer, probably the size of a 3 1/2 in shell.

IMG_0212 

Overall, I am very happy with the kits, and I think they are just plain fun. The shells make great containers in case you want to build your own kits and store them in a shell holder on your shotgun.

Tuesday, May 13, 2014

Sawyer Mini Squeeze Filter Pre-Filter Attachment

I was, and still ma a big fan on the Sawyer Squeeze Filter. In my opinion it revolutionized water filtration for the backpacker, by providing a lightweight alternative to chemical treatment and heavy pump filters. When Sawyer released their Mini Filter, I switched to it and have been very satisfied with it.

f (3) 

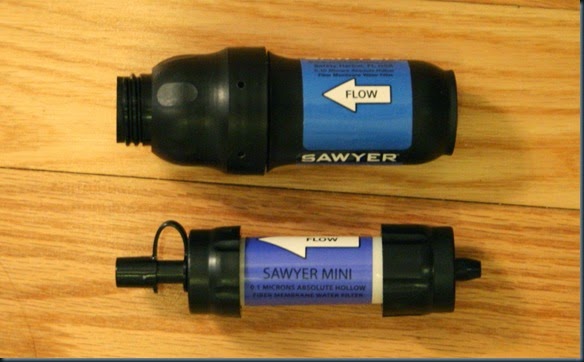
Here you see the Sawyer Mini next to the original Sawyer Squeeze Filter. The Mini weighs just 2oz. For those of you who are not familiar with it, both of the above filters function by screwing on top of a bladder filled with the dirty water. You then squeeze the bag, or let gravity do the work, and the water which passes through the filter is filtered down to 0.1 microns.

My big worry with filters like these however, which use fibers as a filtration medium rather than a ceramic component, is that they can easily get clogged when you are using poor quality water, which I often do. Because of that, I always try to use a pre-filter to eliminate the sediment which contributes most of the clogging.
When I got the Mini, I encountered a problem; mainly that unlike the original Sawyer Squeeze Filter, the Mini had a protrusion from the back, designed to connect it to a water bladder system. That unfortunately made it impossible to use the screw-on pre-filter I was previously using.

f (42) 

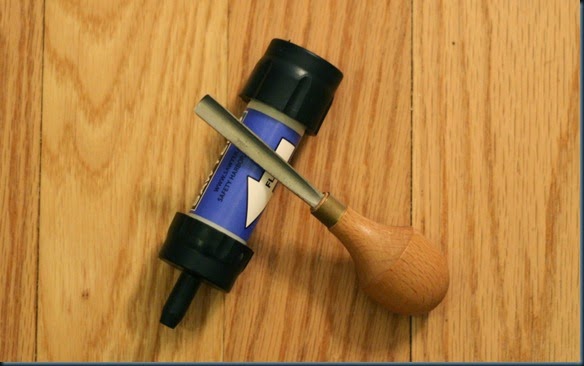
My pre-filter of choice is one from a Aquamira Frontier Pro filter. The Frontier Pro is not a filter I would recommend, but its screw-on pre-filter is excellent. To fix the problem, I decided to remove the hose connector on the back of the Sawyer Mini Squeeze Filter. The task is not as easy as it looks. I finally managed to do it with the use of a small gouge.

IMG_0018

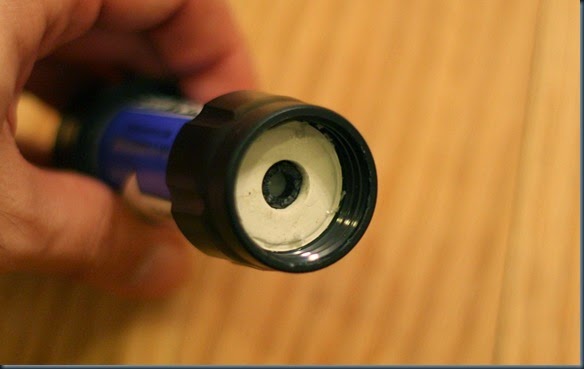
With the gouge it was fairly easy: I just made a few push cuts at the base of the connector, and it came off.

IMG_0037

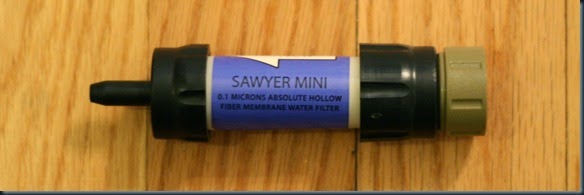
With the rear hose connector removed, the Frontier Pro pre-filter could be screwed on just like with the original Sawyer Squeeze Filter.

IMG_0040

IMG_0061

The pre-filter has a cloth element which removes most of the sediment and larger particles, prolonging the life of the filter. I know there is nothing particularly exciting about it, but if you had been wondering how to do it, this is the way I managed it with mine.

Thursday, May 8, 2014

Trip Report: Spring Turkey Hunt 5/1/14 – 5/4/14

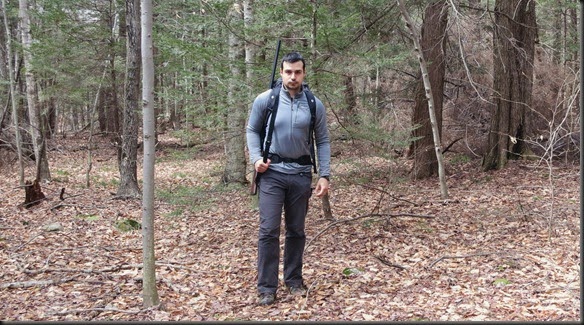
In my state, May is spring turkey season. I took a few days off to try to get a jump on the season. Like a lot of other places, in the spring only hunting of bearded birds is allowed, and it can only be done from half an hour before sunrise until noon each day. This makes things somewhat difficult for me. One problem is that I don’t live close to the woods, so I have to drive for several hours to get to the forest. This precludes me of taking the usual approach of getting up at 4am and going out on the local field to hunt in the morning. I typically have to already be in the woods the night before, spend the night there, and then start hunting in the morning. This is even more so because I like to hunt deeper into the woods, which means I need to take time to get to my location.

So, hunting on the first day of my trip would not be possible. I would have to spend the morning getting to the forest, and then the rest of the day backpacking into the woods to reach a location where I would want to start hunting. The location for this trip was about twelve miles into the woods located at the southern section of the Catskills. I picked the area because it is far away from any fields where turkey is usually hunted. In this part of the state people like their turkey hunting, but it is usually done on fields and private property close to roads, where you can see large groups of hens and toms strutting around. It’s not my preferred way to hunt, so I wanted to do it deeper into the woods, where there wasn’t any human traffic. Now, I did not chose a random spot. I was in this are last year, and spotted some turkeys roosting in the trees there. The problem was, I never noticed any scat or other sign on the ground, so I assume the turkey roost in the area, and then fly off to farms and fields in the area for the day. My strategy was to try to call them in as they were coming down from the roost, before they had flown away.

After saying all that, I jumped in the car and drove up to the forest. We have had some serious rain here over the past week, and unfortunately, the rain had washed away several of the smaller bridges in the area. That made it very difficult to get to the forest. I had to take some serious detours to try to get there.

With all of the delays, by the time I got to the part of the forest where I intended to start, it was already mid afternoon. I quickly got my things and got going.

IMG_8835

It wasn’t long before I started running low on daylight. I wasn’t anywhere near the location I was aiming for. I figured I would have to camp for the night, and then continue into the woods the next day. Unfortunately, that meant I wouldn’t be ready for the hunt the following day. I would keep the shotgun at the ready just in case, but I would be relaying mostly on luck.

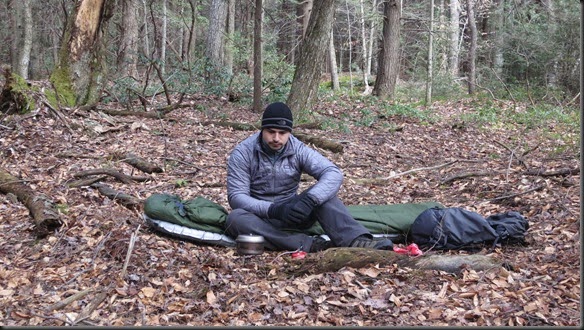
I wasn’t in the mood to set up all of my gear. I just pulled out my sleeping pad and sleeping bag and got to eating dinner. I figured if it rained, I could just use the tent as a bivy bag.

IMG_9111

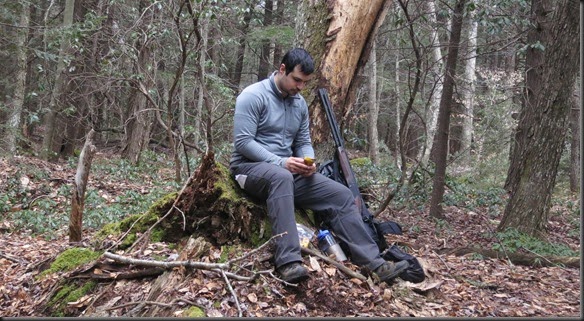
In the morning I packed up and got going again. Other than stopping for lunch, I just kept moving for most of the day. I didn’t flush out any birds, but then again, I didn’t actually expect them to stick around for long after coming down from the roost.

IMG_9260

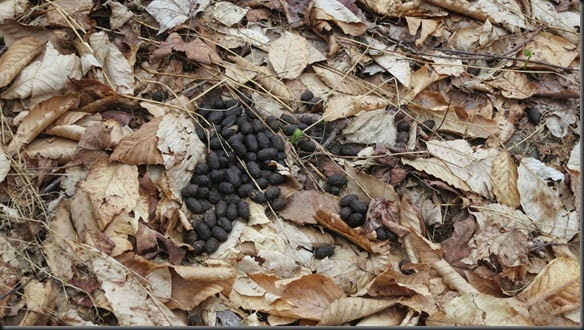
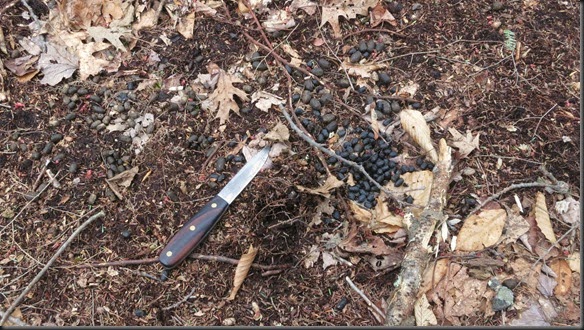
There was plenty of deer sign in the area, but no turkey signs.

IMG_8842 

IMG_8859

IMG_9274

By early afternoon I had reached the location where I was planning to hunt during the trip. I couldn’t do any hunting in the afternoon, so I just set up camp, cooked some food, and went to sleep early.

IMG_8962

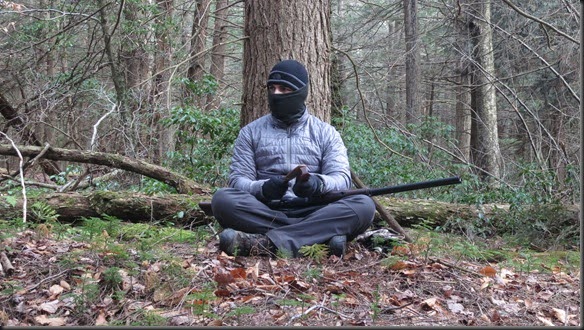
The night was a little cold. It was about 32F (0C). When my alarm rang at 4:30am, I was not looking forward to getting out of the sleeping bag. So, being lazy, I turned off the alarm and went back to sleep. Hunting time wasn’t until 5:30, so I figured I had time. Unfortunately, I slept longer than expected, and was woken up by the flapping of wings as the turkeys were coming down from the roost. I was about 5:15am. I got up, put on the headlamp and walked over to the area that I had cleared out for hunting the day before. I put up a decoy, leaned against a tree, and started calling. It was just about 5:30am. By the way, I feel like I am the only one who still used a box call these days, but I just like it.

IMG_9000 

I was using an inflatable hen decoy from Cherokee Sports. Normal decoys are unrealistic to carry any distance into the woods, but these inflatable decoys pack up very well, and look halfway realistic from 20 yards away.

IMG_9050

The morning was cold. Sitting around and calling for hours, or “armed napping” as my friend Rich calls it, wasn’t helping. I was right at the verge of shivering the whole time. I would be okay for a few minutes, then shiver for a few, and that’s how it kept going the whole morning.

I wasn’t able to call anything in. I had made several mistakes. One was that I had gotten up to late. By that time birds were already coming down from the roost. The second was that I was too close to the roosting area. The two factors combined almost guaranteed that I had been spotted, and no turkey was interested in landing in the area.

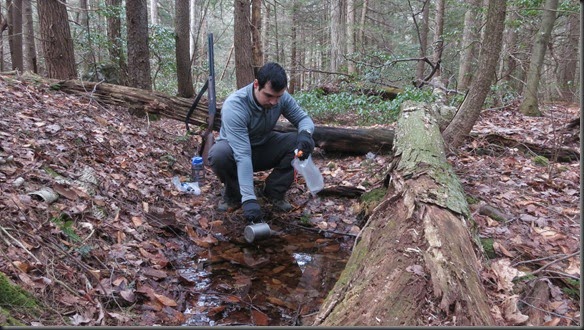
I spent the afternoon taking pictures and filtered some water. The rain had created some small puddles that i could use.

IMG_9227

I was pretty chilled from the day, so I spent the evening in my sleeping bag. I cooked dinner, and again went to sleep early.

IMG_9124

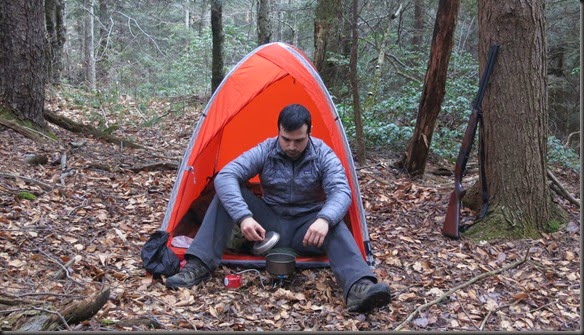
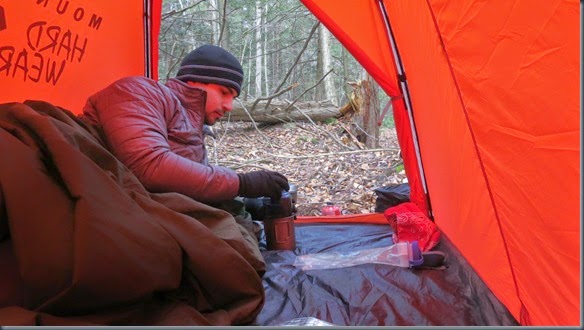
As you can see, I was using the Mountain Hardwear Direkt 2 tent on this trip. It is not my ideal tent for these conditions, but I’m doing a long term test of it, so I’ve been trying to take it out in different conditions. The tent actually performed very well. I’ve still had no condensation issues with it, even though it is a bivy tent.

I was woken up in the middle of the night by the noises of a bear in my camp. The sound was unmistakable. It was clearly trying to get to my food, which I had placed up in a tree not too far away from me. I put on the headlamp and quickly jumped out of the tent. After some shouting, I managed to chase it away. I continued to listen for it during the rest of the night, but it didn’t return.

In the morning I got up early and set up again.

IMG_9045

Again, I had no luck calling any birds in down from the roost. After a few hours however, I heard a gobble from my four o’clock. I couldn’t see anything, but tried to call him in. Unfortunately, the gobbles stopped soon after. I suppose my calls weren't sexy enough, or my impression of a rock wasn’t good enough.

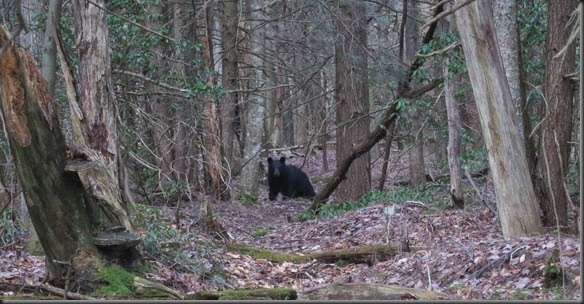
After an hour or so however, I heard a rustling in the bushes in the exact same area. I figured the gobbler was back. I slowly looked to my right, only to see a huge black mass moving slowly through the bushes. It was clearly a bear, and very likely the one from the previous night. He was looking right at me and trying to circle around. I stood up to make myself visible, but he didn’t care. He didn’t care about me shouting either. We stood there for a while, looking at each other.

Copy of IMG_9080

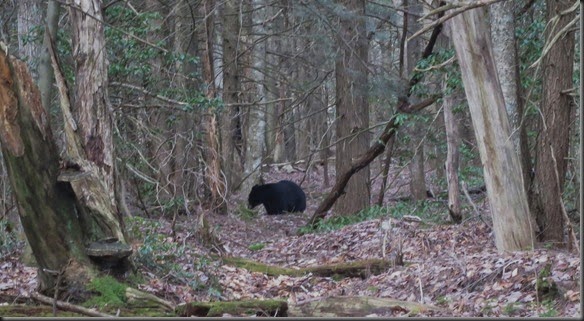
He was about 30 yards away from me. After what seemed like way too long, I fired a shot into the branches above him. Without much of a rush, he turned and walked away in the direction of my camp.

Copy of IMG_9086

I followed in the same direction. I wanted to make sure my camp was okay. The bear just passed it and kept walking away.

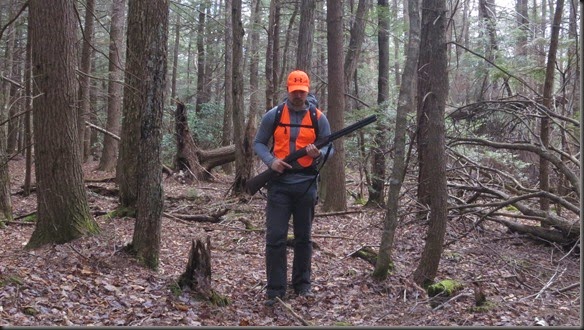
It was now around 10am. After I fired the shot, there wasn’t much of a reason for me to keep hunting. I ate breakfast, and started packing up. I then headed out. I had brought a blaze orange vest and hat just in case I had to move around during shooting hours, and I’m glad I kept them in my bag. I put them on, and got going.

IMG_9267

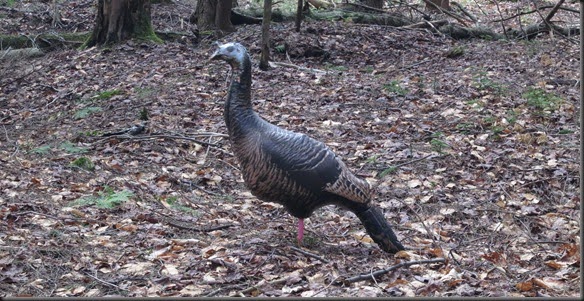
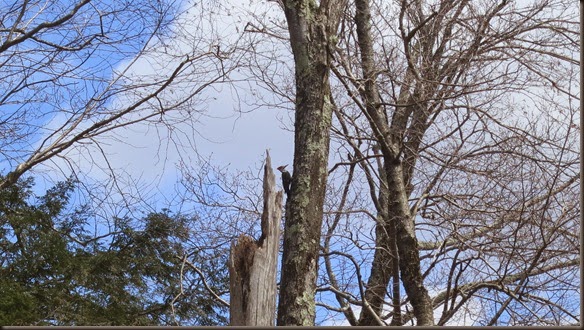
I spent most of the day making my way out. When I was closer to the edge of the forest I managed to flush out a turkey from some fallen trees, but it was after shooting hours and it looked like a hen. A woodpecker was the only other bird I saw.

IMG_9276 

I lucked out with the weather this trip. Last year it rained the whole time, but this time around I managed to get a few consecutive days without rain. I am still not sure about the area. The entire time I was there, I didn’t hear a single shot, no matter how distant. That leads me to think that people simply do not hunt turkey in this part of the forest. The fact that the birds only seem to roost here and spend their days someplace else, might very well be the reason. I think I’ll give it another try or two, and then move on.

The terrain was pretty easy. There was no difficulty navigating, and the forest was open with relatively little undergrowth. There was no serious climbing or river crossings.

My gear was pretty much what i usually have with me, loosely contained in my Black Diamond Speed 40 pack. The only additions were my hunting tools.

IMG_9095

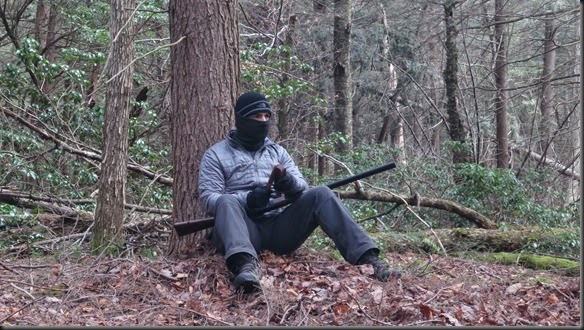
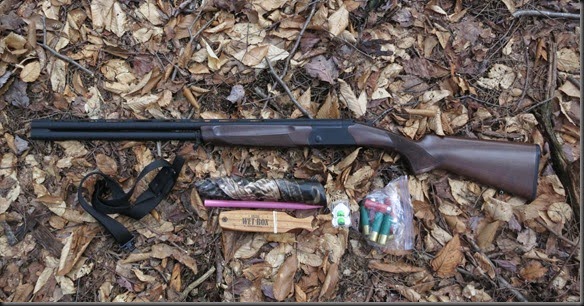
My shotgun was a CZ Upland Ultralight in 12 gauge with 28 inch barrels. I was running a modified choke on the top barrel and a turkey choke on the bottom barrel. From left to right you see my shoulder sling for the shotgun, the folded up turkey decoy from Cherokee Sports, the Primos Wet Box turkey call, a Primos mouth call, and some shells. In addition to the Remington #5 3 inch shells I was using during the hunt, I also had some lighter loads in case I wanted to shoot a squirrel or a porcupine.

So that’s it; a few days out with no luck. Hunting this way is not easy, and since I don’t have anyone to learn from, I have to largely do it by trial and error. I’m sure eventually I’ll get it right. Either way it’s a fun trip outdoors.