Wednesday, January 28, 2015

Backpacking Stoves For Cold Weather

Recently I have been reading a lot about cold weather stoves online. I like making things, and tinkering with my stoves and modifying them makes me extremely happy, so I’m constantly looking for ideas and techniques. What I found is that there is a lot of fighting over the issue of cold weather stoves, and the information on them is all over the place. It got me thinking about the issue, so I figured I would write this post based on my own experiences and testing, as well understanding of the issues which cause the conflicts.

IMG_0234

I believe a lot of the debates occur because of lack of clarification over certain assumption which people are making. The issues I see most often are:

  • What exactly do we mean by “cold weather”?
  • Are we discussing the performance of a particular stove, or the stove system?
  • What is the user willing to do in order to make the stove function?
  • What do you expect the stove to actually do besides produce a flame?

What is cold weather?

A lot of the confusion over stoves for cold weather use comes from what the user actually considers to be “cold weather”. The average user tends to assume that if there is snow on the ground, we are talking about cold weather. So, if they see someone use the stove in the snow, then the conclusion is usually that this is a good cold weather stove. That of course is pretty far from the truth.

I am fortunate to be in a region where winter weather can fluctuate over a huge range of conditions. I can tell you, you can have temperatures of 10F (-12C) with absolutely no snow on the ground, and you can have temperatures of 35F (2C) with waist deep snow. Seeing a stove function in the snow does not automatically make it a good cold weather stove. Just about any stove will function at 32F (0C); –15F (-26C) is a different story.

Another thing we often see is people pulling a stove or a fuel canister out of the freezer and showing that it can still work. On the spectrum of cold weather camping, the freezer is actually a pretty warm environment. Most freezers maintain temperatures just below freezing (although some have commented that typical freezers run colder, so make sure to find the exact temperature; I’m no freezer expert). So, the freezer tests don’t really tell us all that much about how a stove will work in weather that is actually cold.

Are we discussing the performance of a particular stove, or the stove system?

I also see a lot of confusion and conflict because people discuss stove performance while in many cases referring to the stove system rather than the stove itself. The way a stove system utilizes the heat from the stove can make a drastic difference to the performance. One system may be much more efficient than another. That is valuable information when it comes to choosing a stove system, but it doesn’t necessarily tell us much about the stove itself.

For example, you can have two stoves that utilize an upright canister with isobutane as fuel at 20F (-7C). At that temperatures both stoves will be struggling. However, if one of the stoves uses a good integrated pot system that captures the heat better, it will boil much faster and more efficiently. The conclusion of that however is not necessarily that the stove itself somehow works better, or that it has altered the laws of physics. It is just a case of there being a better system in place to utilize the heat.

What is the user willing to do in order to make the stove function?

Yet another issue is what the user actually means when they say they use a particular stove in cold weather. Just about every stove has been used under just about any condition. However, what did the user have to do or put up with in order to use the stove, and are you willing to do the same thing. Are you willing to wait 20 minutes to boil two cups of water? Are you willing to stay up all night melting snow? Are you willing to swap out cartridges every 10 minutes and warm them up under your jacket? Are you willing to risk an Alpine Bomb configuration for your stove?

And not only are you willing to do those things, but do you actually have to. In that picture that you saw of a climber using an upright canister stove, did he actually have a different option, or was his “tent” hanging from bolts on the side of a wall and this stove was the only one he could safely use inside the shelter?

What do you expect the stove to actually do besides produce a flame?

Lastly, when you hear a person say that a stove works in cold weather, what exactly do they mean by that? A stove producing a flame might be sufficient for someone to say that it is working, but is that the definition you had in mind, or did you mean that the stove must perform a certain function that you need, i.e. melt snow, boil water, etc. If a stove produces a flame, but can not get water to boil, or takes 30 minutes to boil two cups of water, would you say this stove works in cold weather? Make sure your definition of “working” matches that of the person whose advise you are taking.

We see that a lot with alcohol stoves. Some people say they work in cold weather, others insist that they don’t. My experience is that just about all alcohol stoves will burn in cold weather. It is also my experience that you will need huge amounts of fuel and time to actually do anything with that stove other than watch it burn. What do you have in mind when you hear that a stove works in cold weather?

------------------------------------------------------------------------------------------------------------------------------------

So, all that being said, let me go over some of the more popular options and give you my $0.02 on stoves for cold weather use.

Alcohol Stoves

Turbo-I-D

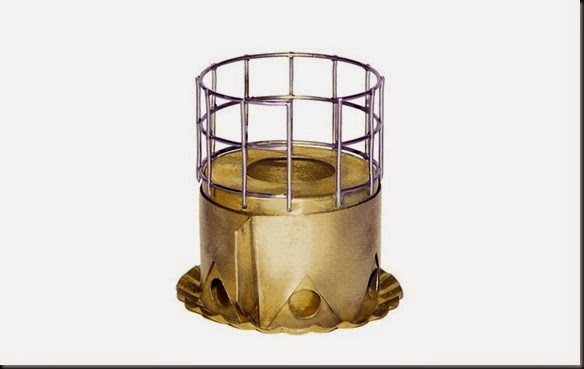
Most people these days accept that alcohol stoves are not well suited for cold weather use. That of course doesn’t mean that they can not be used at all under such conditions. Keeping the above questions in mind, an alcohol stove may very well be put to use in winter. Fridtjof Nansen used a specially made alcohol stove during his crossing of Greenland in 1888, so clearly it can work. For what it counts however, that is the last expedition on which he used an alcohol stove, as far as I know.

Like with a lot of other fuels, when burning alcohol, you are not burning the liquid directly, but rather the fumes from the fuel. Under warm weather conditions, alcohol readily releases fumes, which you can light. Once the stove is burning, the heat generated causes the rest of the alcohol to evaporate and burn. The colder the weather however, the less vapor is released by the fuel. As such, it becomes more and more difficult to light. Holding a flame however to the fuel for a few seconds will usually fix that. Once the initial fuel starts burning, the stove will heat up and cause the rest of the fuel to vaporize. So, in the sense that you can light a stove in cold weather, it is doable, especially if you keep the fuel and stove warmed up under your coat or in your sleeping bag. Again, it is an issue of what you are wiling to do.

The main problem with alcohol stoves is that while you can get them to burn, it is hard to get them to do much else. Keeping in mind the issues of stove systems and your expectations of what a stove should do, generally, alcohol stoves have a hard time producing enough heat to function well in cold weather. It is very possible that your stove will be burning at full blast and still fail to boil any water. Consequently, the amount of fuel required tends to be very large, an issue which increases exponentially when trying to melt snow for water.

Keep in mind that an efficient alcohol stove will boil two cups of water in warm weather in about 10 minutes. You have faster stoves, but they are not as frugal with fuel. Imagine that you now had to use that same stove to melt enough snow for two litters of water and then boil two cups at 10F (-12C). The amount of time and fuel required makes alcohol stoves impractical. If however, all you want is a stove that can warm up a cup of water for tea during a winter hike, then such a stove may very well be a good choice.

So, to put alcohol stoves within the context of the questions at the top of the post, an alcohol stove can make a suitable cold weather stove if your definition of cold weather is just below freezing, and you only intend to use the stove to heat up small quantities of water. A stove system which traps the heat well (pot and ground insulation, windscreen, preheating pan, etc) will increase the operational range of the stove, but you must still be willing to compromise and work within the limitations of the stove.

Upright Canister Mounted Stoves

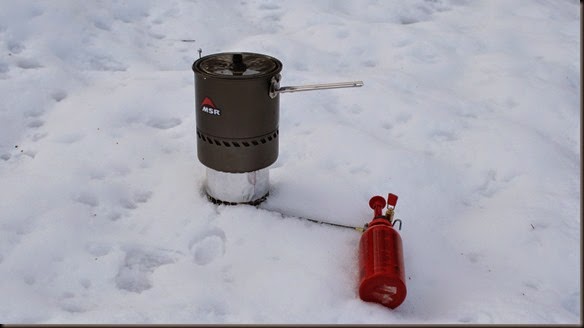
msr_reactor_17_stove

Canister mounted stoves are also not very high on the cold weather stove list. The reason for that is a combination of the fuel they use and how they utilize the fuel. Most fuel canisters contain one or a mixture of several gases. The main ones are butane, isobutane, and propane. A canister mounted stove screws in to a valve on top of the fuel canister. Once the valve is opened, the gas is pushed up through the burner due to the internal pressure of the canister. That works well for moderate weather, but suffers a serious performance drop in cold weather.

The reason for the poor cold weather performance the that such stoves rely on the internal pressure of the canister, which in cold weather diminishes, and ultimately stops being enough to propel any fuel out of the canister. For there to be pressure in the canister, the fuel has to be able to gasify. The boiling points, the points at which each fuel becomes a gas are:

  • Butane: 31F (-0.5C)
  • Isobutane: 11F (-12C)
  • Propane: –44F (-42C)

Below each of the above temperatures, the fuel remains liquid, and does not generate sufficient pressure. The question of course is, why not use pure propane. While there are propane cartridges, they seem to require very thick walls, which makes them unsuitable for backpacking purposes. Most manufacturers offer a “cold weather” fuel mix which typically contains about 70% isobutane and 30% propane. The main working component of such a fuel is the isobutane. In order for it to properly gasify, a minimum operating temperature for the stove (without using any tricks) is about 20F (-7C), roughly 10 degrees above the fuel’s boiling point. Keep in mind that a canister cools while fuel is being drawn from it because of the decreasing pressure. The propane within the mix helps the stove burn in colder temperatures, but if you consistently use the canister in temperatures too cold for the isobutane to come into play, you will quickly burn off the propane, and the stove will stop working. 

There are three issues that I want to address in terms of canister mounted stoves, which I think cause a lot of confusion:

  • “My stove worked fine for the first litter of water, but then if stopped working well.”
  • “My stove has a pressure regulator, so it works in all temperatures.”
  • “I saw a picture of this guy use the stove on Everest, so why can’t I?”

As to the first point, the issue is the one I mentioned in the above paragraph. The person making that statement is burning off the propane in the canister. Once the propane is used up (in reality some of the isobutane/butane mix is used as well, but no need to overcomplicate it), the stove has to rely on the isobutane/butane fuel, which then can not perform at the lower temperature.

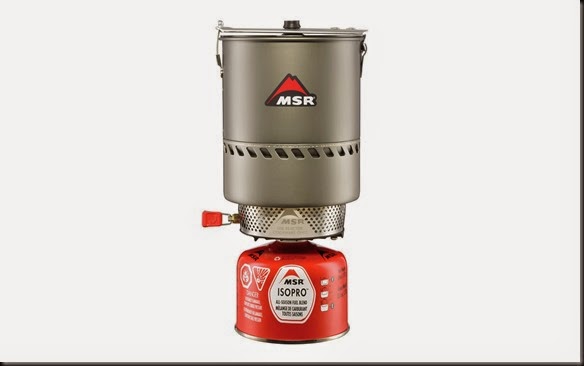
The second point, regarding pressure regulators/controllers is slightly more complicated. In recent years several companies have come out with canister mounted stoves which have pressure regulators, and claim improved cold weather performance. Jetboil has one on the Sol (which I think they are phasing out), Soto has the OD-1R, and MSR has the Reactor. If you are to listen to sales reps, you would rightfully get the impression that these pressure regulators allow the stoves to work in any temperature. That couldn’t be further from the truth. All that the regulators do is they allow the stove to work at lower canister pressure. By doing that, they provide more consistent flame over the traditional operating range of the canister fuel, and may be able to go a few degrees lower than a conventional stove which requires a higher canister pressure. That however does not translate to cold weather performance.

This brings us back to your definition of “cold weather”. While manufacturers of stoves with pressure regulators talk about cold weather performance, you have to look closely at their data to see that they actually mean. For the Jetboil stoves with pressure regulators, the “cold weather” temperature range they are talking about is 20F (-7C) to 32F (0C); Soto talks about 15F (-9C) to 32F (0C), and MSR doesn’t give exact numbers, but specifies that the reactor is intended to be used for temperatures down to just below freezing. What does all this mean? Well, it means that the stove is not doing all that much beyond what an ordinary canister mounted stove would do. The boiling point of isobutane is 11F (-12C). All of the above stoves operate above that temperature. None of them can circumvent the issue of the gasification point of the canister fuel. Once the fuel stops gasifying, an upright canister stove will not work unless certain tricks are applied, regulator or not. 

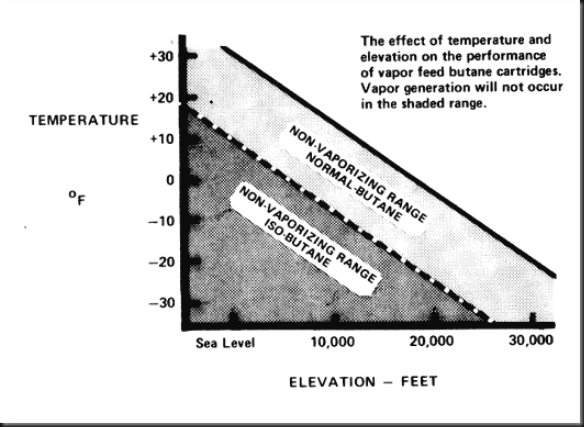
As to the last point, aside from the earlier consideration of you not knowing exactly what that person is willing to do to make the stove work, there is the additional issue of the fact that the boiling point of the gases will decrease as atmospheric pressure decreases. That means that at high elevation the canister fuel will be able to vaporize at a lower temperature. The fact that a butane canister may work at 20,000 feet does not mean it will work at sea level. Here is a chart showing the correlation for butane.

Elevation_vs_Boiling-Point_Chart

Chart courtesy of Adventures in Stoving.

Know your fuel, and know your conditions. Once the fuel stops vaporizing however, an upright canister mounted stove will not work without external help. This makes them less than idea for cold weather use.

So, once again, to put upright canister mounted stoves in the context of the four questions asked in the beginning of the post, if your definition of cold weather is above 20F (-7C) these stoves can be convenient and can work quite well. Having a well developed stove system will allow you to efficiently heat larger quantities of water and melt snow. The colder the temperature, the more you have to pay attention to keeping the fuel warm. Below 20F (-7C), these stoves can be made to work, but the swapping out of canisters during use, sleeping with the canister in your sleeping bag to keep it warm, and cooking in an enclosed space may be required.

Inverted Canister Stoves

msr-windpro-ii-2012

Inverted canister stoves strive to solve the above issue of fuel vaporization. In my opinion they make for good cold weather stoves. They still have limitations, but can be successfully used in properly cold weather and have been, especially at altitude.

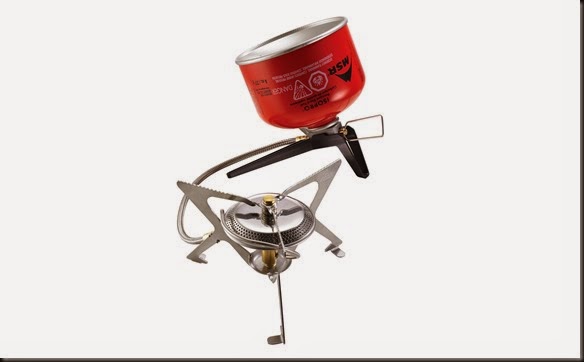
Inverted canister stoves still utilize the same pressurized fuel canisters discussed above, but they can utilize the fuel inside without the need for all of the gas to vaporize. Most such stoves have a canister that attaches remotely with the use of a hose line, but not necessarily, nor are all stoves with a remotely mounted canister suited for inverted canister use. For inverted canister use you need a stove with a vaporization tube. The tube takes the fuel from the fuel line, passes over the burner head, and then feeds the fuel to the burner. By taking the fuel over the burner, it can utilize liquid fuel, which then gasifies due to the heat from the burner, in effect eliminating the need for the canister to stay warm. As long as you haven’t used up the propane in the canister, there will be enough pressure to keep it working even at low temperatures.

Now obviously such a stove is not going to work at –60F (-51C), but for most cold weather, short of arctic exploration, it will work fine. Things like burner size, and the size of the vaporization tube will effect exactly how well the stove performs in cold weather, but the system itself makes for good cold weather use. The MSR Windpro II and the Kovea Spider are good examples of this system.

In the context of the four questions at the top of the post, Inverted canister stoves are a good choice if your idea of cold weather is above –20F (-29C). They will effectively heat up good quantities of water and melt snow. For melting snow, a system with a heat exchanger will provide increased efficiency and may be worth the added weight. These stoves are relatively easy to use and require little compromise as long as the temperatures are not too low.

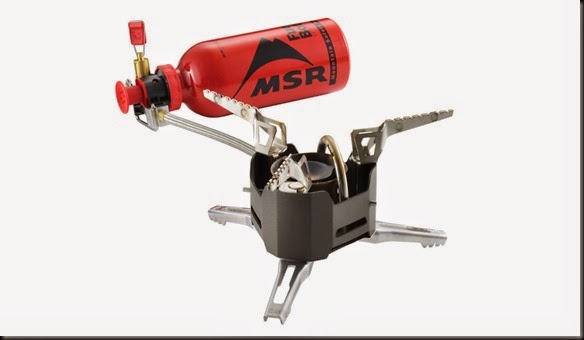
Petrol/Liquid Fuel Stoves

msr-xgk-ex-extreme

The workhorse of cold weather stove systems is the white gas or petrol stove. Since the beginning of the 20th century, they have dominated cold weather exploration. Much like the inverted canister stoves above, petrol stoves use a vaporization tube to take a liquid petroleum based fuel, and vaporize it before reaching the burner. However, instead of using a pressurized canister, these stoves utilize a hand pump to pressurize the fuel bottle. This system allows for the stoves to be used in any temperature where a human being can survive.

The downside is that these stoves are not the lightest, and require some knowledge to operate. It’s not as easy as turning the knob and lighting it. For that reason many people avoid them at all costs. If you truly need cold weather performance however, a system based on a white gas stove is the way to go.  

So, if your idea of cold weather is below –20F (-29C) a liquid fuel stove is the way to go. They produce large amounts of heat and are excellent for heating up large quantities of water and melting snow. A heat exchanger is a good idea since it will these stoves produce a lot of heat which may otherwise be lost with a regular pot.

Summary

It has been hard to put together a coherent summary for all of the above, but here it goes:

If your idea of “cold weather” use for a stove is temperatures just below freezing, down to about 20F (-7C), then alcohol stoves and upright canister mounted stoves will fit the role. While alcohol stoves will work at those temperatures, they will struggle to heat up large quantities of water or melt snow. Canister mounted stoves on the other hand, assuming you use a cold weather fuel, will do a good job at heating up large quantities of water as well as melting snow. Stove systems like the MSR Reactor extend the abilities of such stoves, making them excellent at heating up water and melting snow, and doing it consistently across the operational range of the stove. That being said, a stove system will not extend the operational range of the basic stove past what is possible for the fuel.

If your idea of “cold weather” requires a stove that can reliably function below 20F (-7C), then an inverted canister stove may be right for you, assuming you do not want to go much below –20F (-29C). By inverting the standard fuel canister, these stoves can use the fuel in its liquid form, significantly extending the operational range of the stove. These stoves are very good at heating up water and melting snow. A pot with a heat exchanger and a good windscreen will increase the performance.

If your idea of “cold weather” dips below –20F (-29C), then a liquid fuel stove is your best bet. They have been used in just about any temperature, and function reliably if very cold weather. As with the other stoves, a stove system designed to effectively capture the heat will increase performance. White gas/petrol stoves can put out a lot of heat, and without a good system to capture it, a lot of heat can be lost.

The above guidelines are just that, guidelines. They are my estimates for the temperatures in which I would feel conformable using the stoves without having to do any tricks. That being said, I’ve used just about all of the stove systems in temperatures for which they are not recommended, and others have pushed their stoves even further. That however enters into the realm of “What are you willing to do in order to keep your stove working?” I’ve recommended a bottom operating temperature for an upright canister stove of 20F (-7C). I, along with many others have used these stoves in much colder weather. If however, running a flat piece of copper pipe from the burner to the bottom of the canister, or swapping out canisters while using the stove in your tent is not your idea of proper stove use, then the above guidelines are a good rule of thumb to follow.

Also, as mentioned above, using a good stove system can significantly add to the stove’s performance. How well your stove system works, how much more efficiency it provides, and whether the additional weight of the system is worth it, is a question you have to answer for yourself. 

Anyway, these are just my thoughts on stoves for cold weather use. I’m not a huge stove guy, but when I’m out in the woods, I do need stoves that will get the job done. The above is based on my experience with the different stove types. Just a few examples:

  • I’ve used a Brasslite Turbo ID stove in 25F (-4C) weather. I had to spend a ridiculous amount of time just to boil water. I’ve also had several situations where even in warmer temperatures I couldn’t get water to boil at all because I had forgotten the windscreen.
  • I’ve used a MSR Reactor at 10F (-12C). It didn’t work particularly well. I had to use two canisters. I would keep one warm in my jacket and use the other one. After about 10 minutes I would have to change out the canister and use the warm one while putting the other one in my jacket. It’s not a fun thing to do with a frozen canister.
  • I’ve successfully used a Kovea Spider with inverted canister at –15F (-26C). I had some flare-ups, but it got the job done without much hassle. It definitely needed a windscreen. I imagine that a stove with a larger vaporization tube like the MSR Windpro II would be better in colder weather.
  • I’ve been using liquid fuel stoves for a long time. I’ve had a bunch of them and I really like them. Once you are used to them, they aren’t particularly difficult to use and definitely get the job done.

If you have a more than casual interest in backpacking stoves, be sure to check out Adventures in Stoving for much, much more information. There you can find much more in-depth info on everything from cold weather use of canister stoves to stove fuel efficiency. 
Friday, January 16, 2015

Lonnie Dupre Successfully Completes Solo January Summit of Denali

On his fourth attempt, after years of struggles and bad luck, Lonnie Dupre finally manages to complete his solo summit of Denali in January, the coldest month on the mountain. A January summit of Denali has been completed only once before, by a Russian team. This is the first successful solo attempt.

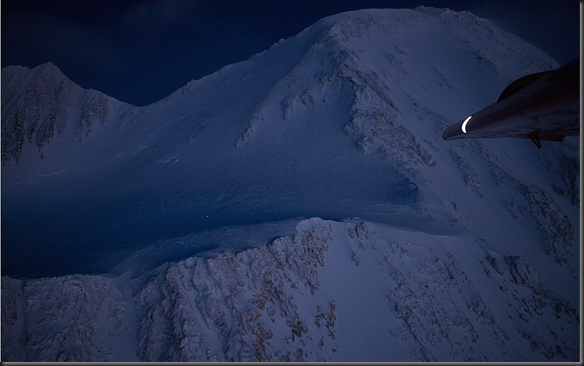
At 5:04 pm (central time) on January 11, 2015, Lonnie Dupre summated Denali, confirmed by a SPOT locator.

cc6e53_8a5b6efa0b1643e9b1e51cc667aa5a80

The above picture was taken during the descent from an airplane by John Walter Whittier. In the right corner you see the edge of the airplane wing. If you look very closely at the mountain side, you will see a white spot, which is Dupre’s headlamp as he descends from the summit in darkness.

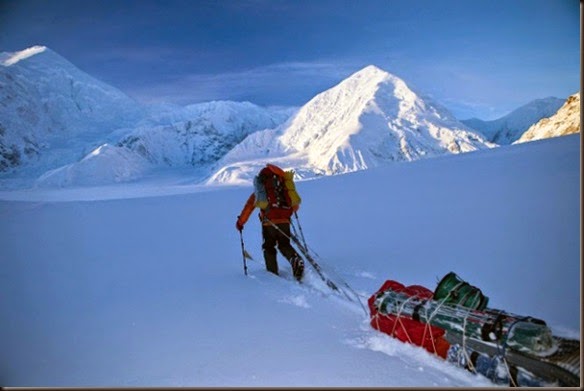
Dupre started out from base camp on December 18, 2014. On the lower elevations he pulled a sled with 165lb of supplies.

dupre-2

Once above the Kahiltna Glacier, he transitioning to packs for higher elevation.

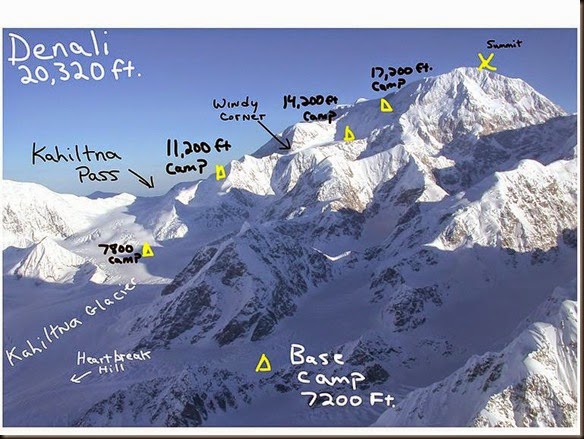
cc6e53_08825b2f7d68eed74b910c8c64dc162f

According to my count, he reached the summit of Denali 25 days after leaving base camp.

cc6e53_b37ee583e98995188330394cb40d59bf

On some of his previous attempts Dupre relied only on snow shelters rather than a tent. On this attempt I understand he carrier a Hilleberg Soulo tent, although from the pictures he has posted I’ve only seen snow shelters. He also seems to be using Granite Gear packs, Granite Gear being a sponsor.

Yesterday, January 15, 2015, Lonnie Dupre finally made it back to base camp, nearly a month after starting his attempt.

cc6e53_80c1a8d31e614d8e97427ab27c00d946

It is indeed an amazing achievement, many years in the making. You can find a more detailed account of his journey on his site here. If cold weather travel is your thing, his book Life on Ice is excellent in my opinion and well worth a look.

Tuesday, January 13, 2015

Trip Report: Taconic-Hereford Multiple Use Are 1/2/15 – 1/3/15

So, I know I’m still behind on the trip reports. This last weekend however I stayed home, dealing with the closing, so with this post I will be up to date with the trip reports.

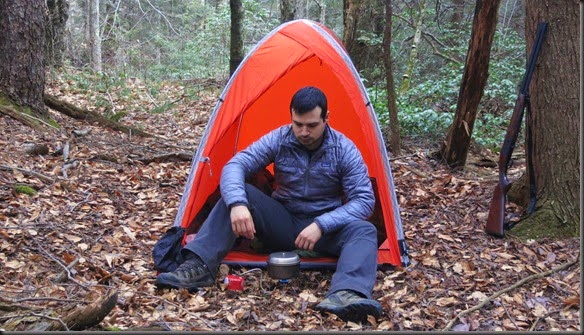
For this one I decided to try an area which had been mentioned to me by a friend of mine, but I had never visited before, the Taconic-Hereford Multiple Use Area. He had hunted there in the fall last year for squirrel with good success. I figured I would bring the rifle along and give it a try.
Copy of IMG_1469

The morning was cold. When I started out it was just barely above 10F (-12C). The weather has been continuing to fluctuate wildly, going from single digits above 0F (-18C) to nearly 32F (0C) within the span of a week. This morning it was on the cold spectrum. I hadn’t brought my facemask, so my face suffered for it. My hands didn’t fare much better, but I hate shooting with gloves.
This Multiple Use Area (MUA) seems fairly well used, and is crisscrossed by a number of trail, which I understand are logging roads. The area is still used for timber. The terrain is largely comprised of hardwoods, so any squirrel in the area wouldn’t have much room to hide.

Even so, the forest seemed dead. I didn’t see or hear a single noise, to a degree that was a bit creepy. Not only did I not spot any squirrels, I didn’t see or hear any sign of life. This is the first time I’ve had this experience. It is not unusual for me not to see anything, but usually I can hear life around me. I spent the early hours of the morning hunting, with no success. At that point I decided to put the hunting on a backburner and do some exploring. I headed east, and bushwhacked for the rest of the day, nearly traveling through the whole width of the MUA, and reaching some private forests on the other side.

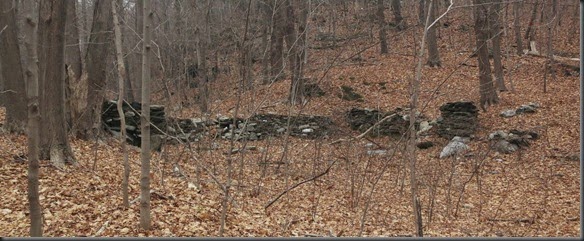
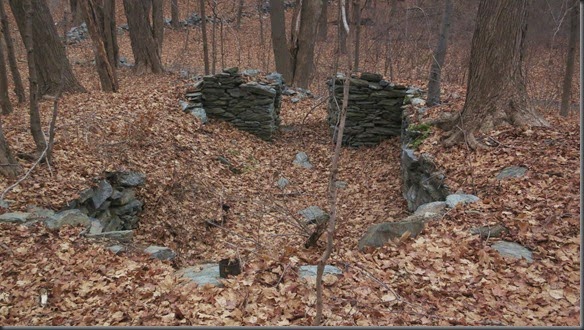
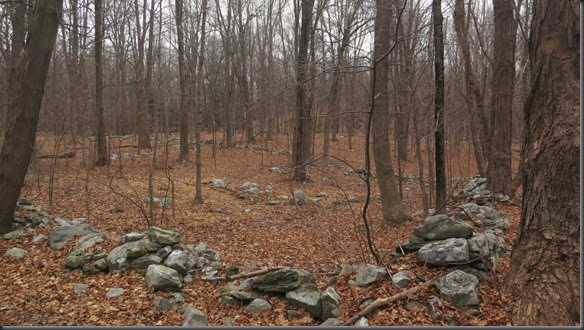
It is clear that this area was occupied at one time. The forest is littered with abandoned ruins of old houses. The long stone walls probably indicate it was used for farming. I wasn’t able to find any history of the area. 

IMG_1483

IMG_1486

IMG_1492

IMG_1500

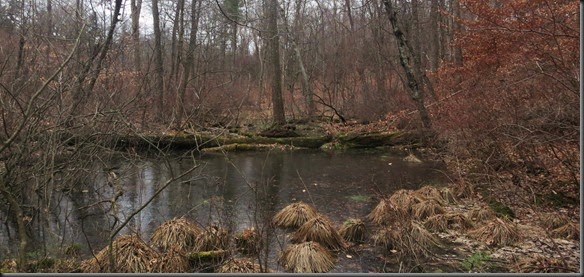
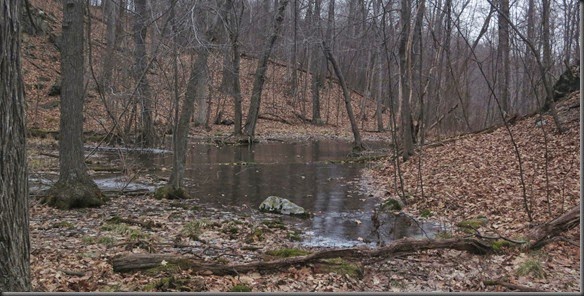
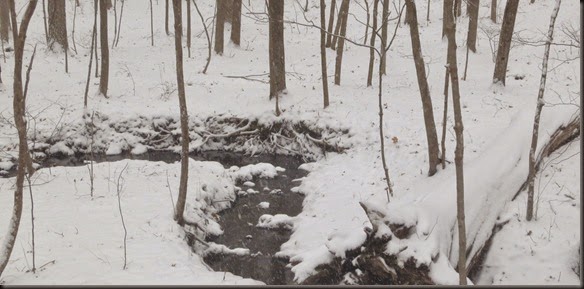
As I continued east, the forest became more dense and the remnants of old building diminished. Eventually I reached a series of small ponds.

IMG_1523

IMG_1535

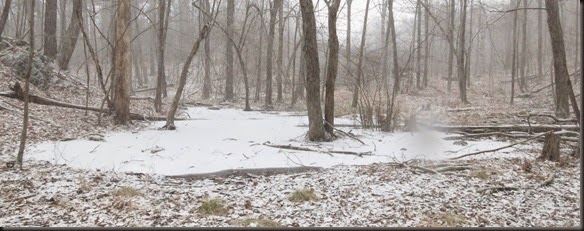
They were all covered by a thin layer of ice. It wasn’t thick enough to walk on, I imagine because of the weather being all over the place, so I had to spend some time navigating around them.

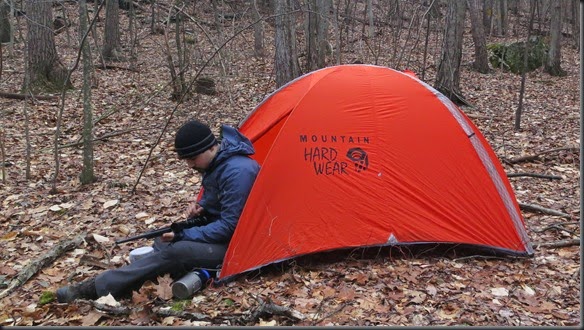
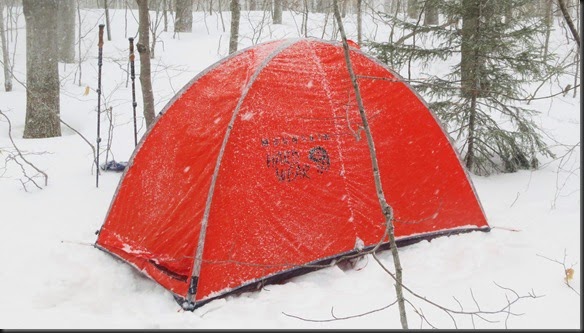
The sky was overcast all day, and around 3:30pm it started to get dark. It was also starting to snow, although it was more like ice. It would come down for a few minutes and then stop, then repeat. I decided to call it a day and around 4:00pm set up the tent on a small patch of level ground.

IMG_1550

I took some time to clean my rifle. I’ve “winterized” my guns, so I’ve removed most of the oil and lubricants. That makes them susceptible to moisture like this sporadic ice I was getting. I didn’t want to put the rifle in the tent while iced up, so I took the time to clean it. After that it was lights out. Temperature overnight was in the 5F (-15C), but I had my Western Mountaineering Antelope MF with me, so I was plenty warm.

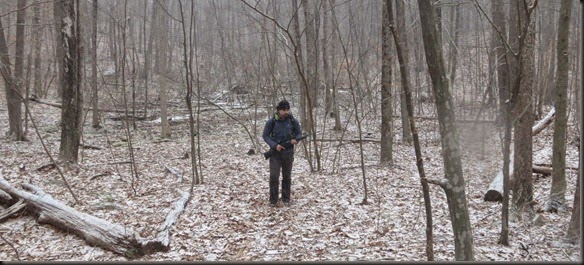
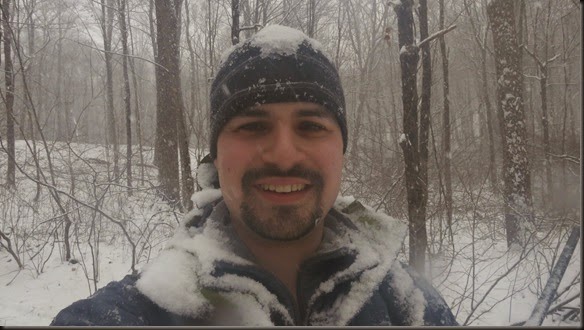
The next day I woke up to a light snow cover. It was coming down relatively hard. It is a good thing I got up early, which saved me the trouble of cleaning too much snow from my tent. I packed up and started moving. I had a full day of bushwhacking to get back.

IMG_1571

IMG_1572

The snow kept coming down for the rest of the day. Unfortunately the weather had warmed up, which made for very sticky, wet snow. It makes gear maintenance very difficult.

As I was trying to make my way back, with most of the forest features gone, I stumbled into some more ruins.

IMG_1609

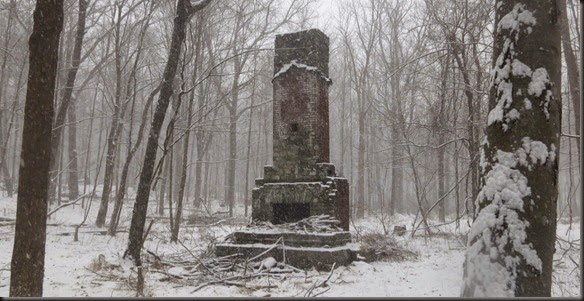
It was an old fireplace and chimney. This one was clearly newer than the other ruins I had encountered. There was some concrete used, and the bricks were well made. There was even some metal sheeting remaining where the roof once met the chimney.

The snow kept falling, and I kept chugging along.

IMG_1614

Late in the afternoon I reached a road, which I followed back to my car.

IMG_1612

I dug the car out. Usually when people ask me about winter camping, the questions revolve around sleeping in the woods. For me, that is not the hard part. The hard part is getting to the forest and then getting back home, i.e. digging the car out and getting it to a plowed road. I carry all sorts of gear in my car to assist in that task, but even so, I have found myself stranded in the woods a number of times because I couldn’t get the car out. This time fortunately I had no problems, although I drove past several serious accidents on the way home. 

Something to point out from this trip is that being lazy can get you in trouble. The way I handled the second day wasn’t too smart. To start off, I assumed that the temperature would be the same as the previous day. It wasn’t. I should have known that because while it is not unusual to be cold when you first get up, things like the fact that my nostrils weren’t freezing, and I didn’t feel any needle prickling on my face should have let me know that it was warmer. I didn’t bother to check. Even though it was warmer, I ended up wearing the same amount of insulation as the previous day. As a result I was overheated. I knew I was getting out that day, so I was too lazy to alter my layers, especially since the snow was coming down hard and I didn’t want to remove my shell in order to adjust the layers below. Forget all claims made by different manufacturers about their materials. It doesn’t matter how well something wicks moisture, or how breathable it is. If you are overheated you will sweat and you will get wet. Wicking and breathability are not a solution to overheating. This wasn’t an issue since I got out as planned, but if I had gotten stuck and had to spend another night in the woods, it would have been annoying to deal with all the damp clothing.

Friday, January 9, 2015

Mountain Hardwear Direkt 2 Tent Long Term Review

I usually don’t write much about tents. I’m not a tent guy. I don’t have or use many tents, and it’s hard for me to offer you any side by side comparisons. In all of my years camping, here are all the shelters I have used in that order: Kelty Gunnison 2 tent, DD 3m x 3m tarp, GoLite Shangri-La 5, GoLite SHangri-La 3, and now the Mountain Hardwear Direkt 2 tent. I have now been using the Direkt 2 tent for over a year, and wanted to give you some of my reasoning for choosing the tent, and my experience with it.

IMG_8573

Before I get into any details, I think it would be fair to acknowledge that the Mountain Hardwear Direkt 2 tent is designed as a pure mountaineering bivi tent. It is tiny, it is light, and it is designed to function in extreme conditions. It does not give much thought to comfort, space, or ease of use. In that respect, i.e. as a mountaineering tent, it has already secured its place and proven to be a good tent. There isn’t much I can tell you about the tent in that capacity that others have not already demonstrated much better.

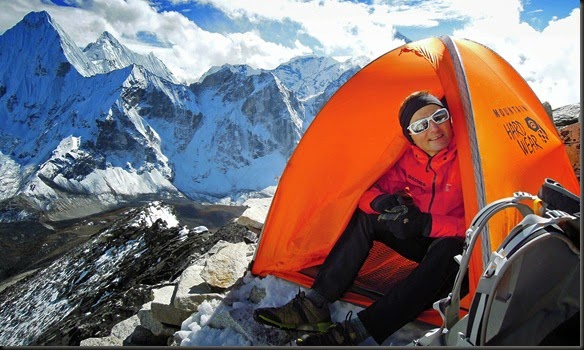
In the above picture you see Ueli Steck using the Direkt 2, the tent he carried on his solo summit of Annapurna. In fact the tent was designed by Mountain Hardwear specifically for the task. So, that’s the end of my review of the Direkt 2 as a mountaineering tent. If it’s good enough for The Swiss Machine, it’s good enough for me.

My review of the tent however is not over. That’s because I wasn’t looking for a dedicated mountaineering tent, I was looking for a ultralight four season free standing tent for year round use. In this review I want to look at the Mountain Hardwear Direkt 2 tent from exactly that perspective and share my experiences with it.

For quite some time I was very happy with the GoLite Shangri-La 3. In fact, I’m still happy with it, and I still own one. I love the room and open floor space, as well as the very low weight and volume. However, I decided to start looking for a similarly light four season free standing tent with a small footprint. The reason was that despite all of the benefits of the Shangri-La 3, it’s large foot print and need to be staked securely made it challenging to pitch under some circumstances. A small free standing tent offered the solution. This tent however would still have to be capable of year round use, and offer certain amount of livability when in the woods, at least by my standards.

When we factor in the above characteristics, i.e. light weight, small footprint, four season use, and free standing, the field very quickly gets limited to single wall mountaineering tents, particularly those used in alpines style climbing. I knew of the Mountain Hardwear Direkt 2, so that was an immediate contender. I also knew of the Black Diamond Firstlight, and some additional research lead me to the Rab Latok. Here is how they stack up:

tents

Tent Direkt 2 Firstlight Latok
Tent Fabric 30D PU coated nylon NanoShield 3 layer eVent
Weight 2lb 12oz 2lb 13oz 3lb
Height 45in 42in 31in
Length 81in 82in 87in
Width 45in 48in 47in
Cost $550 $350 $500

The Rab Latok got eliminated first. While I like the eVent construction, it is just too low to the ground. That would be ideal if you have to overnight on the slopes of Everest, but way less than ideal for year round use. I can’t imagine trying to change clothing while in the tent.

It came down to the Direkt 2 and the Firstlight. The Black Diamond Firstlight is a well tested and respected bivi tent, and comes in at a lower cost than the Direkt 2. The reason why I chose the Direkt 2 instead however is that the Firstlight is not truly waterproof. The NanoShield material which comprises the tent body is a proprietary breathable membrane. However, there are plenty of reports of it leaking when saturated with water. This of course isn’t an issue if you are climbing above tree line in freezing temperatures, but for year round use, when I can be trapped in a rain storm for several days, it makes a big difference.

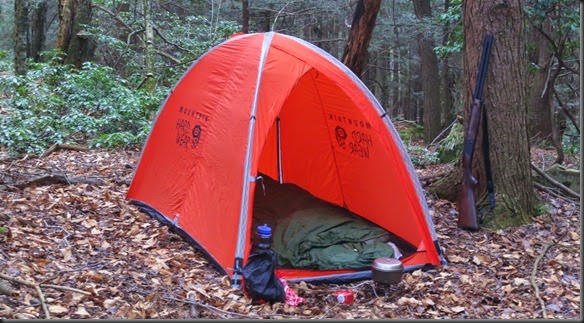
Even though I had made my decision, I held off on buying the tent because of the cost. As luck would have it, it was offered to me for testing,, and later I bought one myself from REI at a sale where it was 50% off. And so, I began testing it. My main concern was lack of space and condensation. In order to be completely waterproof, and at the same time light weight, the shell material is not breathable. Combined with the minimal ventilation of mountaineering tents, it was a real concern.

Let’s look at some details:

Size:

The tent, as expected is small. It is just long enough for me to stretch out. I’m just under 6 feet tall and when stretched out I’m almost touching the two ends of the tent. The tent is just wide enough to fit two sleeping pads (read people) next to each other. Doing that however will leave absolutely no space in the tent. If you are climbing and share a sleeping bag with your partner, that works fine, but otherwise, this is a one person tent.

Copy of IMG_8325

Copy of IMG_8417

The tent height is surprisingly good. I have no problem sitting up in it, or even kneeling, an important consideration when trying to use a pee bottle.

Copy of IMG_8360

Copy of IMG_8605

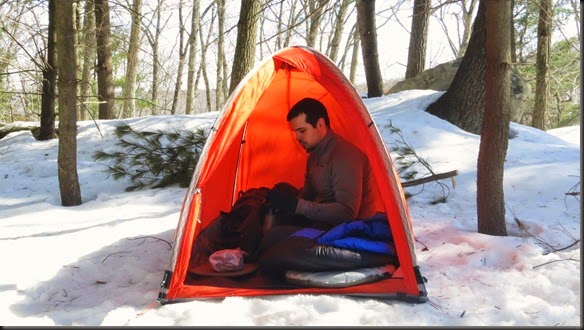
Overall I have been very happy with the tent with respect to size. It offers just enough room for one person. I can stretch out in it, I can sit up in it, and it fits all of my gear and leaves room for me to do any prep or repairs to my gear. The only downside when compared to an open floor tent is that cooking inside with a remote canister or white gas stove is very difficult and risky.

Weight and Packability:

The weight of the tent will somewhat depend on what components you bring. I use the tent just with four 8in carbon fiber stakes. Mountain Hardwear lists this minimal weight as 2lb 12oz, but on my scale, including the stuff sacks for the tent and tent poles, the weight was 2lb 11.7oz. The difference probably comes from the after market stakes I use.

If however you expect some serious weather, i.e. high speed winds above tree line, you would want to bring extra lines and stakes to really strap down the tent. In that case the weight will go up slightly.

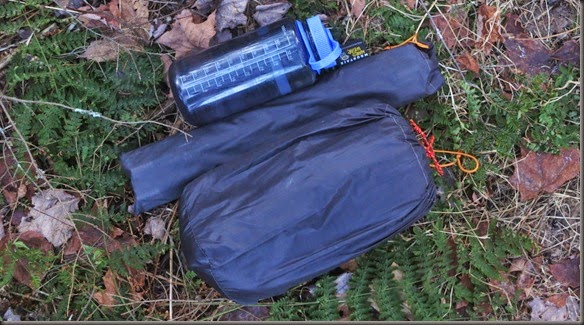
When it comes to packing it down, the tent is a little bulky, but still very portable.

IMG_1355

The tent poles and stakes come in a separate stuff sack. In the above picture you see both the tent poles and tent body next to a Nalgene bottle. I still haven’t figured out exactly how to fold the tent so that it fits well into its stuff sack. In the above picture the sides of the stuff sack can compress a lot more.

Other Features:

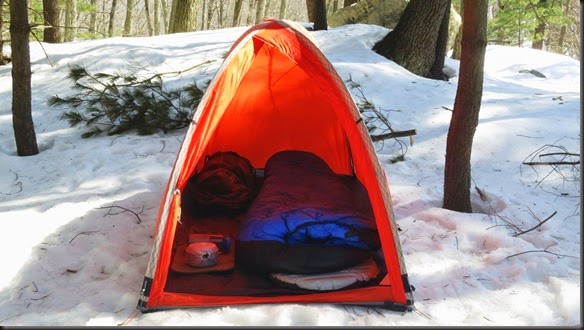
The Direkt 2 is a single wall tent. It is pitched with the use of two crossing tent poles which are placed on the inside of the tent. Since it is a free standing tent, no stakes are required, but they make the job easier and make sure the tent doesn’t fly away while empty. The white patch you see in the picture below is snow, not light. The tent is fully enclosed.

IMG_8391

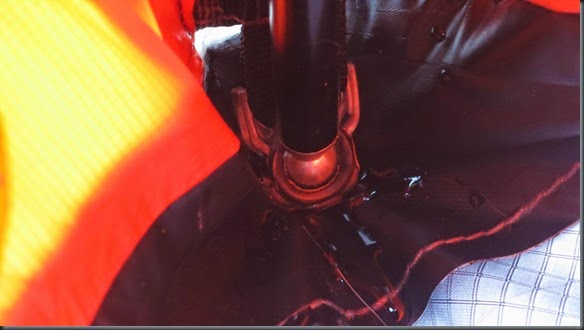
A clever system of snaps holds the ends of the tent poles in place. This largely eliminates the risk of puncturing the tent body. The poles are then held onto the tent with Velcro closures. In order to give you a mountaineering tent that can stand up to severe weather while only using two poles, the pole system is extremely stiff. The entire time the poles operate just under breaking capacity in order to provide the required rigidity.

While the system works, and the tent feels solid, actually getting the poles into position is an extreme challenge. After a while you’ll figure out a few tricks which will help you do it, but there is no way to make the process easy (at least one that I have discovered).

The tent has one door, which is held open with a strap, and has zippers along the bottom and side in order to fully secure the door.

IMG_8382

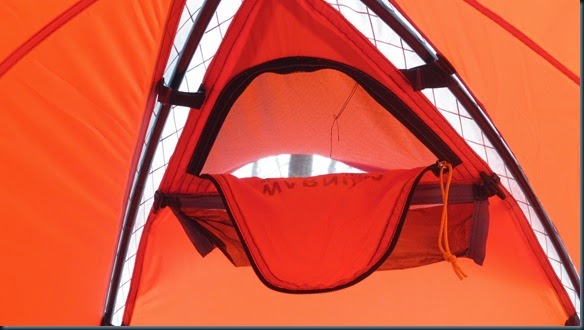
Opposite the door, there is a small ventilation flap, the only ventilation point for the tent other than the door. Otherwise the tent is completely sealed.

IMG_8398

The vent is covered by mosquito netting and can be zipped closed. If you need to get any more serious ventilation going, you have to unzip the top of the door, which provides a similar vent point. If you are in the tent with another person cooking, one person can breathe through this vent while the other breathes through the door opening.

Under the vent is a small removable mesh pocket. It is not much use, so I removed it on my tent. There are no other storage compartments in the tent.

Livability:

Overall, the tent has been great for my purposes. It is exactly what I was looking for. It is relatively light, and very light for a free standing four season tent. It has a small footprint, but is large enough for me to use it comfortably.

IMG_9708

IMG_9936

IMG_8954

The big surprise for me was the lack of condensation. I was expecting to be drenched in water after every use of the tent, but a year into using it in just about every imaginable weather, I have not experienced any noticeable condensation. I always keep the ventilation flap open, and I imagine I have gotten very lucky, but so far I have not had any condensation in the tent. That is pretty spectacular for a single wall bivi tent. 

IMG_8968

IMG_8755

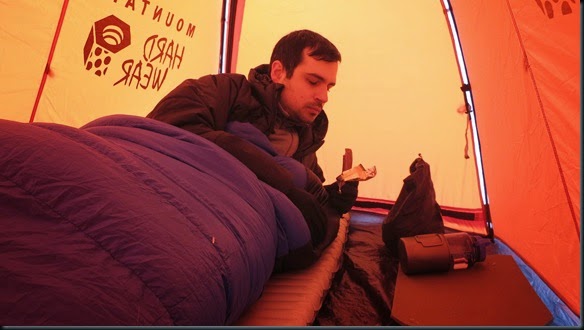
Even though I have not had any condensation, the tent provides a surprising amount of warmth. The space is small and enclosed enough that it definitely provides for some dead air space. With the wind completely shut out, sleeping in the tent has been very comfortable. 

IMG_8642 

IMG_0969[3]

As designed, the tent is minimal in every aspect. Even the one tiny storage compartment is removable. Everything else is pure function.

IMG_1550

There is a surprising amount of light that comes into the tent, largely through the transparent material where the tent poles are held in place. The orange color is pleasant when in the tent, although when you come out of it the world seems a bit bland from a color perspective.

The one and only downside I have experienced with the Mountain Hardwear Direkt 2 tent is the pole system. It is just too hard to pitch. I can not imagine successfully doing it with frozen fingers. I understand that this is due to the requirements put on the system. It is very hard to make a mountaineering tent using just two poles, and as a result they need to be pushed to the limit. I don’t see a good solution to it, but it is problematic.

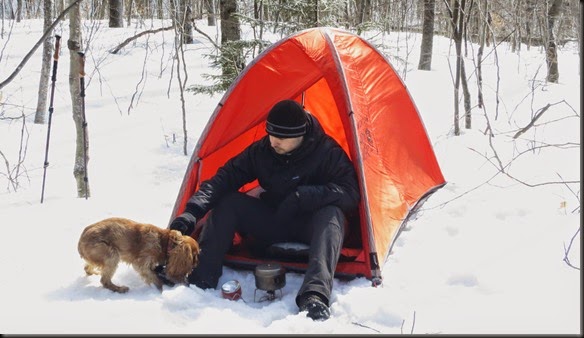
Less of a problem, and more of a preference issue, I don’t like that my ability to cook inside the tent is limited. It can be done, but you either need a canister mounted stove, a platform, or a hanging stove in order to do it. Sitting in the doorway with the stove just outside is my preferred method, but it is not a good option if the weather is particularly bad. Of course, this is an issue for all fully enclosed tents without vestibules.

Conclusion:

The Mountain Hardwear Direkt 2 is definitely not for everyone. It was designed to be a mountaineering bivi tent, and it excels in that role. If you are searching for comfort or multitude of features, this is not the right tent for you.

If however you are looking for a small, lightweight tent, that has been stripped of anything not absolutely necessary, and are interested in being able to use the tent year round, then the Direkt 2 is worth a look. It has performed very well for me. I have used it from warm Summer nights, to Fall hunting trips, to Winter outings, and it hasn’t let me down.

Tuesday, January 6, 2015

Ultimate Survival Alaska Season 3: Same Drama, Different Format

This past Sunday, we saw the return of Ultimate Survival Alaska on the National Geographic Channel for a third season. This post just reflects my thoughts on what I saw, for what it’s worth.

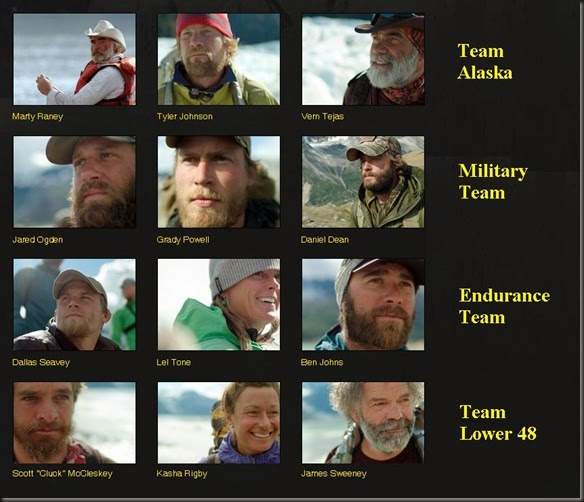
2088849_team-endurance_4k7oqxm7si267hl7ucplbjkdsxcj7vq7fo25elzxyug5jje2fdsq_610x343

Initially I was a big fan of the show, or more precisely of the idea of the show. Too many of the current survival shows are just scripted nonsense, teaching skills which while entertaining are largely inapplicable in a real survival situation, let alone general time spent in the wilderness. That is why I was excited when Ultimate Survival Alaska first went into production. The way the show was described to me was that it would have a group of people who had to travel through the wilderness to achieve an objective while carrying all of the gear they would need for the whole journey on their backs, having only minimal food. I though the emphasis on mobility, carrying your own gear, and lack of competition would demonstrate some actually usable skills and gear selection methodology.

The show however quickly devolved into a staged competition between teams. The gear people carried kept changing from episode to episode, and the producers were working over time to create drama, with every slip and stumble being set to dramatic music and cut half way as a transition into a commercial brake. On top of that the teams were clearly pushed to perform certain “exciting” tasks each episode. Somehow, no matter where they traveled, they would have to repel off something or climb something, even if it was the worse option available.

So, we are now back for season three. On the upside, the show has stopped pretending to have anything to do with survival. The concept was put on back burner last season when the show was turned into an adventure race, but this season it is not even mentioned. This season is purely a race between four teams. It’s not what I hoped the show would be, but at least there is less pretending. On the down side, the same over the top drama and staged antics persist.

Ultimate Survival Alaska

You can see this season’s teams in the above picture. One of the aspects about this show that I still like is that all of the team members are experienced outdoorsmen. In a surprising turn for such shows, all of the participants have serious credentials under their belts.

This season the competition again seems to be between Team Endurance and the Military Team, which were minutes apart from each other during the first two stages of the race. Team Alaska has three very experienced mountaineers on it, but Marty Raney just doesn’t seem to have enough in his battery to keep up and make the team competitive. He adds a lot of character to the show, along with some bizarre gear choices, but poor gear selection along with too many miles under his belt make him the team’s boat anchor. Lastly, Team Lower 48 seems to serve no other function so far than to embarrass the lower 48 states. Team member James Sweeney seems to have serious anger management issues, or possible some type of substance abuse problem, and just about every scene featuring the team is composed of him being an all around poor example of a human being.

The most interesting part of the show for me was seeing this season’s gear selection. While in prior seasons the teams were more diverse, this season the gear choices seem to have converged, possibly because we have so many returning contestants who have already figured out what works and what doesn’t.

Everyone wore mountaineering boots. I saw a few Nepal Evos and Baturas and a pair of plastic boots. Everyone seemed to have a pair of ice tools, and the military team was heavily loaded with commercially available gear, from packs to clothing. The only outlier was again, Marty Raney, sporting a wooden pack frame complete with a gold sifting pan hanging from the back. Luckily when it came time to actually ski, he got rid of the pair of old wooden skis he had sticking from his pack and put on the functional pair that was provided.

Anyway, still a fun show to watch. I look forward to seeing who wins.

Sunday, January 4, 2015

Trip Report: New Year’s Eve In The Woods 12/30/14–12/31/14

Hey guys. I know it’s been  while since my last post. My intention was to at least put up some of my trip reports, but I’m behind even on those. Here is my trip report for a short outing I did during the last days of the year:

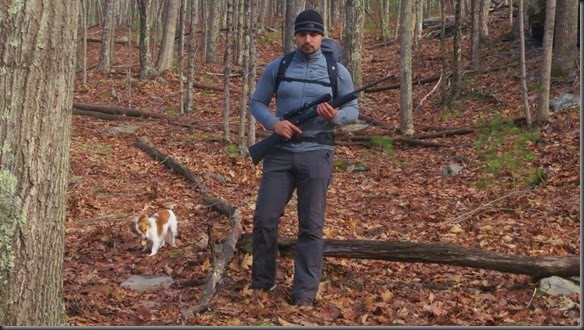
During my previous trip, I did some exploring in the Vernooy Kill State Forest. I decided to go back there again. Initially I as going to try my luck at squirrel hunting again, but I spoke to a guy who told me there was some good hedgehog hunting country there. Here in NY hedgehogs are not protected, so we can hunt them year round. I just hadn’t seen any great habitat for them. I figured I would give it a try.

IMG_1198 - Copy

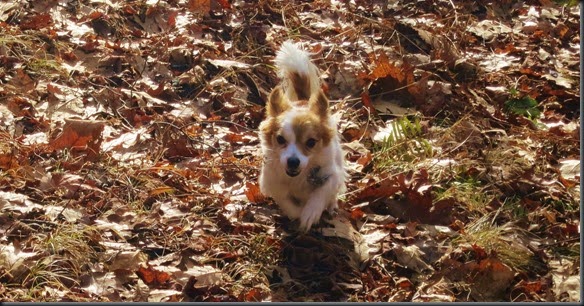
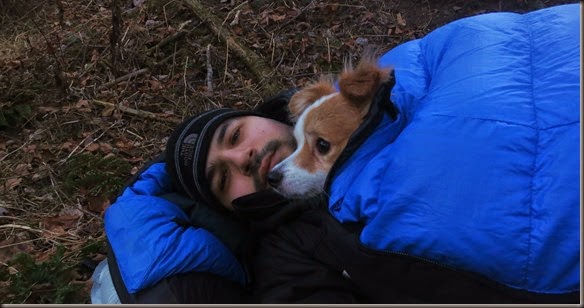
What’s that next to me? That’s my other dog, Dexter.

IMG_1176 - Copy

I usually don’t bring him out with me because he doesn’t like the woods much. I adopted hi when he was older, so he never got used to it.

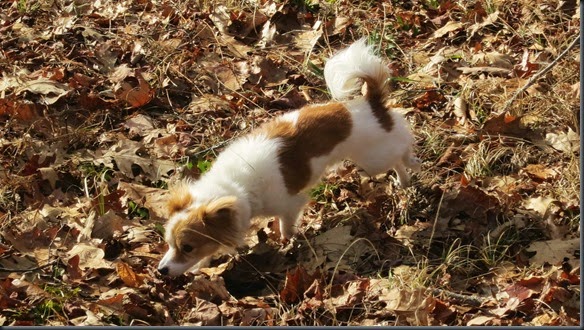
That being said, he does have some characteristics which would make him a good dog for the woods. He has a great sense of smell, and is good at following scents. He is also good at retrieving. My hope on this trip was that he would run around and flush out whatever may be hiding in the woods. It wouldn’t be great for hunting, but it would be interesting to see what he could do.

So… he put all of his skills to work, and as expected, started picking up scents. Unexpectedly however, his favorite scent to follow turned out to be deer scat. Apparently it reminds him of dog food. He would sniff it out and find it without fail. Not much use considering I can’t hunt deer with dogs here in NY, but very amusing.

IMG_1174

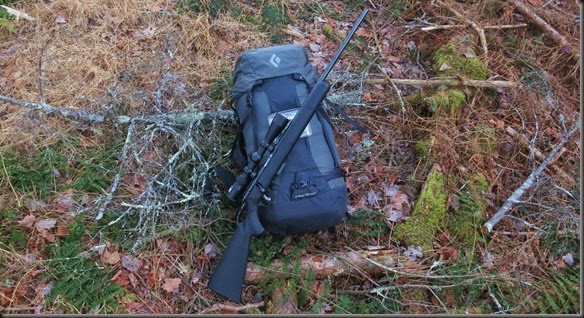
This time around I brought my rifle, the Savage 93R17. Last time I was short on range with the shotgun, so I thought the rife would be a better option, as was recommended by a reader.

IMG_1377

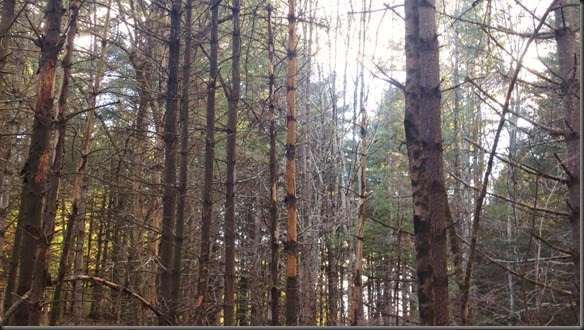
Most of the first day was spent walking through the woods, searching for the area where I was told there could be porcupine. The guy who told me about it had reached it by using a 4x4 partway, but since there was no way my car could make it there, I had to hike my way there.

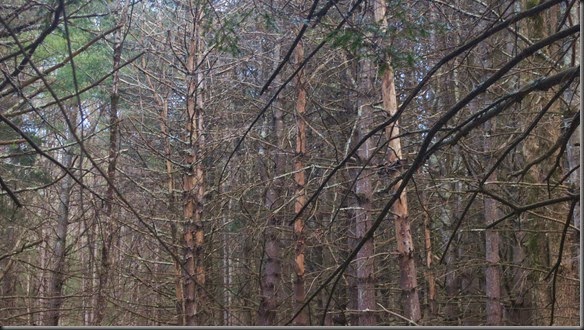
Towards the early afternoon I found an area which I though was promising, and then shortly after another one.

IMG_1301

IMG_1308

I stayed in the area for a little over an hour. I didn’t see or hear any movement. Perhaps that’s not too surprising with Dexter doing his best to find every pile of deer poop in the area.

It gets dark in the forest around 4:30 pm. It was getting close to that time. Without much warning the temperature just plummeted. The weather had been nice most of the day, hovering just under freezing. Within minutes however, it fell to about 15F (-9C). Dexter had a very hard time dealing with the cold. I’m used to backpacking with Rhea, who is a bit larger and can deal much better with the cold, but Dexter wasn’t having any of it.

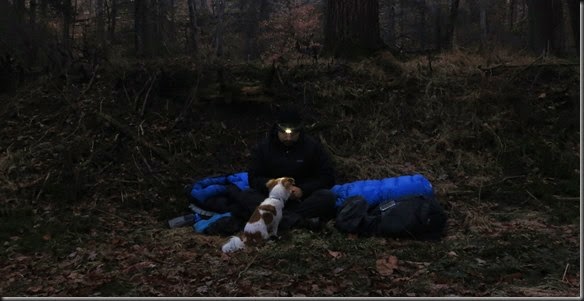
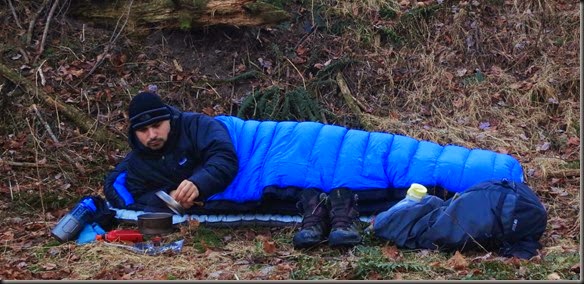
I quickly found a sheltered spot and set up camp for the night. With the temperatures what they were, there was no chance of rain, so I didn’t bother with the tent. In fact, I didn’t bother with much else either. I ate, fed Dexter, and we jumped into the sleeping bag.

IMG_1332

The night was relatively cold, about 10F (-12C). We were perfectly fine in the Western Mountaineering Antelope MF sleeping bag. We woke up shortly after sunrise.

IMG_1337

The previous evening I just ate dry food. For breakfast I cooked up what would have been my dinner.

IMG_1347

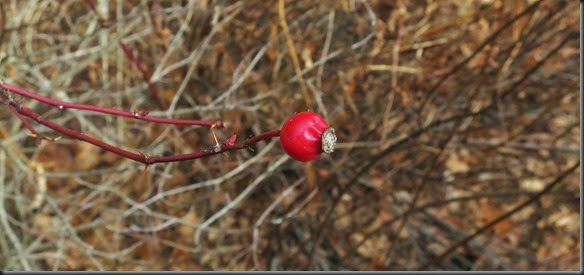
I had gathered some rose hips the previous day. Clearly it’s past the season, but there were still some let.

IMG_1437

I used them to make some tea, which wasn’t very good. I usually like to let them boil for a long time to make good tea. Simply bringing the water to a boil doesn’t do much good. Back home we used to dry them out and store them to use during the winter.

We ate, packed up, and started to make our way back to the area where I had seen porcupine sign. Unfortunately t was still very cold, with the temperature still being in the teens. Walking around wasn’t a problem, but whenever I would slow down or stop in order to hunt, Dexter would start freezing.

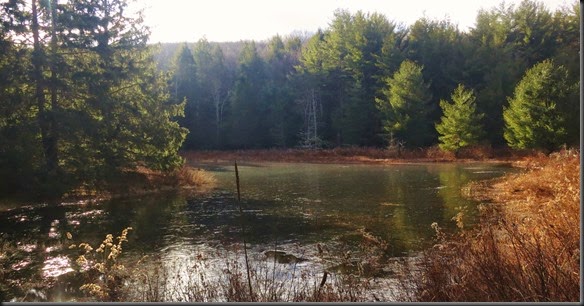
After a while I abandoned my hunting pursuits and decided to explore the are some more. During my last trip to the area, I had bushwhacked to a lake. This time around, during my searching for porcupine, I saw a road that paralleled the river on the North side that I had followed to the lake. I decided to follow it and see where it went.

The road ended rather abruptly shortly after the lake. It didn’t seem to lead to anything in particular. It does however offer an easier way to the lake, even though some bushwhacking is still required.

IMG_1431

Even though the road ended, there was a small foot path that continued into the mountain. None of this is marked on any maps, and I don’t see where the trail would lead, but I decided to follow it. It just followed the route of the rive, now stream.

IMG_1422

I followed the trail for over an hour, and it just kept going. I still have no idea where. Early in the afternoon I decided to start making my way back. If I wasn’t home by midnight my car would turn back into a pumpkin.

IMG_1406

Dexter was very happy to be back in the car. Clearly this is not the activity for him.

The biodiversity in the area seems very good. It is much better than most other parts of the Catskills I’ve seen. I’ll be back here again for sure.