About two years ago I did a series titles A Beginner’s Guide to Camping and Bushcraft. It was intended to give a basic explanation about how to get started with camping and bushcraft if you were trying to figure it out on your own. You can read the series here:
Quite a bit of time has passed since I did the series, and I keep getting a lot of questions about both affordable and beginner gear. So, I figured I would write an updated list for what I consider good beginner gear that will not brake the bank. Most of it will repeat what was provided in the above series, but I will make a few changes and updates.
There are a few things you should keep in mind when reading this post.
First, this is intended to cover only three season gear. By that I mean, gear that you can use in temperatures down to about 32F (0C). While most of the same gear will be equally applicable to winter camping, some changes will have to be made.
Second, the gear recommendations I am providing here focus on commercially available options. By that I mean gear that anyone can find and buy at major retainers. You can certainly find cheaper gear if you search through army surplus stores, or get it from friends and family, but here I am going to deal only with gear that everyone can find with equal ease.
Third, my recommendations here are designed to get you a complete set of gear, which will allow you to comfortably backpack and do bushcraft in the normal conditions you are likely to encounter in the woods. This is not a “survival” gear list, it is not a “look how little gear I can get away with” list, and it is certainly not a “look, I am so trendy” list. The gear listed here will give you general backpacking and bushcraft gear that will allow you to spend time in the woods without drawing any special attention to yourself.
Fourth, in this post I am trying to keep the cost of the gear to a minimum. After all, when you are first starting out, you don’t want to shell out the big bucks.
All that being said, let’s get to the gear!
Clothing:
I know, I know, boring! Let’s get to the knives and pots…we will. First though, we have to cover the most important part, the clothing. Your clothing is what will keep you warm and dry, and in the event you have an emergency, your clothing is what’s going to keep you alive through the night.
Avoid buying clothing based on ridiculously sounding claims. This material keeps you warm when wet, this material is both completely breathable and completely waterproof, this material is fire proof, etc. All of those claims have a small grain of truth behind them, but are ridiculously exaggerated. Most materials and designs will work fine for our purposes. The only material that is generally avoided when out in the woods is cotton. It dries very slowly, and is not particularly warm when wet, although in my experience, no material is warm when wet. That being said, the general wisdom is to avoid cotton clothing when possible.
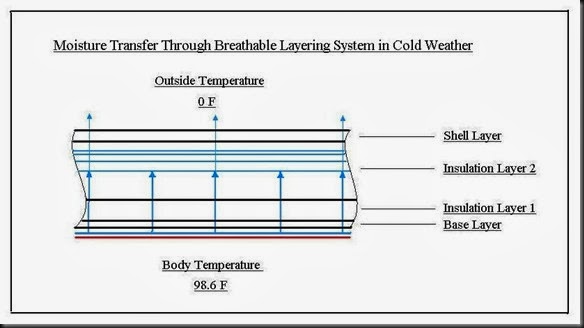
You should approach your clothing as a system of layers. Layering with several thing garments rather than one thick one will allow you to better thermally regulate, so you don’t get cold or overheated. Each layer has a function that it needs to perform.
Base Layer-This layer of clothing is the one directly against your skin. It should be of material that wicks away sweat from your body. Keeping cost in mind, your best bet here is a simple synthetic (polyester) t-shirt. Technically it would be great if you could find synthetic underwear, but I have done fine with regular cotton ones for many years now. A synthetic t-shirt, or one that is a mixture of synthetic and cotton fibers (try to look for something that is more that 50% synthetic) work well, and should cost you no more that $5. Target has a great brand, C9 by Champion, which has great cheap clothing for this purpose.
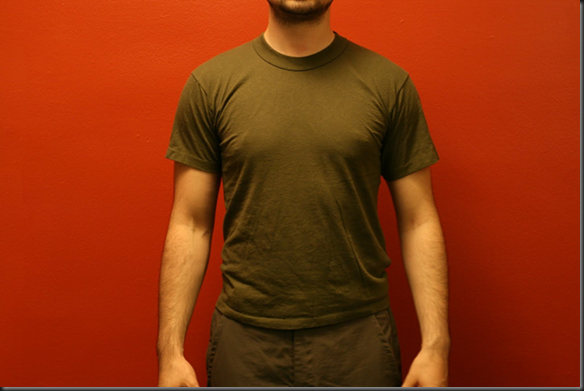
Mid Layer-First, the pants. Your best value for the money is a pair of cargo pants that is more than 50% synthetic. You can find them in most department stores, and in many military surplus stores (new, not surplus). They should cost you about $20.
For the upper body I like to split it into two clothing items. I may carry one or both of them depending on the time of the year. Here we are again looking at synthetic clothing. The lower mid layer should be something that fits well and is not too bulky like a thin fleece. A long sleeve synthetic shirt will also do well in this role, and in fact would be preferable in hot environments.
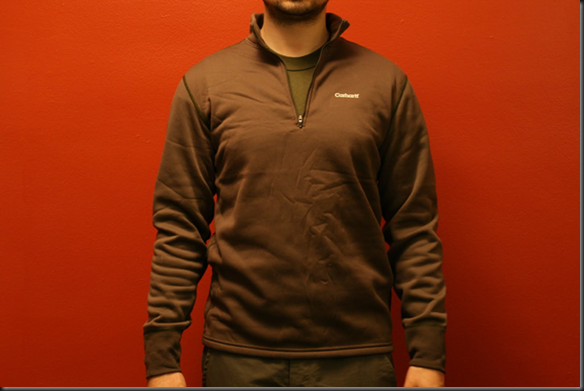
For the upper mid layer thicker fleece works great. It will keep you warm, and you can find good fleece clothing for $20 or $30 at any Wal-Mart. If you have a wool sweater it will work as well.
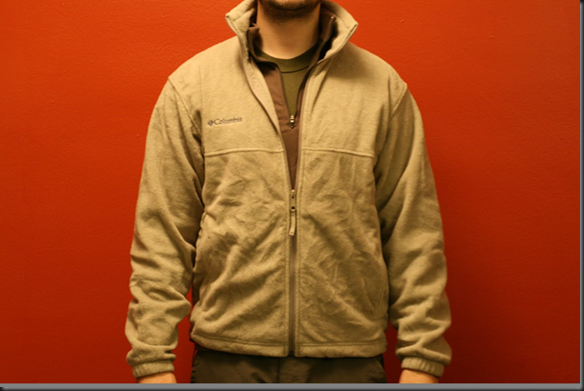
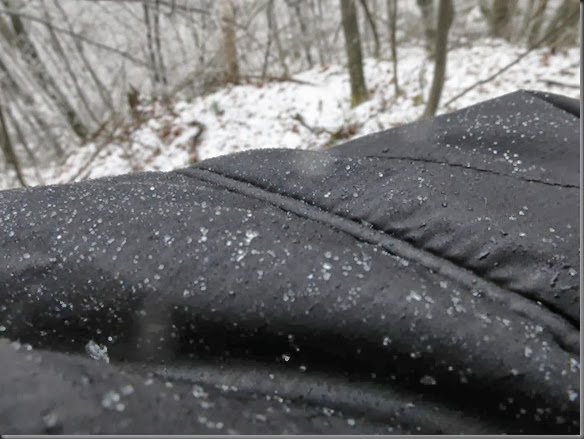
Shell Layer-Keep in mind that fleece does little to stop the wind from cutting through it. A shell layer will stop both the wind, and will protect you from the rain. For this I like a simple nylon jacket. The jacket should have no insulation, as this is provided by the mid layer. A simple nylon jacket should cost less than $30. I bought mine at an Army surplus store, even though it was a commercially made model. C9 by Champion, available at Target, also has some great jackets of this design for under $30. Some people like to carry rain pants as well, but I have managed to go without them so far. A poncho is also a good shell against rain, but the reason why I prefer the jacket is that the jacket can be used as wind protection and to add warmth. A poncho is however, a very good alternative and will cost you about the same.

Socks-Some good wool socks will go a long way towards making your hike more comfortable. They do not need to be 100% wool, nor do they need to be any special type of wool. You should be able to get a three pack for about $20. If you go to an Army surplus store, you can find Army issue new ones for much less.
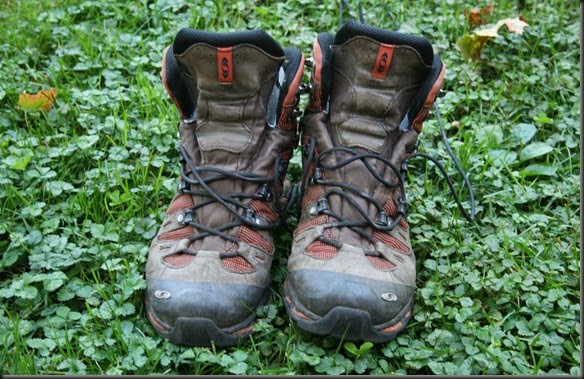
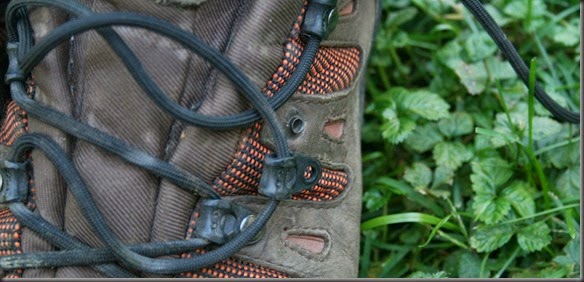
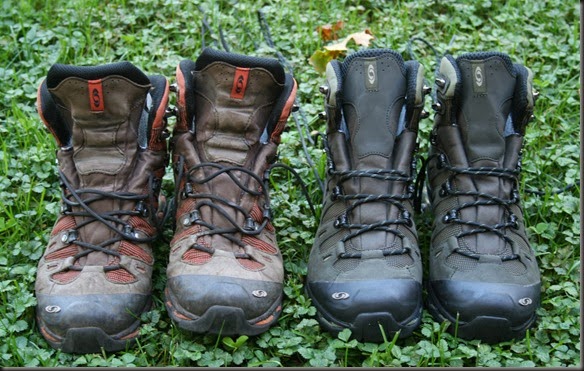
Boots-A good pair of boots can make a trip much more enjoyable. That being said however, good booths are expensive, and it is hard to know what type will work for you until you actually do quite a bit of walking in the woods. For example, I have come to like boots with flexible, but thick soles. That is because I carry fairly light loads, which eliminates the need for a stiff sole, but I backpack in very rocky and rough terrain, which requires the thick soles, so I don’t feel every stone. You will figure out what works for you after you spend some time walking with all your gear. I would not spend $150 on shoes before then. A pair of running shoes, or a pair of comfortable work boots will do just fine for now.
Backpack:
Alright, here comes the gear! One of the most important pieces to consider is the backpack. After all, for most of the day, it will contain all of your other gear. It can make the difference between you being bale to cover 10 miles in a day, or two. Nothing will limit your mobility faster than a poorly designed backpack. Unfortunately, most backpacks cost quite a bit of money. I would hold off on buying one until you have finalized your other gear. What you carry will significantly effect what type of pack you want to get. There are however a few packs currently on the market which I think will function very well.
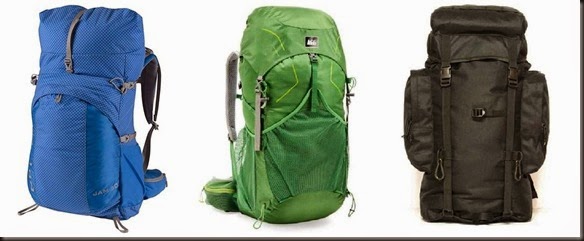
The first is the GoLite Jam 50. It is a 50L pack, which should be more than enough if you keep the rest of your gear buying in check. It weighs 1lb 14oz, and costs about $110. The GoLite Jam doesn’t have a frame, so weight transfer is not the best, but it does have a solid construction and will be comfortable for the weight we are discussing here.
The second pack is the REI Flash 45. It is a 45L pack. It weight 2lb 2oz and costs about $130. The Flash 45 has an internal frame, which I find to be more than enough for the weights it is likely to carry. I have the Flash 62 version, which turned out to be too large for me, but the liked the design very much.
The third option is for those who are really trying to cut the cost. Many people resort to the military surplus ALICE packs. While they do the job, there is a better pack you can find in many stores, including most military surplus stores or simply by doing an online search. It is the Rio Grande 45L Backpack. It is being currently produced, so it’s not surplus and costs about $30-$40. It can be purchased just about anywhere online. It is made from thick nylon, and has a rubberized coating on the inside. It has straps in the front which can hold your sleeping pad. The Rio Grande 45 weighs 2lb 6oz. The pack has no frame, but I find it rigid enough not to need one for the types of gear we are discussing here.
| Item | Weight | Cost |
| GoLite Jam 50 | 1lb 14oz (30oz) | $110.00 |
| REI Flash 45 | 2lb 2oz (34oz) | $130.00 |
| Rio Grande 45 | 2lb 6oz (38oz) | $30.00 |
The above options should give you a pack for any budget. My choice would be the REI Flash 45. It is large enough, can carry loads well, it’s lightweight, and at a very good price for what it offers. My advise is that you should spend your money where it makes the biggest difference. The backpack is one of those areas. The grind angle on your knife makes little difference to your time in the woods. The type of backpack you use makes a huge difference.
Shelter System:
Your shelter system is of crucial importance. Nothing will make you have the woods more than having to suffer with poor shelter. Your rain cover (tarp or tent), your sleeping bag, and your sleeping pad should be given much thought.
Tarp-If you want to save money, I am afraid that a tent is out of the picture. A decent backpackable tent is already in the $100 range. There are some cheaper ones, but they are too heavy for backpacking. The solution is a reasonably priced tarp. I say reasonably priced because there are some you can find in hardware stored for $10. I would stay away from them. While you can do just fine with such a tarp, they are heavy and loud once put up. By the second trip you would have already bought a new tarp, making that $10 a waste. By buying a reasonably priced one of good quality, you can use it for a long time. The lowest cost one I have been able to find is the Equinox (Campmor) 8x10 Nylon Tarp. It will cost you about $40. It is by no means a top of the line tarp, but it will do the job admirably. In the picture above, it is being held together by two rubber bands. You should also bring a regular plastic bag in which to wrap it when it gets wet.

There are also several ways to pitch a tarp that will create a tent-like feeling. If however you insist on a tent, there are decent options in the $100 range. Of course as with most other backpacking gear, you will pay for the low cost with higher weight and bulk. The Kelty Salida 2 is a good choice, which will cost you $160.00 and weigh about 4lb 8oz. Many manufacturers have tent option in that price range with similar weights.
Often people bring what is called bivi bags in addition to the above shelter option, especially when using a tarp. A bivi bag serves as an outer shell for your sleeping bag to protect it from rain and snow that may get under the tarp. I find that they are not necessary if you use a good size tarp. They add unnecessary weight and trap moisture inside the sleeping bag. With a large tarp like the one listed above, and when properly pitched, you will do fine without a bivi.
Sleeping Bag-The sleeping bag is one of the most important pieces of equipment that you will carry, as it is your primary shelter. It is the sleeping bag that will keep you warm without the need for a fire, and keep out the wind. All the other shelter components are just there to supplement the sleeping bag. You may have seen people recommend wool blankets as a low cost alternative for a sleeping bag, but that is not a viable option unless the weather is very warm. For the weight, wool blankets provide low amount of insulation. To match the insulation you can achieve with a 3lb synthetic sleeping bag, you will need over 10lb of wool blankets. You will also note that once you get that many wool blankets, they turn out to not be a cheaper option.
Unfortunately, there is no extremely low cost way to get around a sleeping bag if you plan on backpacking with it. There are however lower cost options. To begin with, avoid rectangular sleeping bags. While they are comfortable and often cheap, they do not provide the best insulation. You should look for what is called a mummy style bag, which will fit close to your body and preserve the most heat.
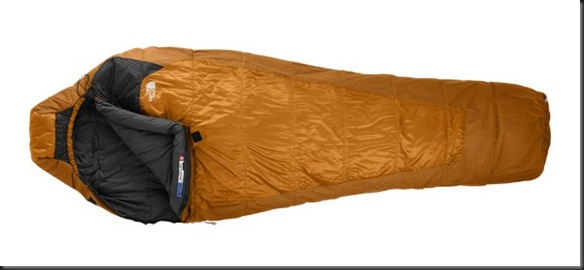
The shape aside, when looking at sleeping bags, you will notice two main types. One type uses synthetic insulation, while the other uses down insulation. Each type has benefits and problems, but the largest benefit we are concerned with here is the cost. Synthetic bags typically have an advantage in this category, especially when looking at top of the line products, but tend to weigh more. Keep in mind however, that not all down bags are made equal. Down bags are rated by “fill”. A 900 fill down bag is top of the line and will cost accordingly, while a 500 fill down one, while providing the same insulation, is not nearly as good in terms of weight and compressibility, and as a result can cost quite a bit less. In the end, we can find bags of both designs in the $100 price range, but they will have similar weight and compressibility. Which one will suit you best is up to you and is beyond the scope of this post. I think you will do fine with either one.
For three season backpacking, I would aim for a 20 degree synthetic or low fill down mummy sleeping bag. That should cover about all of your needs. Keep in mind that some people get colder more easily than others, so if you know you get cold easily, take that into consideration. Some good lower cost designs include the North Face Cat’s Meow, which costs about $150 and weight 2lb 10oz. Another good option is the Kelty Cosmic Down 20. It weighs 2lb 7oz and costs about $160. The Marmot Tristles 30 is a heavier option at 3lb 7oz, but costs around $100. Most manufacturers like Marmot, Kelty, Rab, etc, will offer good quality sleeping bags with similar characteristics and price points.
Another option that gets mentioned a lot is the US Army Modular Sleep System (MSS). I used one for a long time. If I had to do it over again, I would have just bought regular non-surplus sleeping bags. The MSS is not that much cheaper, and at this point is outdated technology. You can find warmer, lighter sleeping bags in the same temperature rating for the same money.
I know that with many of these items there is a temptation to want to move “up” to the next level in quality. My opinion is that the only place where you will see a significant increase in performance by doing that is with the sleeping bag. So, instead of buying that $30 knife, or the $15 water bottle, or the $65 tarp, take all that money and put it towards a better sleeping bag. It is well worth the investment.
Sleeping Pad-You may have heard that a sleeping bag does not provide any insulation under your body because the fibers get compressed by the weight of your body. That is only partially true. A sleeping bag provides a good amount of insulation under your body. Even so, you will want some sort of a sleeping pad. This will make the ground more comfortable, and will provide additional insulation from the ground and moisture. There are a number of inflatable pads out there, but if you want the best performance for the money, go with a simple closed cell foam pad. The Thermarest Ridge Rest SOLite is a good example, that will cost you under $20. If you want to look online at Army surplus equipment, the surplus sleeping pads are very good value at about $5. There is a commercially available equivalent-the Blue Foam Pad, which will cost you just under $20.
Rope-In order to set up your tarp, and performs some general tasks around camp, you will need some rope. A good option is paracord. It is very strong, while being fairly thin. You can buy 100ft for about $4 at any outdoor supply store. Keep one long length (at least 50ft) to use as a ridge line for your tarp, and then about six fifteen foot lengths for the sides of the tarp. You should have a few extra lengths as well.
| Item | Weight | Cost |
| Tarp | 1lb 9oz (25oz) | $40 |
| Sleeping Bag (Kelty Cosmic Down 20) | 2lb 7oz (39oz) | $160 |
| Sleeping Pad (Blue Foam Pad) | 14oz | $20 |
| Rope (150 ft) | 12oz | $8 |
| Total | 5lb 10oz (90oz) | $228.00 |
Cooking Equipment:
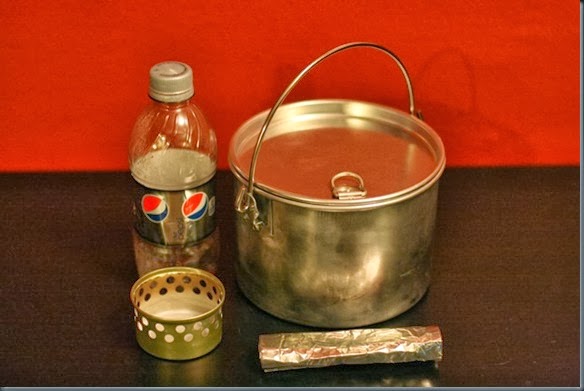
Pot-When you start staying out overnight, you will want to start cooking some of your food. Here I am talking about things like Ramen noodles and rice. For that you will need a pot. I believe that the best balance between cost, low weight, and performance is achieved by aluminum pots. My favorite one in this category is the Open Country 2 Qt. Aluminum Pot. It cost $10.
If you need an extra container, a plastic Ziploc container works very well, and will let you store any left over food.
Stove-After you have been out in the woods for some time, assuming you practice, you will become accustomed to cooing your food on an open fire. Until then though, and even after that as a back up, it is good to have a small stove. There are many options and designs out there, but for three season backpacking, if interested in keeping the cost down, I would go with the Super Cat Alcohol Stove. You can make it out of a cat food can using just a hole punch. The can will cost you $1, and the hole punch $1.50 as Staples. It is a lightweight and easy to use option. Don’t forget to bring a simple windscreen made out of aluminum foil. It will significantly increase the efficiency of your stove.
You will need to carry some denatured alcohol as a fuel. I like the S-L-X Denatured Alcohol, which you can find at any hardware store. You can get a quart of the fuel for $5. To carry it, get a bottle that is around 10oz. I use a small Pepsi bottle which is 10oz (smaller than the regular bottle). The bottle of Pepsi will cost you an extra $1.
Don’t forget to bring a spoon. The is the one object for which I will not give you a price, because I know all of you have a spoon somewhere in the house.
| Item | Weight | Cost |
| Pot | 7.7oz | $10.00 |
| Stove (Super Cat) | 0.2oz | $3.00 |
| Windscreen (aluminum foil) | 0.5oz | $0 |
| Spoon (regular table spoon) | 1.4oz | $0 |
| Fuel Bottle | 0.7oz | $1.00 |
| Bandana | 1oz | $1.00 |
| Total
| 11.5oz
| $15.00 ($17.00 with cost of fuel) |
Water Filtration and Storage:
Water Bottle-For me, I have found that for a day hike in the North East, I need at least two quarts of water. Make sure to carry sufficient water for the trip. There are many water bottles out there, but if you are keeping cost in mind, I would recommend a simple Gatorade 32oz bottle. A bottle of Gatorade will cost you about $2, and will be strong and hold sufficient water. Two such bottles will give you the two quarts of water for a total cost of $4.
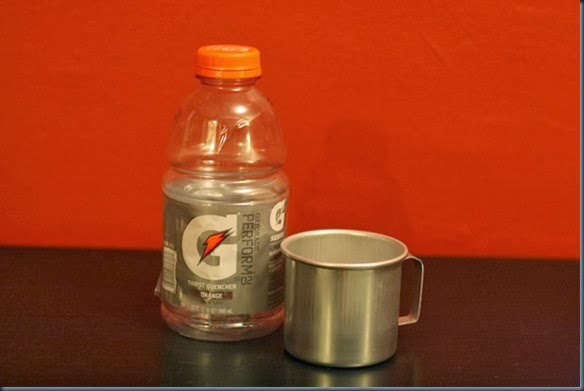
Metal Cup-I have to admit that this is very much a security blanket for me. Even though you can easily get through a day hike without one, I like to know that I have some way to boil water. If you have to spend the night in the woods, being able to heat up water will keep you considerably warmer. A good cheap version is the Open Country 12oz aluminum cup. It is fairly small, but costs only $3, and is very light weight.
Water Filter-Water filters have come a long way in the last few years. My current choice and recommendation would be the Sawyer Mini Water Filter.
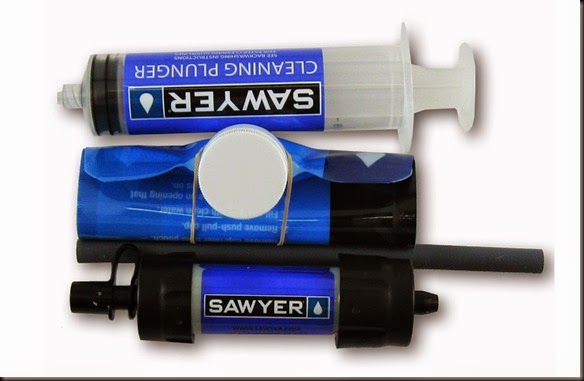
This filter is used by a very large number of backpackers these days, and I have been using it for quite some time now. With all the accessories the system will weigh about 3oz, and can be found for about $25. The filter itself weighs just 2oz.
This is my preferred way for treating water. It allows you to process water quickly when you are traveling without the need to boil, and at the same time allows you to drink water from less than ideal sources. While purification tablets are a great option, using them to purify water that you have just scooped up from a puddle, is less than inspiring.
| Item | Weight | Cost |
| Water Bottle | 1.8oz (3.6oz for two) | $2.00 ($4 for two) |
| Metal Cup | 1.7oz | $3.00 |
| Filter | 3oz | $25 |
| Total | 8.3oz | $32 |
Cutting Tools:
Yes!!! Finally! Real woodsmanship! The reality is that our obsession with cutting tools far exceeds their importance to the modern woodsman. The wood processing needs of most people for three season outings can be satisfied with very minimal cutting tools. For the past year and a half now I have been experimenting in doing it with just a knife and a saw even in winter conditions, and have done just fine. Here I will provide a knife, saw and hatchet. What you chose to carry will ultimately be a product of your needs and your need to assert your masculinity.
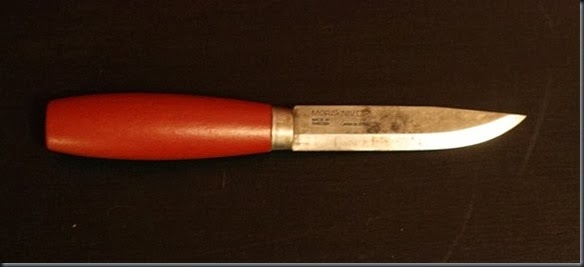
Knife-I strongly believe that a knife is an essential tool. It is possible to get by without one, but I don’t consider it good practice. My favorite is the Mora #2. It is a great knife, and costs only $11. In my opinion it is hard to do better for the money. The smaller Mora #1 and the Mora Companion are equally good and cost about the same. I recommend that you not be tempted by expensive, overly designed knives. While they provide a sense of security by virtue of being over engineered, they will not offer much of an advantage from a practical stand point. Eventually, if after you have been in the woods for some time, you decide that you want a particular design, then so be it, but when starting out, it is hard to beat the simple Mora.
Saw-Here you have to decide what size saw you want. A larger saw will generally cut faster, but will weigh more. A good small option is the Kershaw 2550X, which will cost you about $20. It is a very good folding saw, and is identical to the more expensive Bahco Laplander.
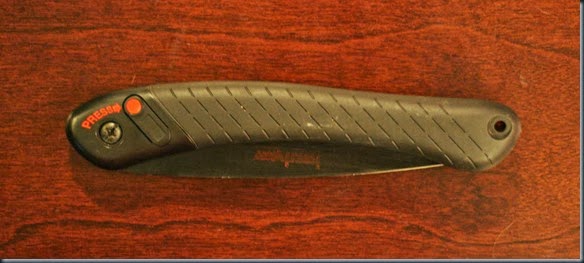
Axe-If you plan on carrying an axe, I would strongly recommend that you learn how to work on one first. You should have no problem taking a completely dull and damaged axe and bringing it back to working condition with minimal tools. If you can not do that, I say you can do just fine with a saw and a knife. If however you want an affordable axe, I would recommend the Husqvarna Hatchet. It will cost you $40. You will most likely have to sharpen it, but it is a great value for the money.
![020[3] 020[3]](http://lh5.ggpht.com/-Ye_c7EXAyBA/UlPtNhqXqnI/AAAAAAAALYw/NzYtMHmNbSw/0203_thumb1.jpg?imgmax=800)
Sharpening Stone-If you are going to be in the woods for any extended period of time, especially if you have an axe with you, you will need a sharpening stone. I like stones that do not require water or oil to operate. I use the Fallkniven DC4 stone, which is not cheap at about $27. If you look around you can find better values, although I do not know enough about them to say more than that. Make sure your stone has a course and fine side. The fine side should be very fine, as that is how you get that razor edge.
| Item | Weight | Cost |
| Knife (Mora #2) | 3.3oz with sheath | $11 |
| Saw (Kershaw) | 6.2oz | $20 |
| Hatchet (Husqvarna) | 2lb 3oz (35oz) | $40 |
| Sharpening Stone (DC4) | 2.7oz | $25 |
| Total | 2lb 15.2oz (47.2) | $96 |
Other Items:
Aside from the major items above, a few other things will be needed. Many of those items will probably be kept in your pocket or a possibles pouch.
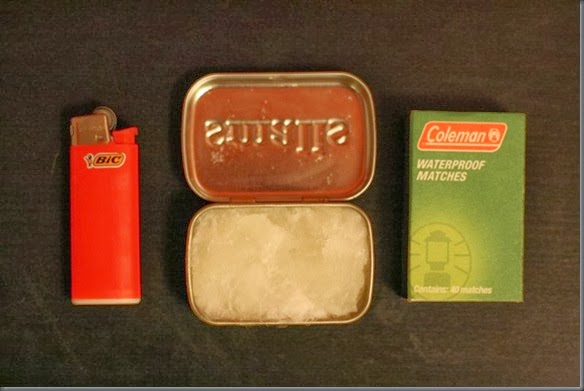
Fire Starting Materials-The simplest fire starter is a BIC Mini lighter. It is small, light weight, can be operated by just about anyone and costs 3 for $1. I never go out without one. A box of Coghlans Waterproof Matches makes a great backup fire starting method and will cost you $1 for the box. Avoid paper matches, as they fall apart too easily. You have probably heard of Ferrocerium rods, but I must say I am not a big fan. They are certainly fun to use, but in the hands of the casual user are not nearly as effective as a box of matches. They also require special tinder preparation, which you may not be able to do without sufficient practice. A more important thing to carry is the tinder itself. I like cotton balls and Vaseline, stored in an Altoids Smalls tin. You can put the whole thing together for under $5. Keep your fire kit protected from water in a Ziploc bag.
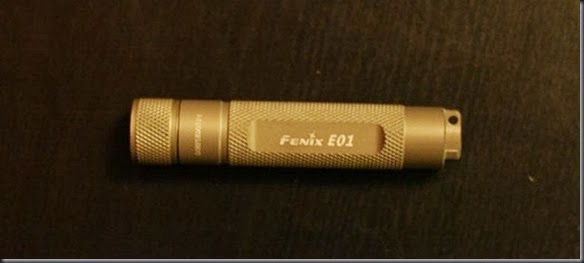
Flashlight-If you get stuck in the woods after dark, a small flashlight like the Fenix E01 can be of great help. This particular one has a microchip, which regulates the electricity, giving a very long duration from a single AAA battery. It costs only $11, and is well worth the price.
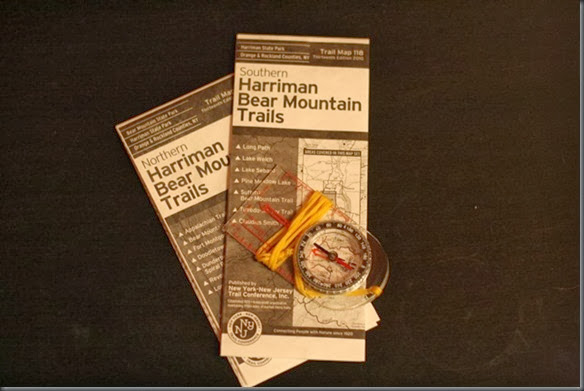
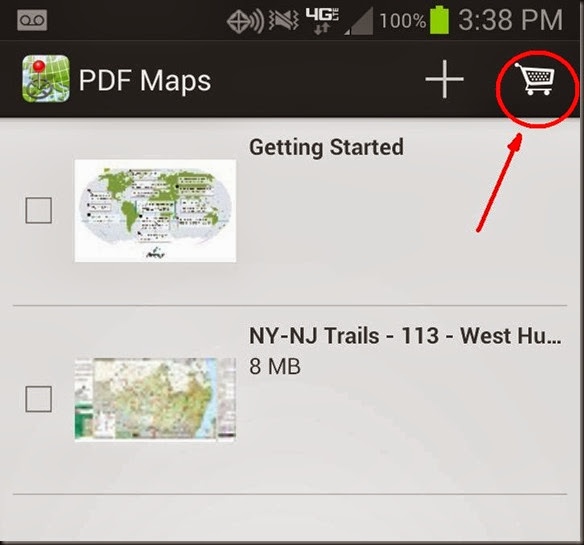
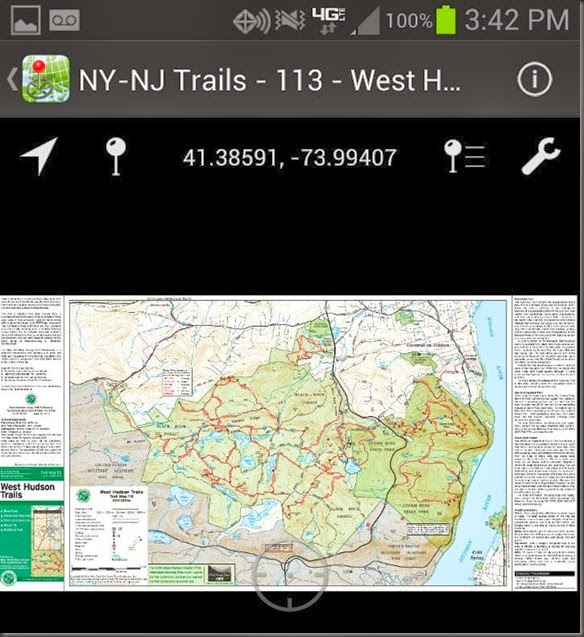
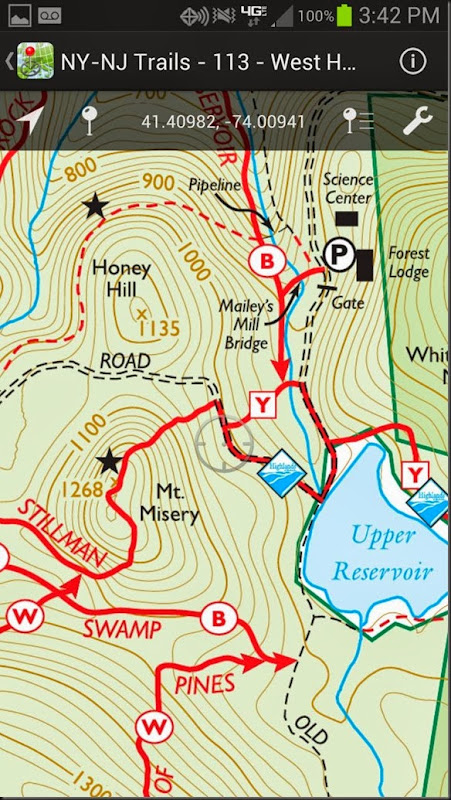
Map and Compass-Since we started this whole trip by buying a map, make sure you have it with you. Also, spend the money and buy a $3 compass. Just about any liquid filled compass of regular size (not a button compass) will do. There are many models out there that have many features, but unless you are exploring the West, making maps for the government, a simple one will do just fine. I’ve been using a basic Coghlan’s compass that I bought for $3 many years ago. It has served me fine. Suunto and Silva also make good affordable compasses.
Signaling Device-You may also want to consider carrying a small mirror and whistle so you can signal in a case of an emergency. I don’t get too preoccupied with them because you will most likely self rescue before anyone even starts looking for you, but if you are in a secluded area, they may be well worth the $2.

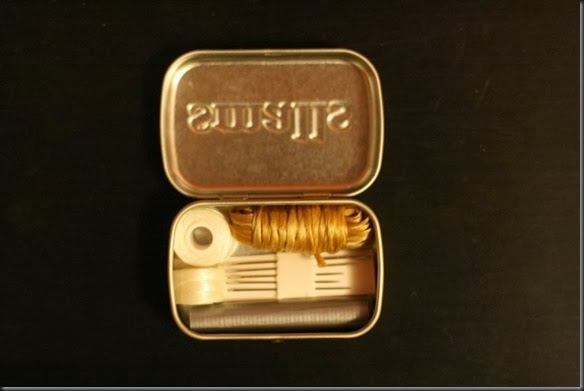
Repair Kit-Here I have in mind something simple. Bring a needle with some thread, as well as a small amount of duct tape, and some string. You never know when you will have to repair an article of clothing. It should cost you no more than $2. You can see mine here packed in an Altoids Smalls tin. The string I like to use is dental floss. It is strong and compact. I also carry some artificial sinew for when I need something stronger, but some nylon string will do just fine.
Toiletries-You should also bring some other miscellaneous items like toilet paper and soap. Do not bring a whole roll of toilet paper and a bar of soap. Smaller amounts in a ziplock bag will do just fine. None of this should cost you more than $2.
| Item | Weight | Cost |
| Lighter | 0.3oz | $1.00 |
| Tinder (in the Altoids tin) | 1.1oz | $5.00 |
| Matches | 0.7oz | $1.00 |
| Flashlight (with battery) | 0.7oz | $11.00 |
| Compass | 0.9oz | $3.00 |
| Map | 1.1oz | $12.00 |
| Mirror | 0.7oz | $1.00 |
| Whistle | 0.3oz | $1.00 |
| Repair Kit (in Altoids tin) | 1.3oz | $2.00 |
| Toilet Paper | 0.1oz | $1.00 |
| Travel Tooth Brush | 1.0oz | $2.00 |
| Total | 8.2oz | $40 |
First Aid Kit:
I am not going to say much about this because this is an area where cutting costs is probably not the best idea. Bring the kit which makes you feel comfortable. If you require any medication, make sure to bring it. You may want to bring some insect repellant if bugs are an issue for you, or sunscreen if the sun is a problem.
Summary:
I believe that with the above gear a person can reliably and comfortably backpack in three season conditions. Your skill will always play a major role in your trips, but as far as gear goes, I think this list provides a good foundation while at the same time keeping the weight and cost of the gear to a minimum. This is not a “last resort” type of gear list. All the items can be commonly seen on the trails, and have proven to be solid performers.
Keeping aside the clothing and first aid kit, which will change depending on the person and the weather, the base weight of the above gear is 12lb 7.2oz (199.2oz). The total cost is $531. The weight and cost reflect some of the higher end options in the above list such as the REI Flash 45 as a backpack and the Kelty Cosmic Down 20 as a sleeping bag. If you decide not to carry a hatchet, you will have a sub 10lb ultralight gear list for under $500.
As I stated in the beginning of the post, you can find cheaper items if you look at surplus gear, but from commercially available items, this is the best I have been able to come up with without sacrificing any utility or comfort. Most importantly, the above list provides a complete list of items. It is easy to reduce the price if you start removing items from the list, but ultimately, if you are new to the activity, doing so is the fastest way to kill your desire to go back into the woods. Could you go out with just a single blanket, a poncho and a pot? Sure. What is the likelihood that you will go out again after spending the night trying to shelter yourself from the rain under a poncho, or shivering by the fire? Probably low.
If you are just starting out, or are looking for upgrades to your gear, see what is commonly in use by modern backpackers. It will give you a good starting point. Look to see what others use, and then mix and match. Avoid gimmicks. If it sounds too good to be true, it probably is.
If you are curious about my current gear choice, just go through some of my other posts. My gear is constantly evolving and changing as I find new items and make improvements. Playing with gear is half the fun of backpacking.





![020[3] 020[3]](http://lh5.ggpht.com/-Ye_c7EXAyBA/UlPtNhqXqnI/AAAAAAAALYw/NzYtMHmNbSw/0203_thumb1.jpg?imgmax=800)


